

PLT - Pretty Little Tart
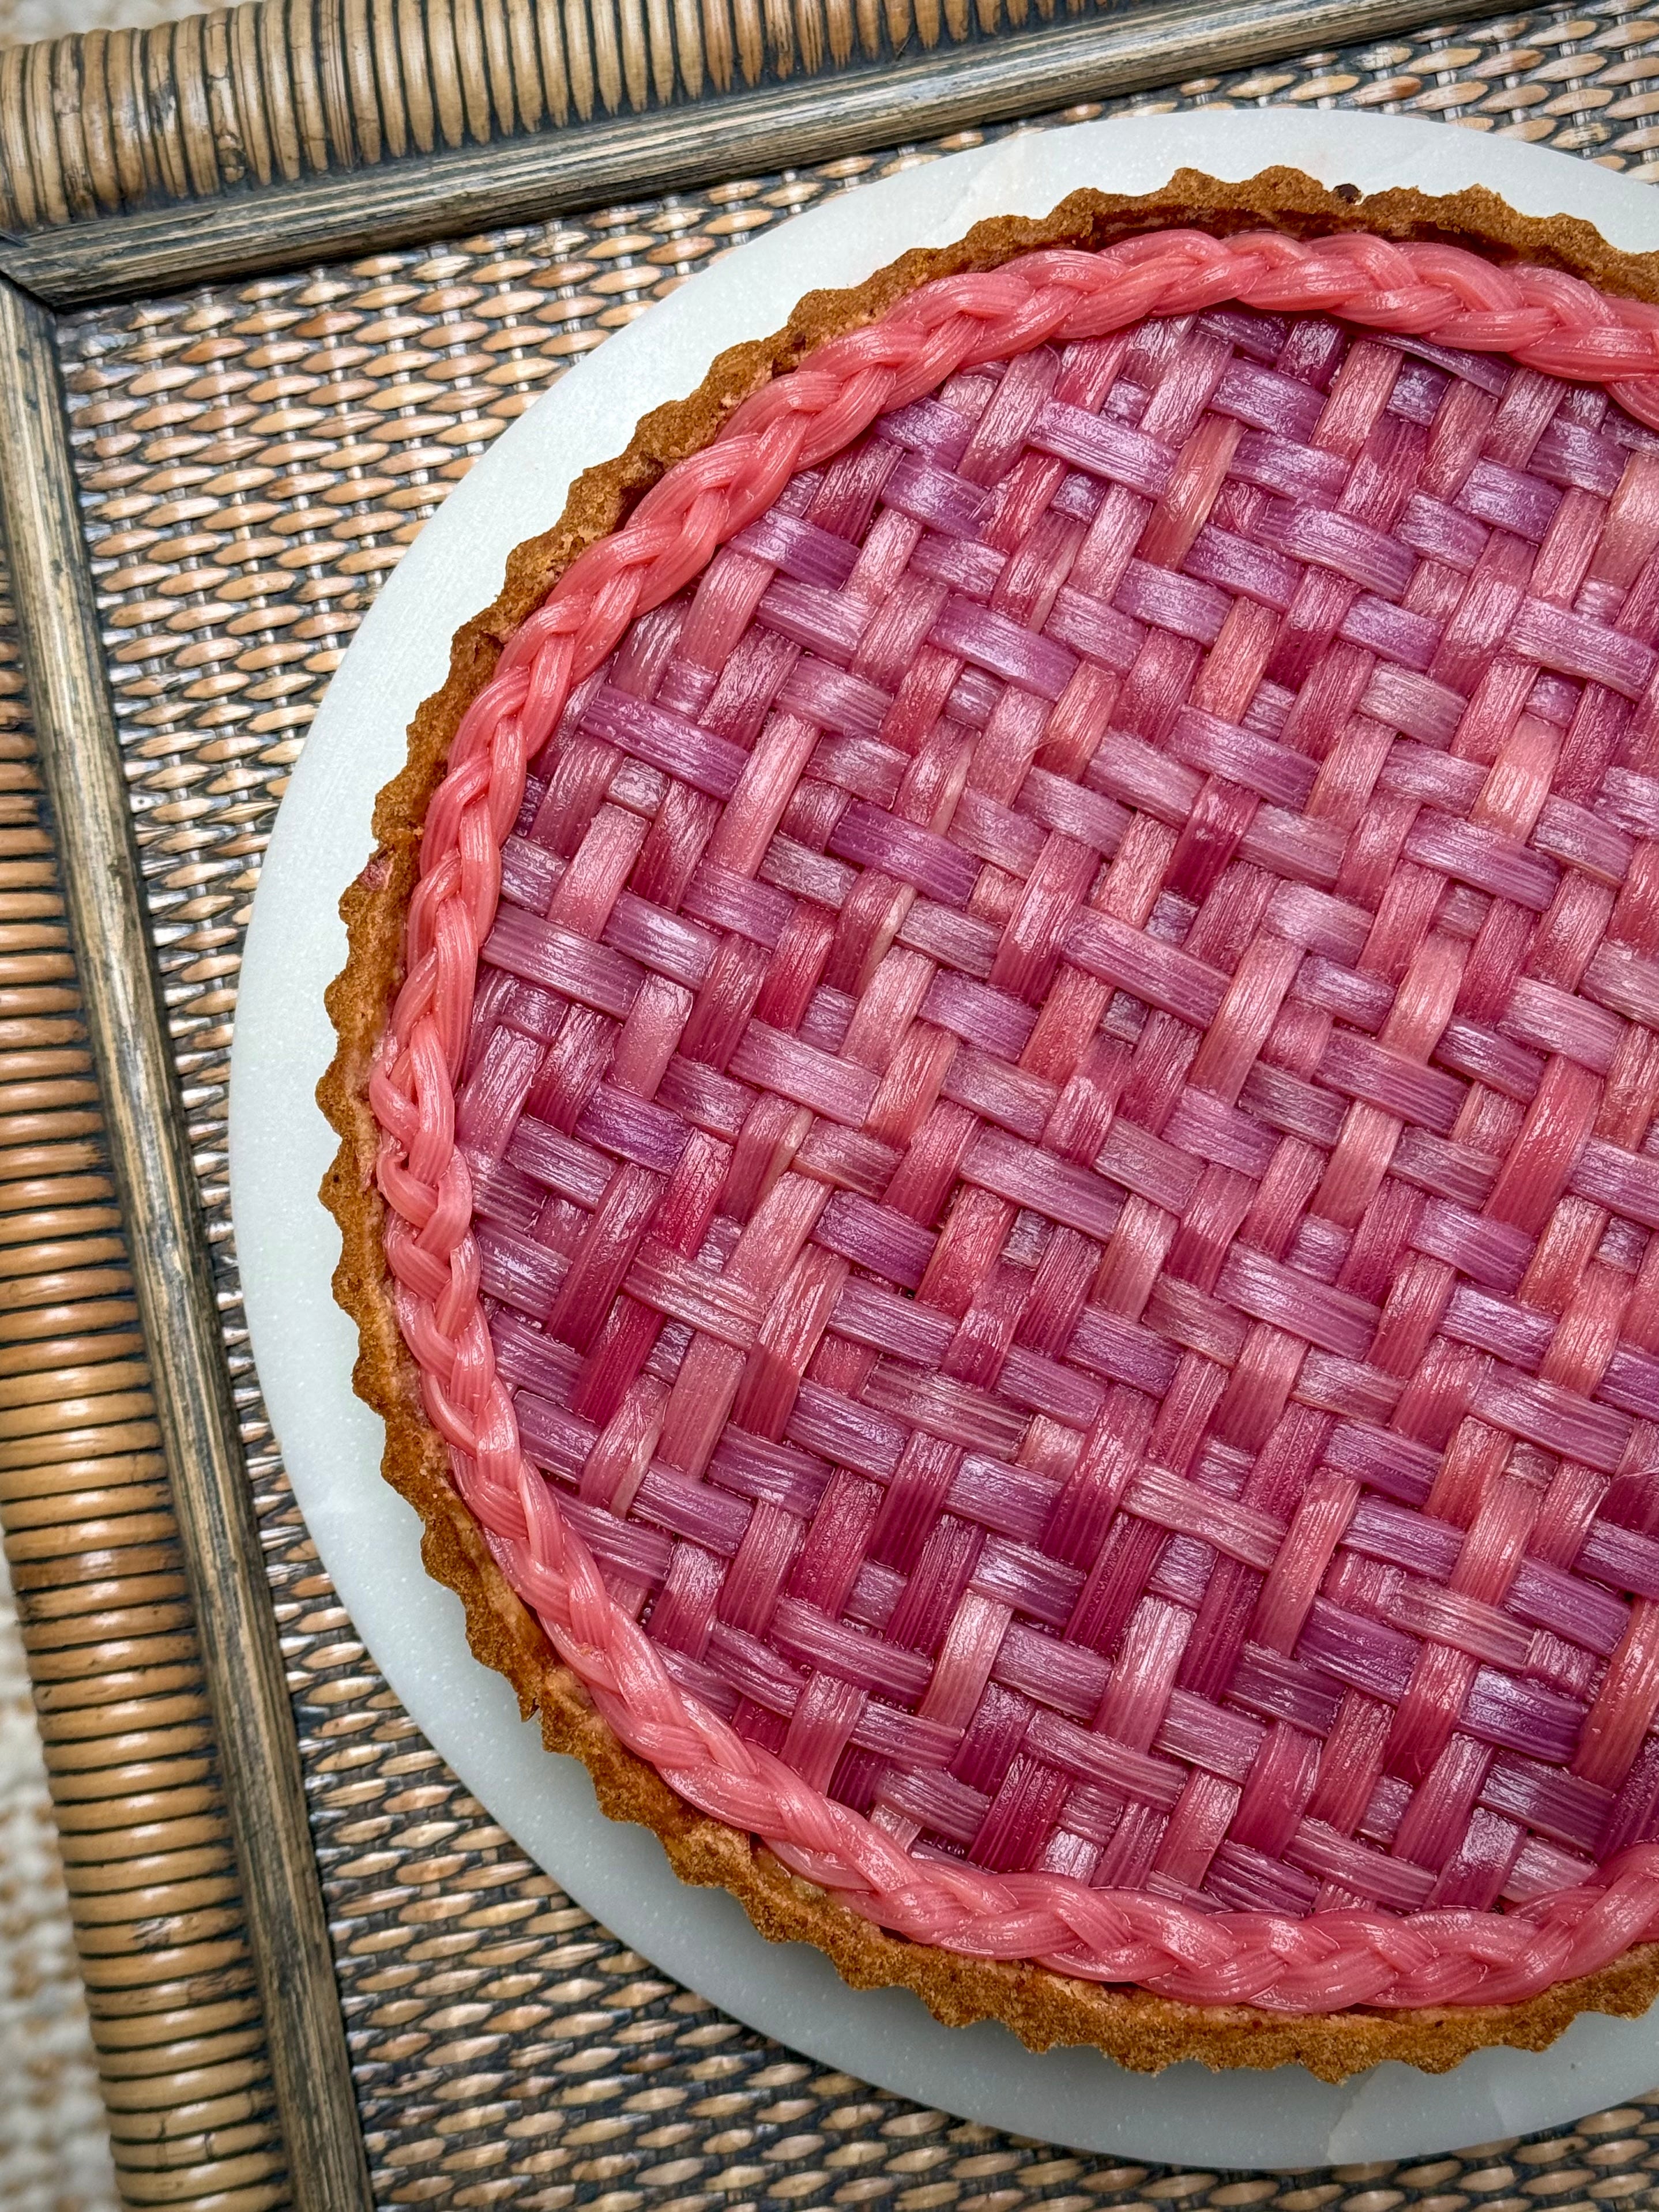
We are diving back into the world of rhubarb with my woven Forced Rhubard, Pistachio & Raspberry Tart plus my food prep brekkie & lunch menu that saw me through the week.


Hey Friends!
I hope you have all had a lovely week? It feels good to be slowly dipping my toes back into the world of work but when the hell did January become February?? I feel like Jan lasted 127621 days and yet also flew by? I don’t get understand how that works but can we all agree the rest of the year just needs to chill cause why on God’s green earth have I been finding Easter Eggs in the supermarkets since Jan 2nd? Which brings me onto my next thought of – are easter eggs a universal thing or is this just a UK marketing thing??
I’ve had an interesting last two weeks which has seen me having to take another pregnancy test (spoiler alert – it’s still negative folks), face some social anxiety with my first proper work event (turns out my sofa has become my comfort blanket), accidentally order 4kg of rhubarb instead of 400g of rhubarb, which I then immediately reordered because I didn’t get a confirmation email of said order and ended up being the proud and yet slightly bewildered owner of 8kg of rhubarb. Yup, you have read that correctly. 8kg – my dog weighs 5kg so if you, like me, are terrible with anything math related, let me just say – IT IS A BLOODY LOT (peep the two bottom shelves in my fridge reserved for rhubarb and rhubarb only).


Meltdown over, I now only have 3 stalks left of the original mountain load that landed on my doorstep so you can bet your bottom dollar on the next few newsies being abundant with rhubarb based recipes (US folks, download the recipe pdf’s and keep them handy for when it comes into season in spring). Am I sorry? No but am I exhausted? Absolutely. My brain has been fried thinking of new weird and wonderful ways to use it, including me pickling my brain trying to weave, coerce and force rhubarb to do things its probably never done before (this sounds v untoward but I am just talking about weaving folks).
On top of all that, I have also been to visit a fertility coach to help heal my body post miscarriage (sorry of the constant mentions of this is triggering to anyone but promise from here on will only be what I am doing to help move me forward or help my body) and turns out, I should be lowering my sugar intake cause apparently that’s good for your health?? Weird but okay. And whilst I will take on board that advice, I can’t necessarily say I will wholly put it into effect because a life isn’t worth living without a little bit of filth – so fear not, the newsy will still contain all the delicious bits you are used to around here but will also now heavily feature bits I am prepping and making for the week to help eliminate some UPF’s from my diet.
Talking of abstaining from sugar in my diet, I am also pleased to say I am getting ready into diving back into my Around The World in 80 Cakes series because my god, let 2026 be the year that series finally ends. I have LOVED it with every part of my being but how has it taken me nearly 3 years to get through it all? I know progress has been woefully slow, but we have some cracking bakes finishing up the list and then we finally move onto the next 80 of something else cause who even am I without a long ass list of bakes to make which take me a good chunk of a decade to complete??
Live laugh love slow progress.

We are in store for another long old newsy (you may have to open this newsletter in your browser, as opposed to email to show full contents – don’t be missing the main attraction at the bottom, she is TOO pretty to miss), so unbuckle those belts, I have got your brekkie and lunch menu fixed for next week, plus my now yearly forced rhubarb madness.
This week, we have:
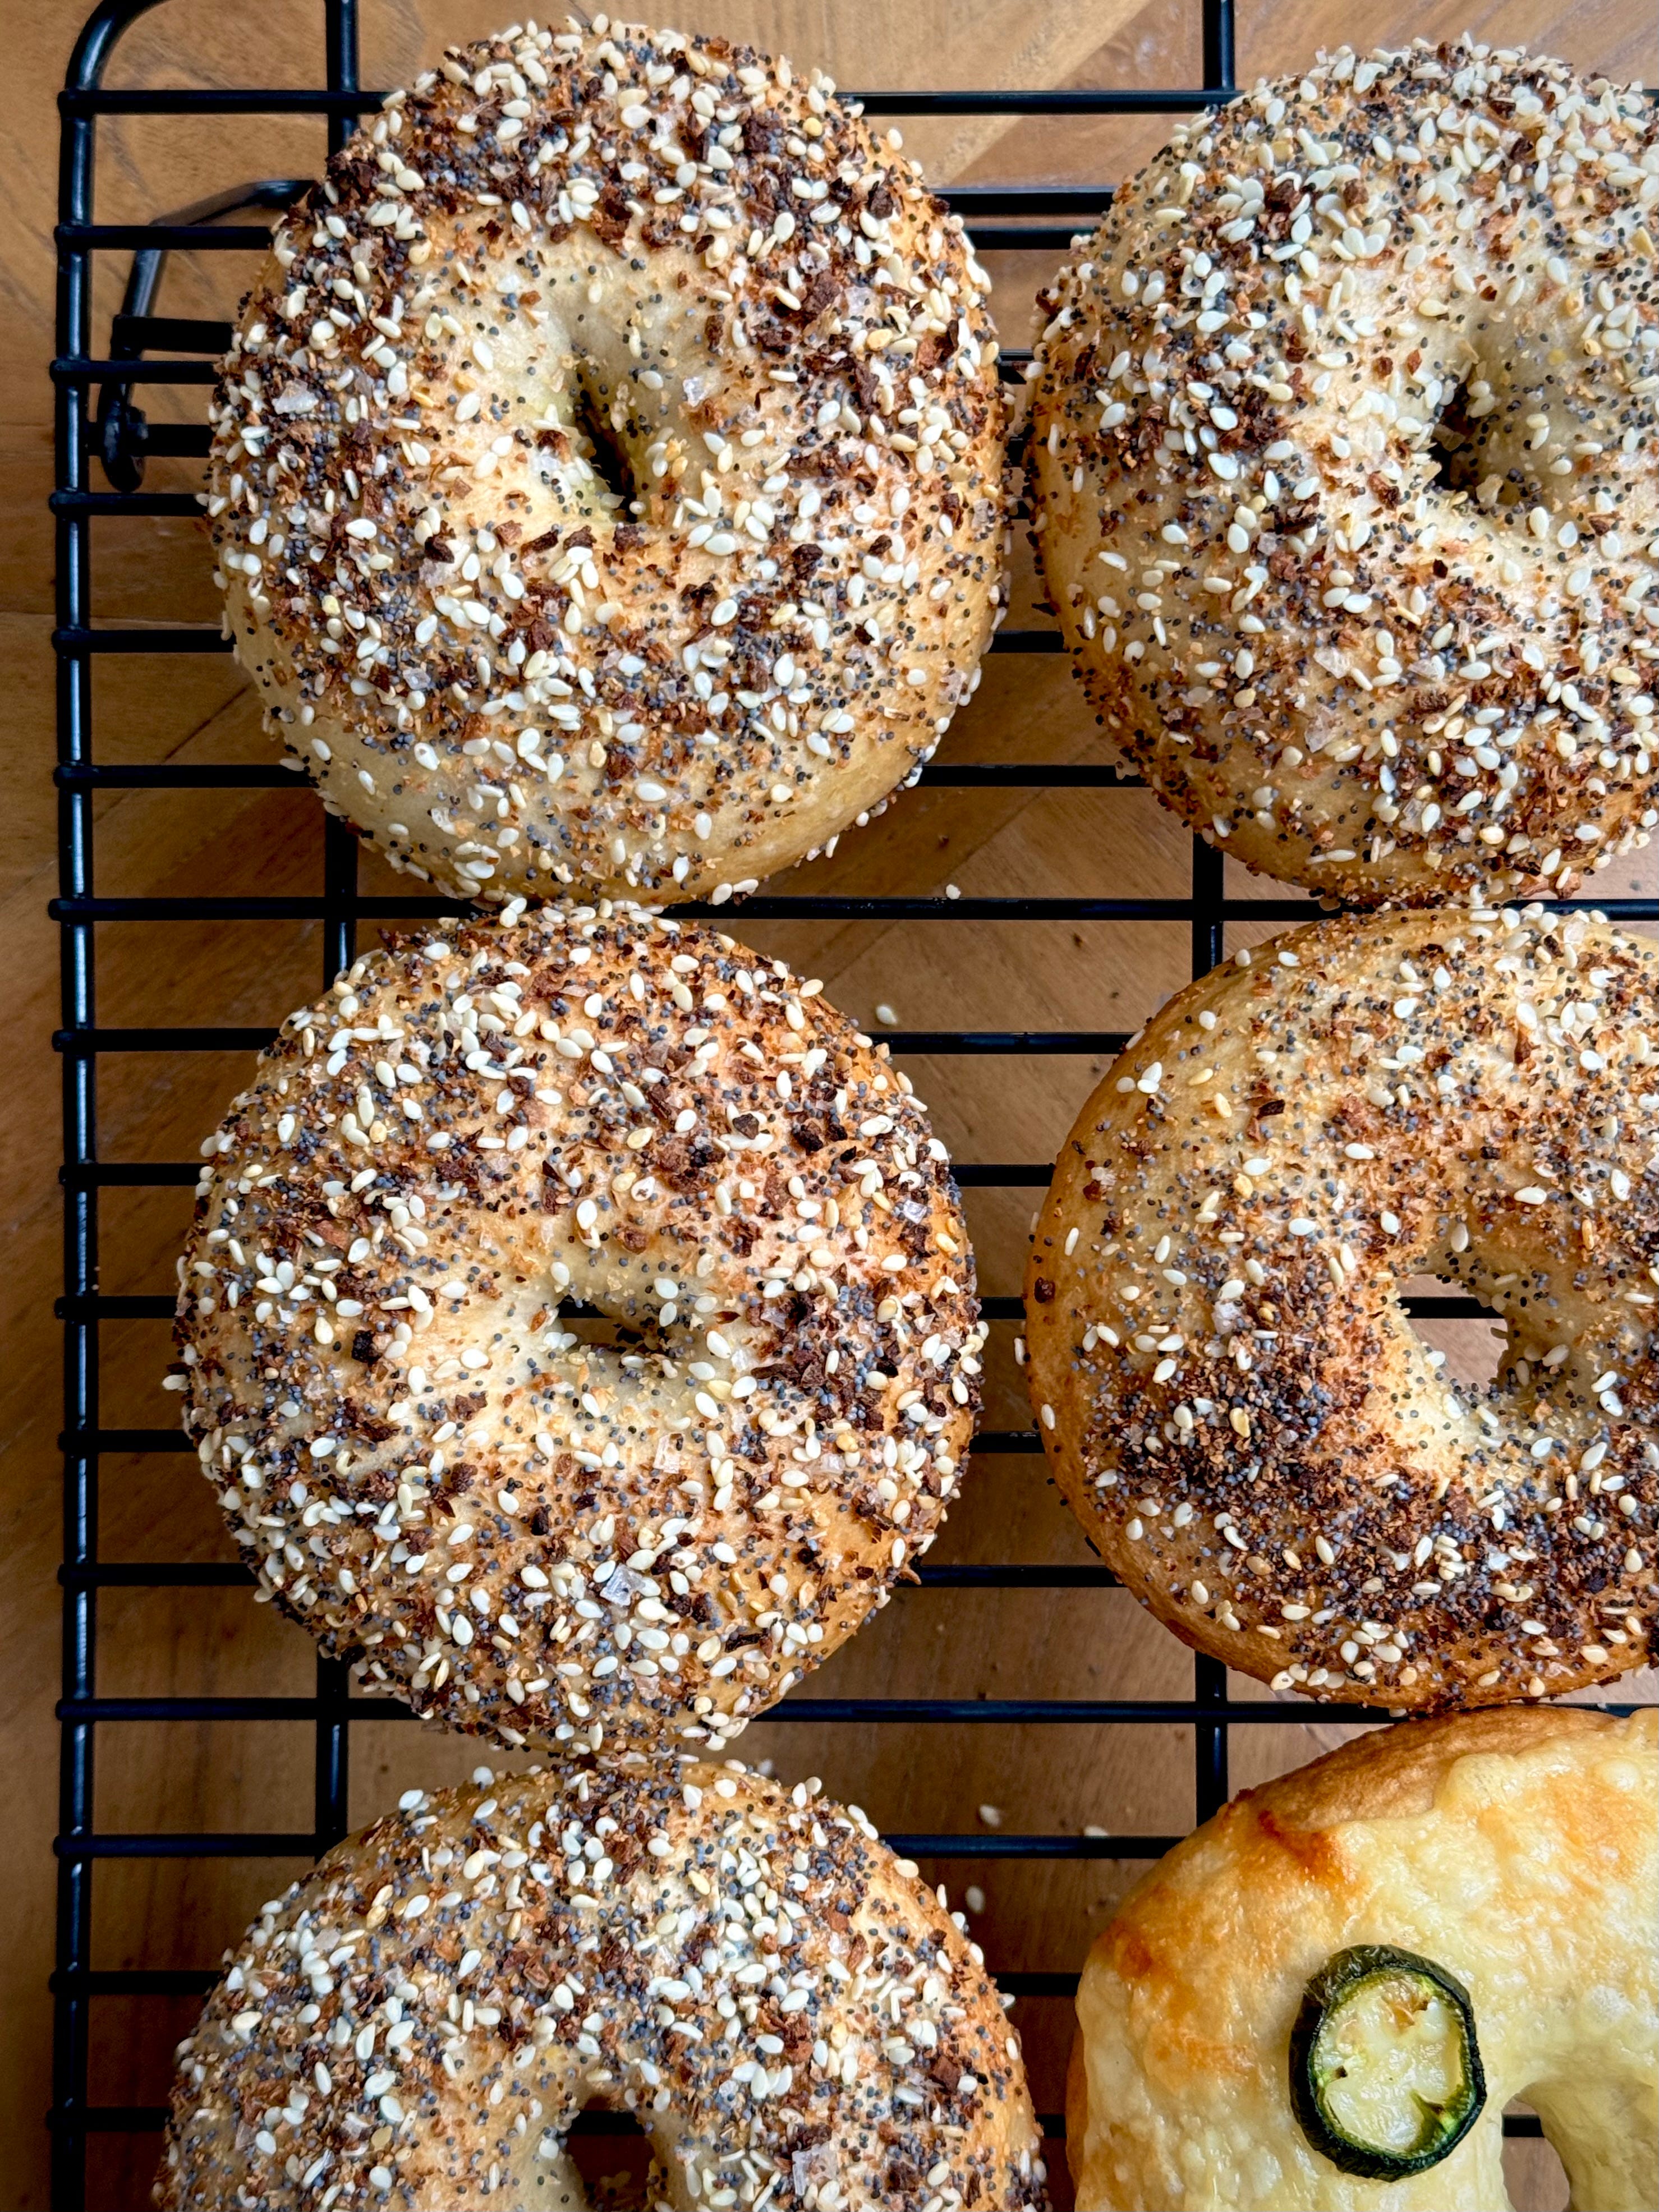
Everything Bagels
Cheddar & Jalapeno Bagels (same dough as above, just a diff topping)
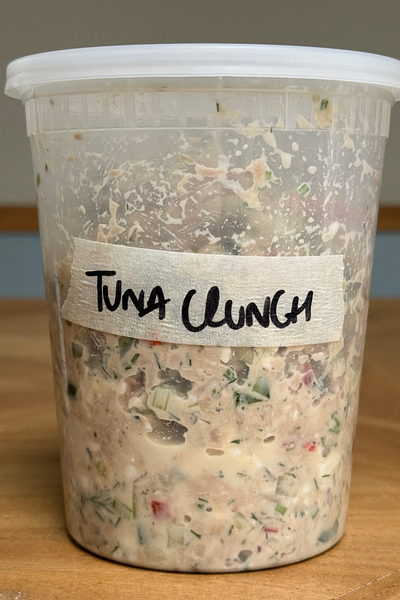
Tuna Crunch Sandwich Filler (the above and this is a dream combo but also great as a jacket potato topper)
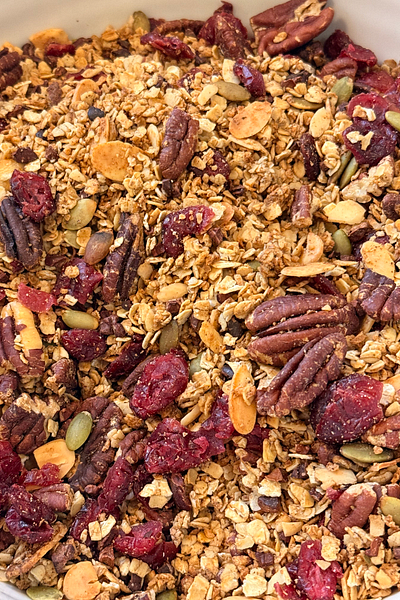
Gingerbread Spiced Granola with Cranberries, Cacao & Coconut (basically a cupboard raid granola)
Rhubarb & Mixed Berry Compote (to eat with the above, duh)
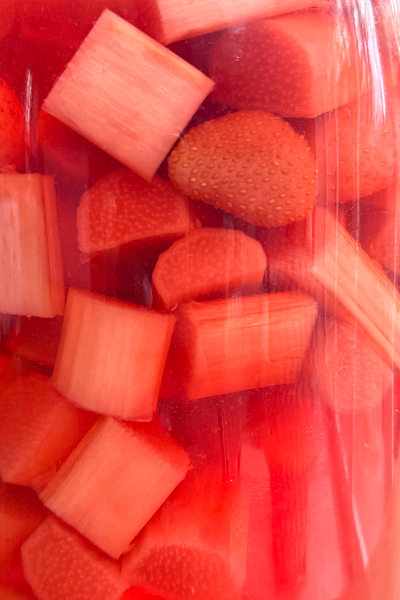
Rube-barb Gin x 2 (one features strawbs, the other sloe berries - future me will thank past me for the misorder)
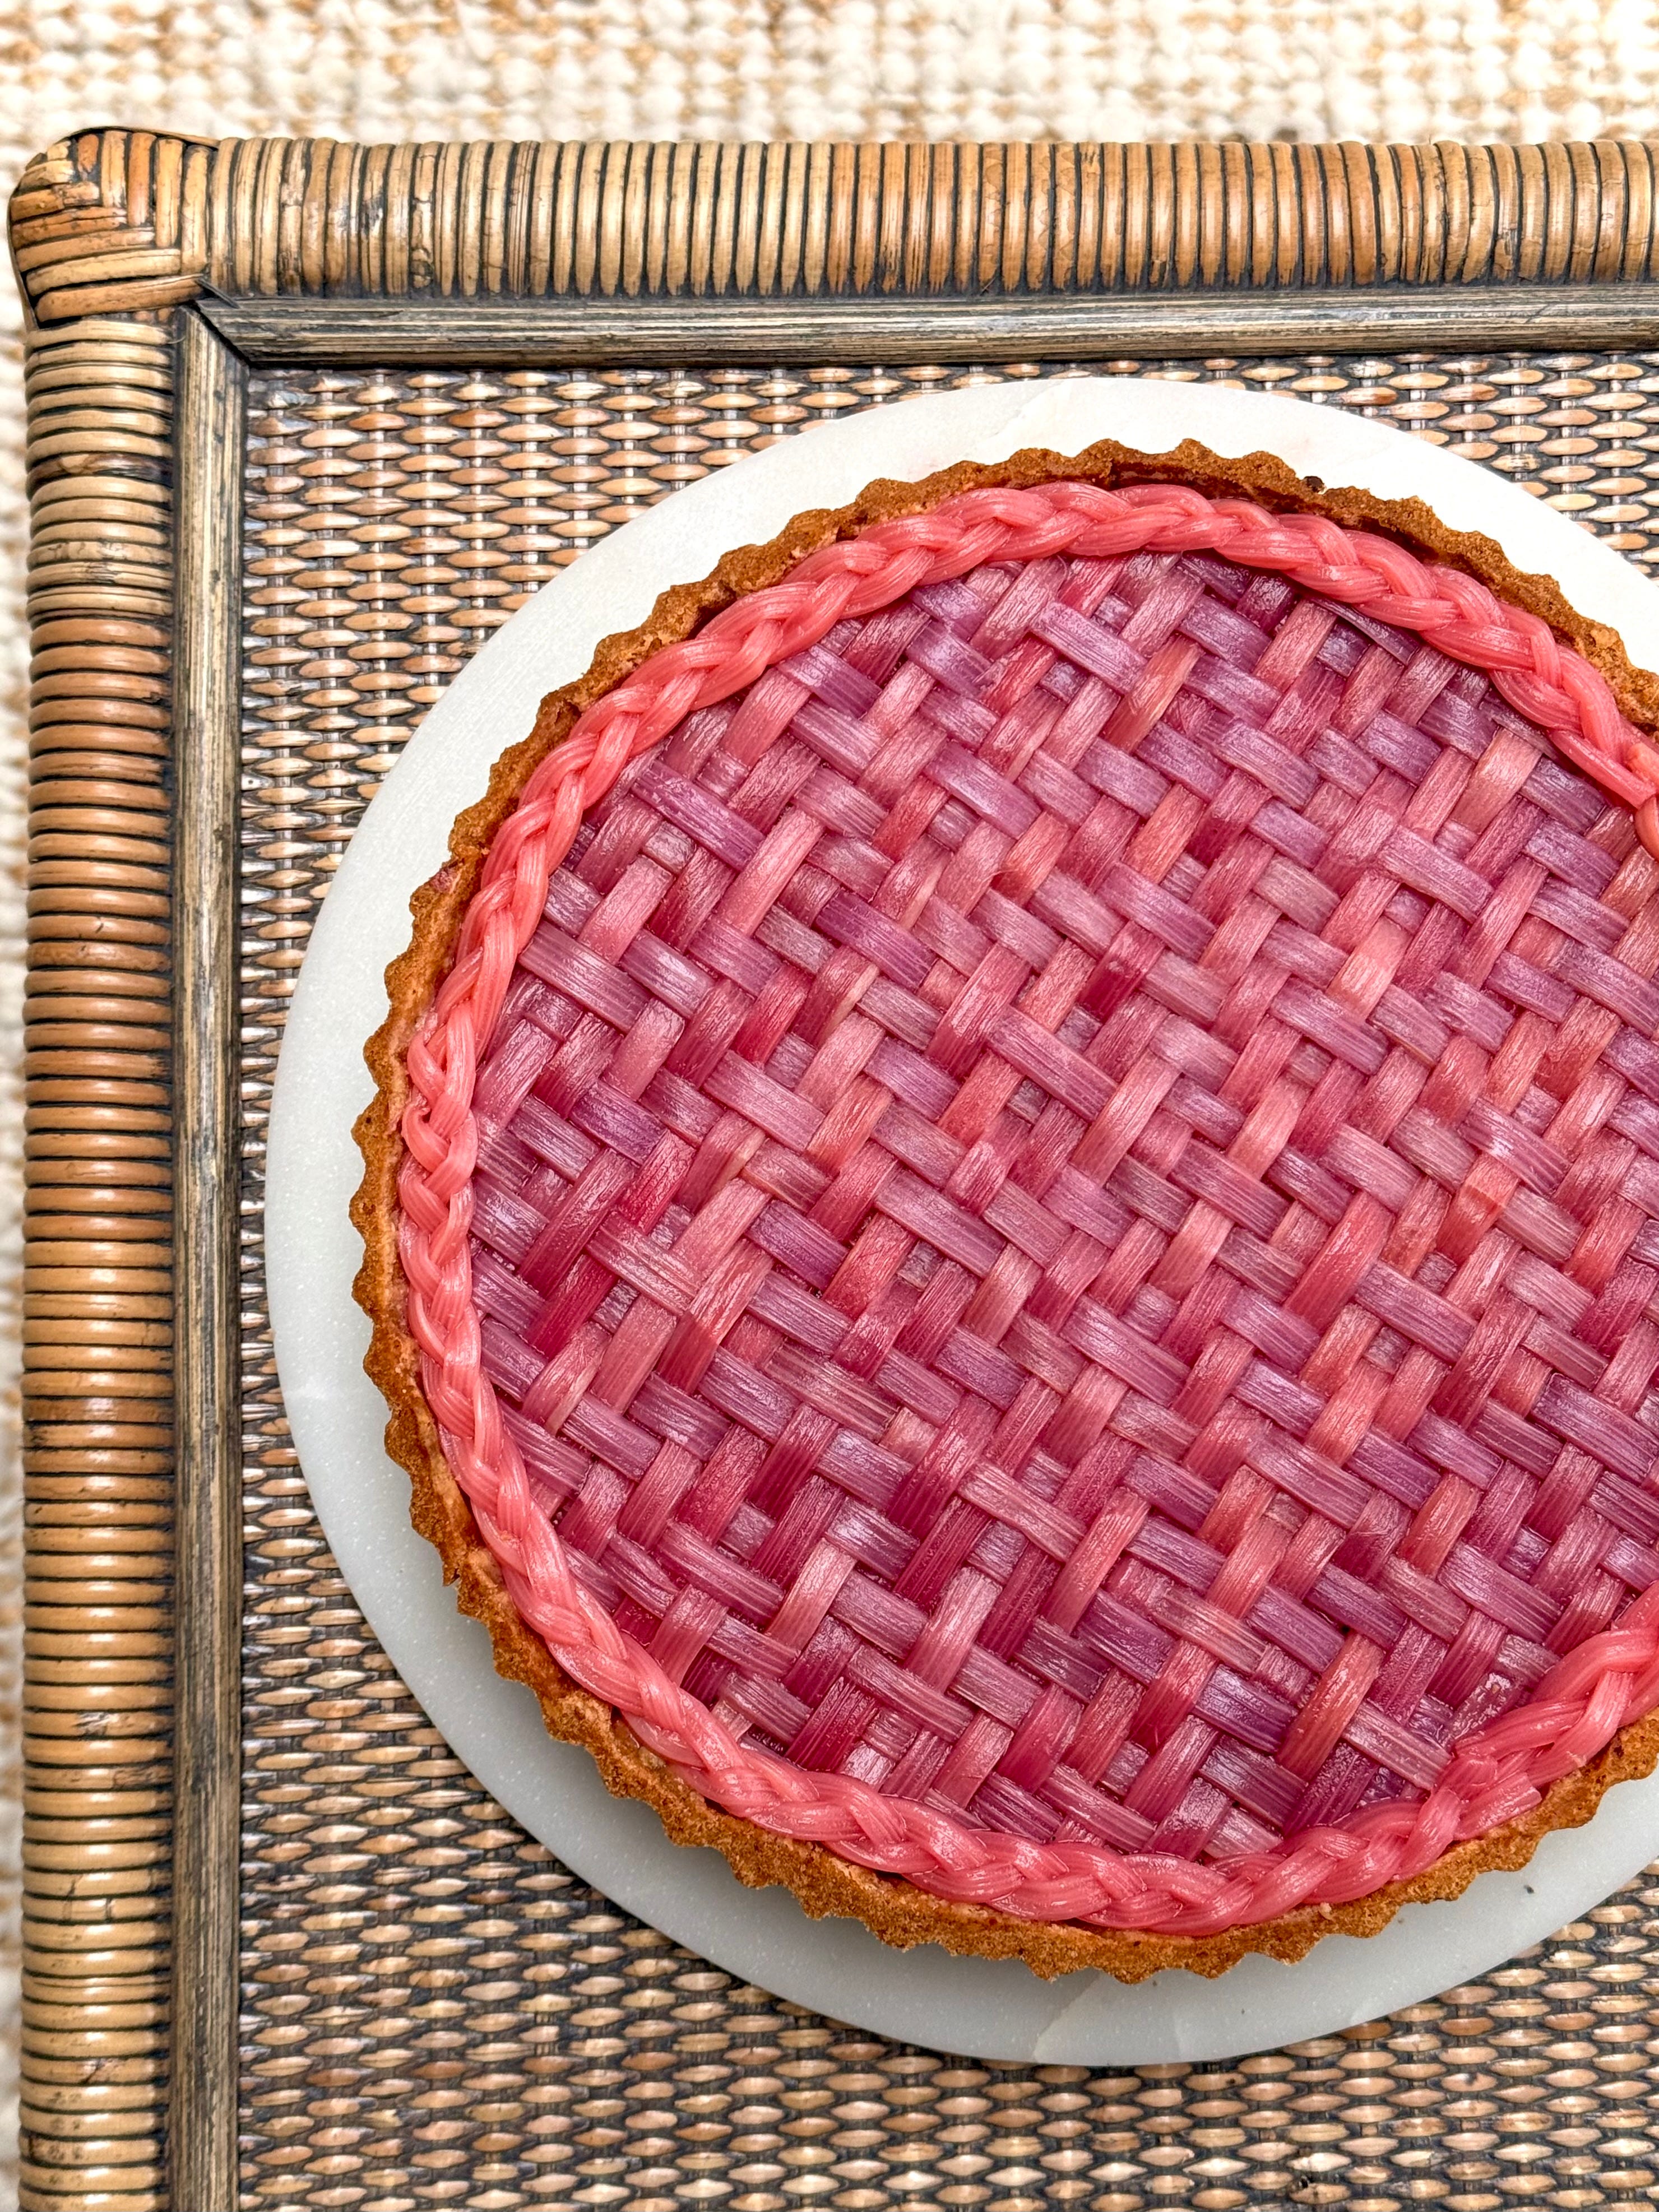
A woven (!!!!) Rhubarb Tart with Pistachio Custard, Roasted Raspberry Jelly and Almond. WOVEN PEOPLE.


Let’s get stuck right into it – like last time, the intros for each recipe are going to be on the slightly shorter side of life because we have A LOT to get through, cutting the rambles to make sure we keep the newsy jam packed full of all the stuff you are actually here for.
As I mentioned before, whilst hot girl summer is never really on the cards for me because I live for cake too much, I am *attempting* to make a conscious effort to reduce the amount of UPF’s in my diet (not going to lie, I have resigned to the fact they will always feature because a life without crisps is life I do not want to live) so prepping for the week on the parts I know I fall short on has now become part of my routine (my deliveroo/uber eats account will be sending out a search party for me soon no doubt).
All the recipes I share here for my meal prep will always feature a carb (I am a hardcore bread girly), some sort of sandwich filler (could happily eat a sarnie 3 times a day) plus a sweet treat or something for brekkie. They WILL and I will continue to promise this, be easy and something you can make individually or as a whole in a few hours on a Sunday (nothing will come in between sofa slob time on a Sunday let me tell you), without the need of fancy pants equipment and will ALWAYS be available to ALL of you, paid subs or not. Cause ya know, ya gal is nice like that.
So first up, we’ve got bagels with two different toppings: Everything Bagel Seasoning (which is not readily available in shops like it is in the US, so we make our own) and then a Cheddar and Jalapeno variation. Both use the same dough, just finished with a different topping. You can make one whole batch of whatever flavour tickles your pickle, or do as I did and divvy up the 9 batch dough in 2 and make half half. Whether you eat these toasted or as is, slathered with butter and nothing else or topped with my Tuna Crunch sandwich filler (below), dunked into soup, toasted as croutons, eaten over the sink cause you have no time, I promise my bagels are satisfyingly easy to make.


We skip any overnight dough proving, so the below can be made in a few hours with very little hands on time – soft, chewy and packed full of flavour. Use my toppings below or use the dough as a base and introduce whatever tickles your pickle throughout.
Recipe Makes: 9
Recipe Serves: 9 (but that being said, I did in fact eat the lot myself)

Y O U – W I L L – N E E D –
Bagel Dough
525 g Strong Bread Flour
10 g Active Yeast
20 g Light Brown Sugar
8 g Sea Salt
310 ml Warm Water (you want this no hotter than 32C/90F)
Bagel Boil
3 l Water
2 tsp Bicarbonate of Soda (helps to give a more flavourful, browned crust)
1 Chicken Stock Cube, optional (people like to use molasses but opted for a more savoury hit)
1 tsp Marmite, optional
Everything Bagel Seasoning
4 tsp White Sesame Seeds
2 tsp Poppy Seeds
2 tsp Dried Onion Granules
1.5 tsp Dried Garlic Granules
1 tsp Fine Sea Salt
Cheddar & Jalapeno
Cheddar Slices (the quantity will depend on how many bagels you are choosing to top)
3 to 4 Jalapenos, sliced and deseeded
M E T H O D –
For the bagel dough, add all the ingredients into a stand mixer bowl and use the dough hook attachment to mix on low until a rough, shaggy dough forms. Once formed, leave the dough to sit for 5 minutes to hydrate the flour.
After 5 minutes, turn the speed onto medium to high and mix for 8 to 10 minutes until you are left with a soft dough that isn’t sticky to the touch. The dough will feel firmer than your normal bread dough but this is expected with zero fat addition. As long as your dough passes the windowpane test (ie. Stretching a small bit of dough between two fingers until it is translucent without tearing), you are good. If you are unable to do the windowpane test and the dough continues to easily tear, mix for a further 3 to 5 minutes and retest.
Transfer the dough to a lightly oiled large bowl and cover with clingfilm. Place into an unheated oven with a tray of boiling water sitting at the base and leave to prove for 1.5 to 2 hours, or until at least doubled in size.
Once the dough has finished it’s initial prove, turn out onto a clean worktop surface. Knock back the dough (i.e., remove all air by flattening it with your palms and knuckles) and weigh. Divide this weight by 9 to give you the weight of each dough ball for equal sized bagels.
Divide the dough by 9, ensuring they all reach the same weight and roll each piece into a smooth ball. I like to do this by forming a cage with my palm and rolling in a circular motion – do not add flour if you choose this method as you need some friction on your work top to help smooth out the dough.
Line 2 large trays with lightly oiled squares of greaseproof paper and place each dough ball on top. Lightly place a clean tea towel over the top and leave to prove in the oven again for 30 minutes or at room temperature for 45 minutes.
When your bagels have nearly finished its second prove, add the water for the boil to a large saucepan, alongside the bicarbonate of soda, chicken stock and marmite (if using). Bring to a boil.
Whilst you are waiting for the water to boil, make the everything seasoning by adding all the ingredients into a bowl and mixing well. If you are opting for the cheddar and jalapeno bagels, ensure you have all the ingredients set aside.
Preheat your oven to 210C Fan/230C/445F/gas mark 8 and line two large trays with greaseproof paper.
Carefully lower in your proved bagels one at a time into the boiling water – ensuring you don’t overcrowd. Once in the water, carefully peel off the paper and cook each side for 1 minute.
Use a slotted spoon to scoop the bagels out of the water and lightly dab the tops dry. You want to ensure they are slightly wet still so your toppings adhere.
Place your bagels spaced out onto baking trays, before generously sprinkling over the seasoning if using. If topping with cheese, ensure each cheese slice is slightly bigger than your bagel so it coats the entire top when baked. Add the jalapenos on top, placing them close together and not on the sides (they will fall off during baking if they aren’t sitting close in the middle).
Place into the oven and bake for 18 to 20 minutes until golden brown. Note: you may want to turn around the baking trays after 12 minutes to ensure an even coloured finish.
Once baked, remove and place onto a cooling rack until at least lukewarm before eating.
Next, let’s move onto a big easy win – my Tuna Crunch sandwich filler. I say sandwich filler, this would be perfect also used to top jacket potatoes, served up in lettuce cups (if that’s your sort of thing, I’m a big bread gal so can’t relate), eaten with a fork from the tub as a quick protein heavy snack, topping a hefty slice of toasted sourdough or as your filling for a tuna melt. Whilst I do think you are a big baby if you don’t like cottage cheese (I was you once but then realised it’s essentially just like healthier, more protein rich burrata??), you can blitz it until smooth if it’s a texture thing or sub for Greek yoghurt instead.

It’s heavy on the additional veg (go healthy us), high on the filling factor (I hate feeling immediately hungry post eating) and BIG on the flavour front. It’s jam packed full of flavour, crunchy, slightly smushy, slightly salty, incredibly yummy and honestly is a 10 out of 10 lunch when teamed with one of my bagels from above and a bag of crisps (a habit I hope never dies). Use the below as guidance and feel free to throw in any veg you need to use up in your fridge – sweetcorn, spring onions, other coloured bell pepper, carrots and beetroot would all work well.
Out of this and last newsies Chipotle Chicken – we are stacking up a solid rota of sandwich fillers. Long may the deliciousness continue.
Recipe Makes: Enough to generously fill 6 to 7 bagels
Y O U – W I L L – N E E D –
220 – 250 g Tinned Tuna
150 g Cucumber, diced
2 Sticks Celery, finely diced
½ Red Bell Pepper, finely diced
½ Red Onion, finely diced
1 to 2 Jalapeno, deseeded & finely diced (depends how much heat you like)
Handful of Chives, finely chopped
Small Handful of Dill, finely chopped
1 tbsp Non-pareil Capers, finely chopped
65 g Dijonnaise
125 g Cottage Cheese (can sub for greek yoghurt)
Squeeze of Lemon Juice
Sea Salt & Black Pepper, to taste
M E T H O D –
Add all of the ingredients, bar salt and pepper, to a large bowl and mix well.
Taste and add salt and pepper to your preference.
Store in Tupperware or a sealed container for up to 5 days.
Note – if you do not have Dijonnaise, you can substitute with equal quantities mayonnaise plus ¾ tsp Dijon mustard.


Moving onto breakfast – a meal of the day I am notoriously bad for and one that I often find myself skipping, heading straight into lunch past midday. Whilst I thought intermittent fasting was good, turns out from some expert advice, that fasting on the second half of your cycle (for women) isn’t beneficial and our bodies need fuel first thing in the morning (I know this sounds and reads so obvious) so with that in mind, I wanted to make something easy, something speedy and something I can chuck in a bowl and eat before getting cracking in the kitchen. Zero fuss but with all the yum.
I wanted something substantial without the heaviness sometimes associated with it and as someone who loves anything crunchy – so my Gingerbread Spiced Granola was my go-to for this week, teamed alongside a tart and sweet Rhubarb and Mixed Berry Compote. Mindful of causing any huge sugar spikes first thing in the morning (something I have been managing over the last few years thanks to a stint of high cholesterol a while back post first book), we have gone easy on the sugar content on both components and rely on the additions to help bring a touch of needed sweetness (because whilst this is moderated fun, we aren’t total party poopers here).


Granola is a great way of adding bits you’ve had lurking in the cupboards for a while, minimising waste, but also a fab way of introducing additional healthy bits to boost your fats, protein and fibre. And yes, I say all of this AND still add cacao nibs because I am Rubes and I am not her, if life isn’t sprinkled with a little bit of naughtiness – plus they are technically healthy, so sue me.
Recipe Makes: A lot. Be prepared to be eating granola for at least a month.
Y O U – W I L L – N E E D –
Gingerbread Spice (will make surplus)
3 tbsp Ground Cinnamon
2 tbsp Ground Ginger
1 ½ tsp Ground Cardamom
1 tsp Ground Allspice
½ tsp Ground Cloves
½ tsp Ground Nutmeg
Granola
400 g Rolled Oats (you can sub for GF oats if needed)
100 g Pecans, chopped
80 g Desiccated Coconut
75 g Sunflower Seeds (you can sub for pumpkin seeds)
1.5 tbsp Gingerbread Spice
Pinch of Salt
80 ml Maple Syrup (you can sub for agave or honey)
40 ml Coconut Oil, melted
25 g Almond Butter (you can sub for another nut butter of your choice, just make sure it is smooth)
Zest of 1 Extra Large Orange
2 tsp Vanilla Bean Paste
Pinch of Salt
100 g Dried cranberries
75 g Cacao Nibs
Rhubarb & Mixed Berry Compote
600 g Forced Rhubarb, chopped
250 g Frozen Mixed Berries
25 g Caster Sugar
Squeeze of Lemon Juice
M E T H O D –
For the gingerbread spice, if making, add all the ingredients into a small jar/Tupperware, seal and shake well to combine. This will make surplus spice, but will keep for up to a year once mixed, provided it is kept in a well-sealed container. If you want to skip making that, sub the spice for 1 tsp cinnamon powder plus 1/4 tsp ground ginger for a similar warming flavour profile.
For the granola, preheat the oven to 160C Fan/180C/350F/gas mark 4.
Into a large bowl, add the oats, pecans, desiccated coconut, sunflower seeds, gingerbread spice and salt. Mix well until combined.
In a separate bowl/jug, add the maple syrup, coconut oil, almond butter, orange zest and vanilla bean paste. Mix well using a spoon before pouring over the oat mix.
Use a wooden spoon to combine, until all the oats, pecans and seeds are well coated.
Grab two large trays and transfer your granola to both. You want this to be tightly packed to create clumps but also not overloaded to ensure it all bakes evenly. I was lazy and opted to use one but this will cause some uneven colouring and baking.
Pop the trays into the oven for 15 minutes. Remove the trays from the oven, gently stirring to break up the granola and smoothing over to an even layer again, before placing back into the oven for a further 10 minutes, until the oats are toasty and golden brown – they should be smelling deliciously sweet with gingerbread spice by now.
Remove once again, but this time don’t disturb the granola. Allow it to sit for 45 minutes, or until cool, before breaking up using your hands or a spoon, to the size you are after. Add the baked granola back into the large bowl, add the cranberries and cacao nibs, mix well before transferring to an airtight container. Note: As this makes a large portion, I like to keep half as granola and slice the other half into bars (whilst still warm) for a breakfast on the go option.
The granola will keep well for up to 2 weeks when stored at room temperature, but you can also freeze any surplus for up to 3 months.
For the rhubarb and mixed berry compote, add all the ingredients to a large pan. Mix well to ensure all the fruit and veg is coated with the sugar and juice, before placing over a medium heat.
Cook for approx. 20 minutes, stirring little but often, until the rhubarb has softened, with some pieces lightly holding its shape and the rest broken down to help thicken the liquid. You should be left with a chunky, textured compote, with some distinguishable fruit to help give the compote some body. Leave to completely cool before transferring to a sealed container.
Store in the fridge for up to 7 days, or in the freezer for up to 3 months. Any surplus can be frozen in ice cube trays, used for smoothies or in ice cubes whenever the sun decides to grace us with its presence again.
Because making food is thirsty work (and I have a stupid amount of rhubarb to work through), I thought I’d share a little tipple recipe. My sister absolutely loves pink gin, so I thought what better way to thank her for all her love and support over the last few months, than to make her some of her very own. I’d love to say this is a tedious process and takes forever to make (ya know, to really make you think I am lovely for doing such a selfless deed) but it is in fact so simple, I feel almost bad for taking up space on the newsy for it and sharing a so-called recipe??
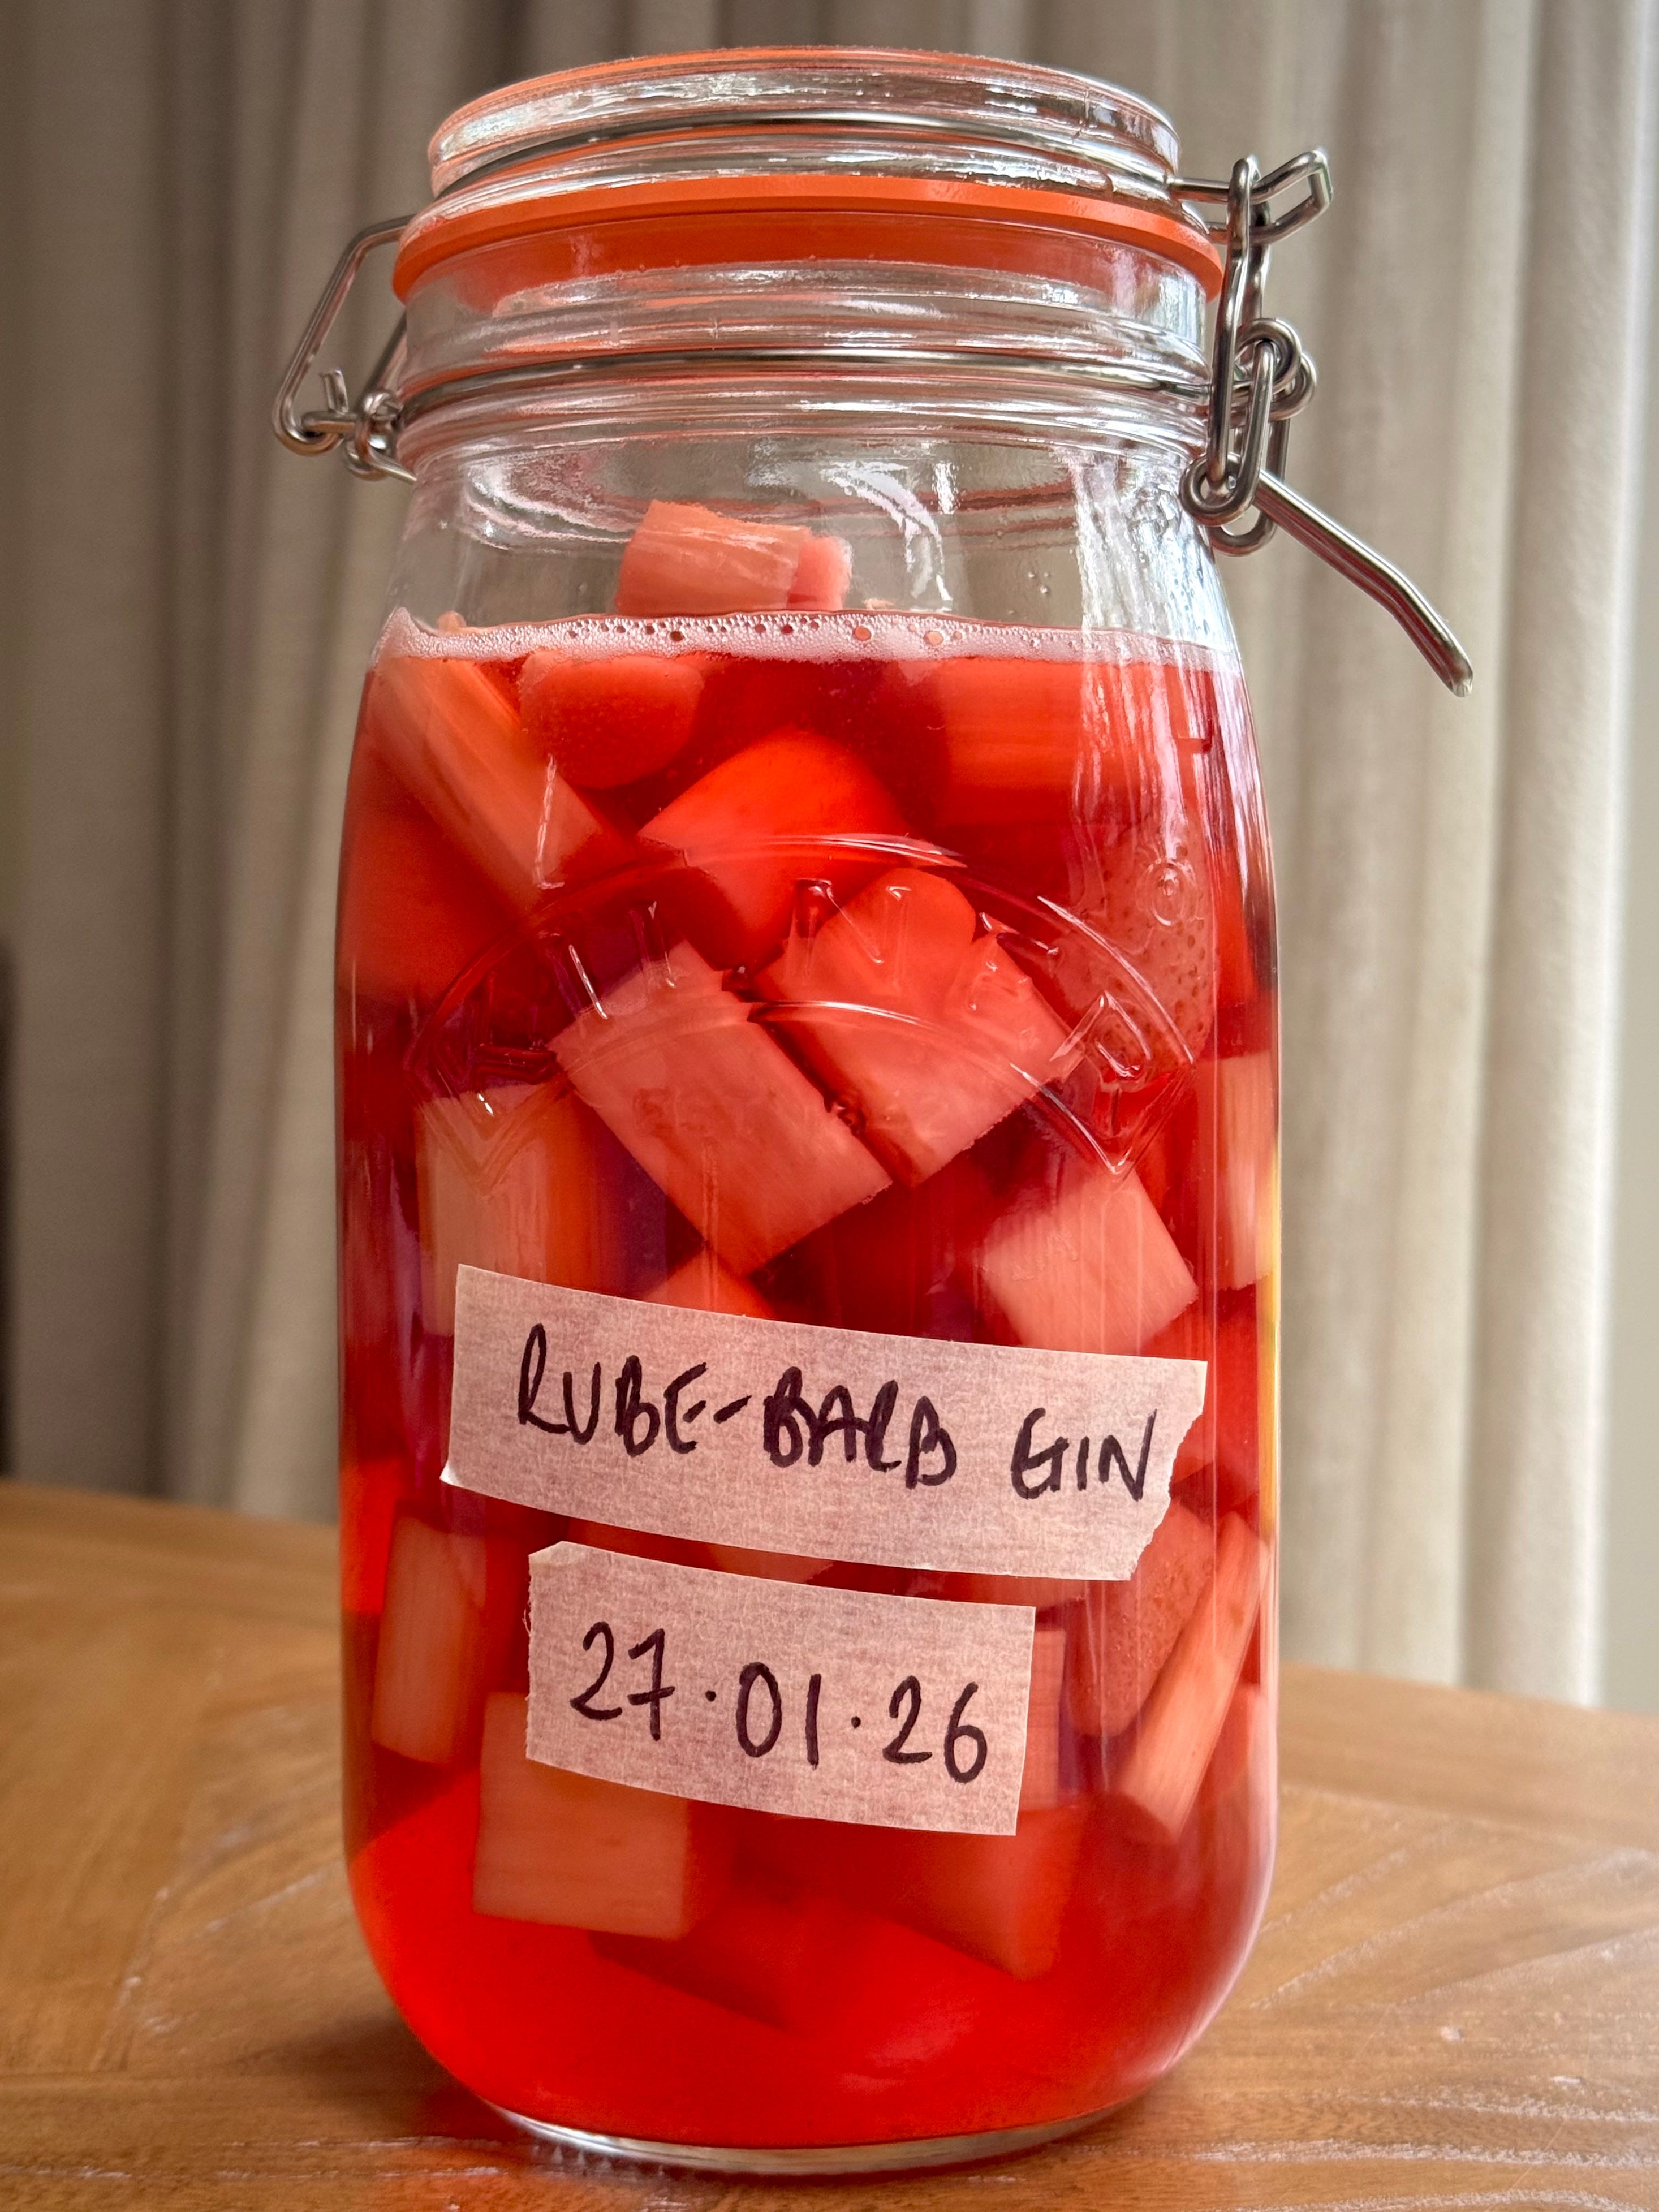
But anyway, random guilt over, if you too would like to infuse and personalise a bottle of gin you’ve got in your cupboard, why not give the below a go. I’ve shared two different types, but the method for both is exactly the same. The only tricky thing about it is that you need to give the bottles a little shake every few days and wait 3 to 4 weeks before you get to sample the goods but future you will be so thankful and isn’t that just lovely?
Both recipes make: 1 x 700 ml Gin
Y O U – W I L L – N E E D -
Rhubarb & Strawberry Gin:
500 g Forced Rhubarb, 1 inch batons
150 g Frozen Strawberries
700 ml Gin
50 g Caster Sugar
Rhubarb Sloe Gin
600 g Forced Rhubarb, 1 inch batons
350 ml Sloe Gin
350 ml Gin
40 g Caster Sugar
M E T H O D –
Add the rhubarb, and strawberries if using, sugar and gin into sterilised glass bottles or jars. Place the lid on, ensuring it is tightly sealed, before giving it a good old shake to mix.
You want to ensure all the sugar has dissolved and isn’t pooling at the base, so every few days, give your bottle a shake, turning it completely upside down and back up again a few times to mix well.
Store in a cool, dark place at room temperature for 3 to 4 weeks for a deep, strong infusion.
My advice would be to sample the goods at 3 weeks before deciding if you want to continue for another week to intensify the flavour. When you are happy, strain the gin through a cheesecloth or a super fine sieve (don’t use a regular one as it will pass through sediment) and rebottle the gin into fresh, sterilised jars/bottles.
The gin will keep well for up to a year, meaning your summer tipple is already sorted.
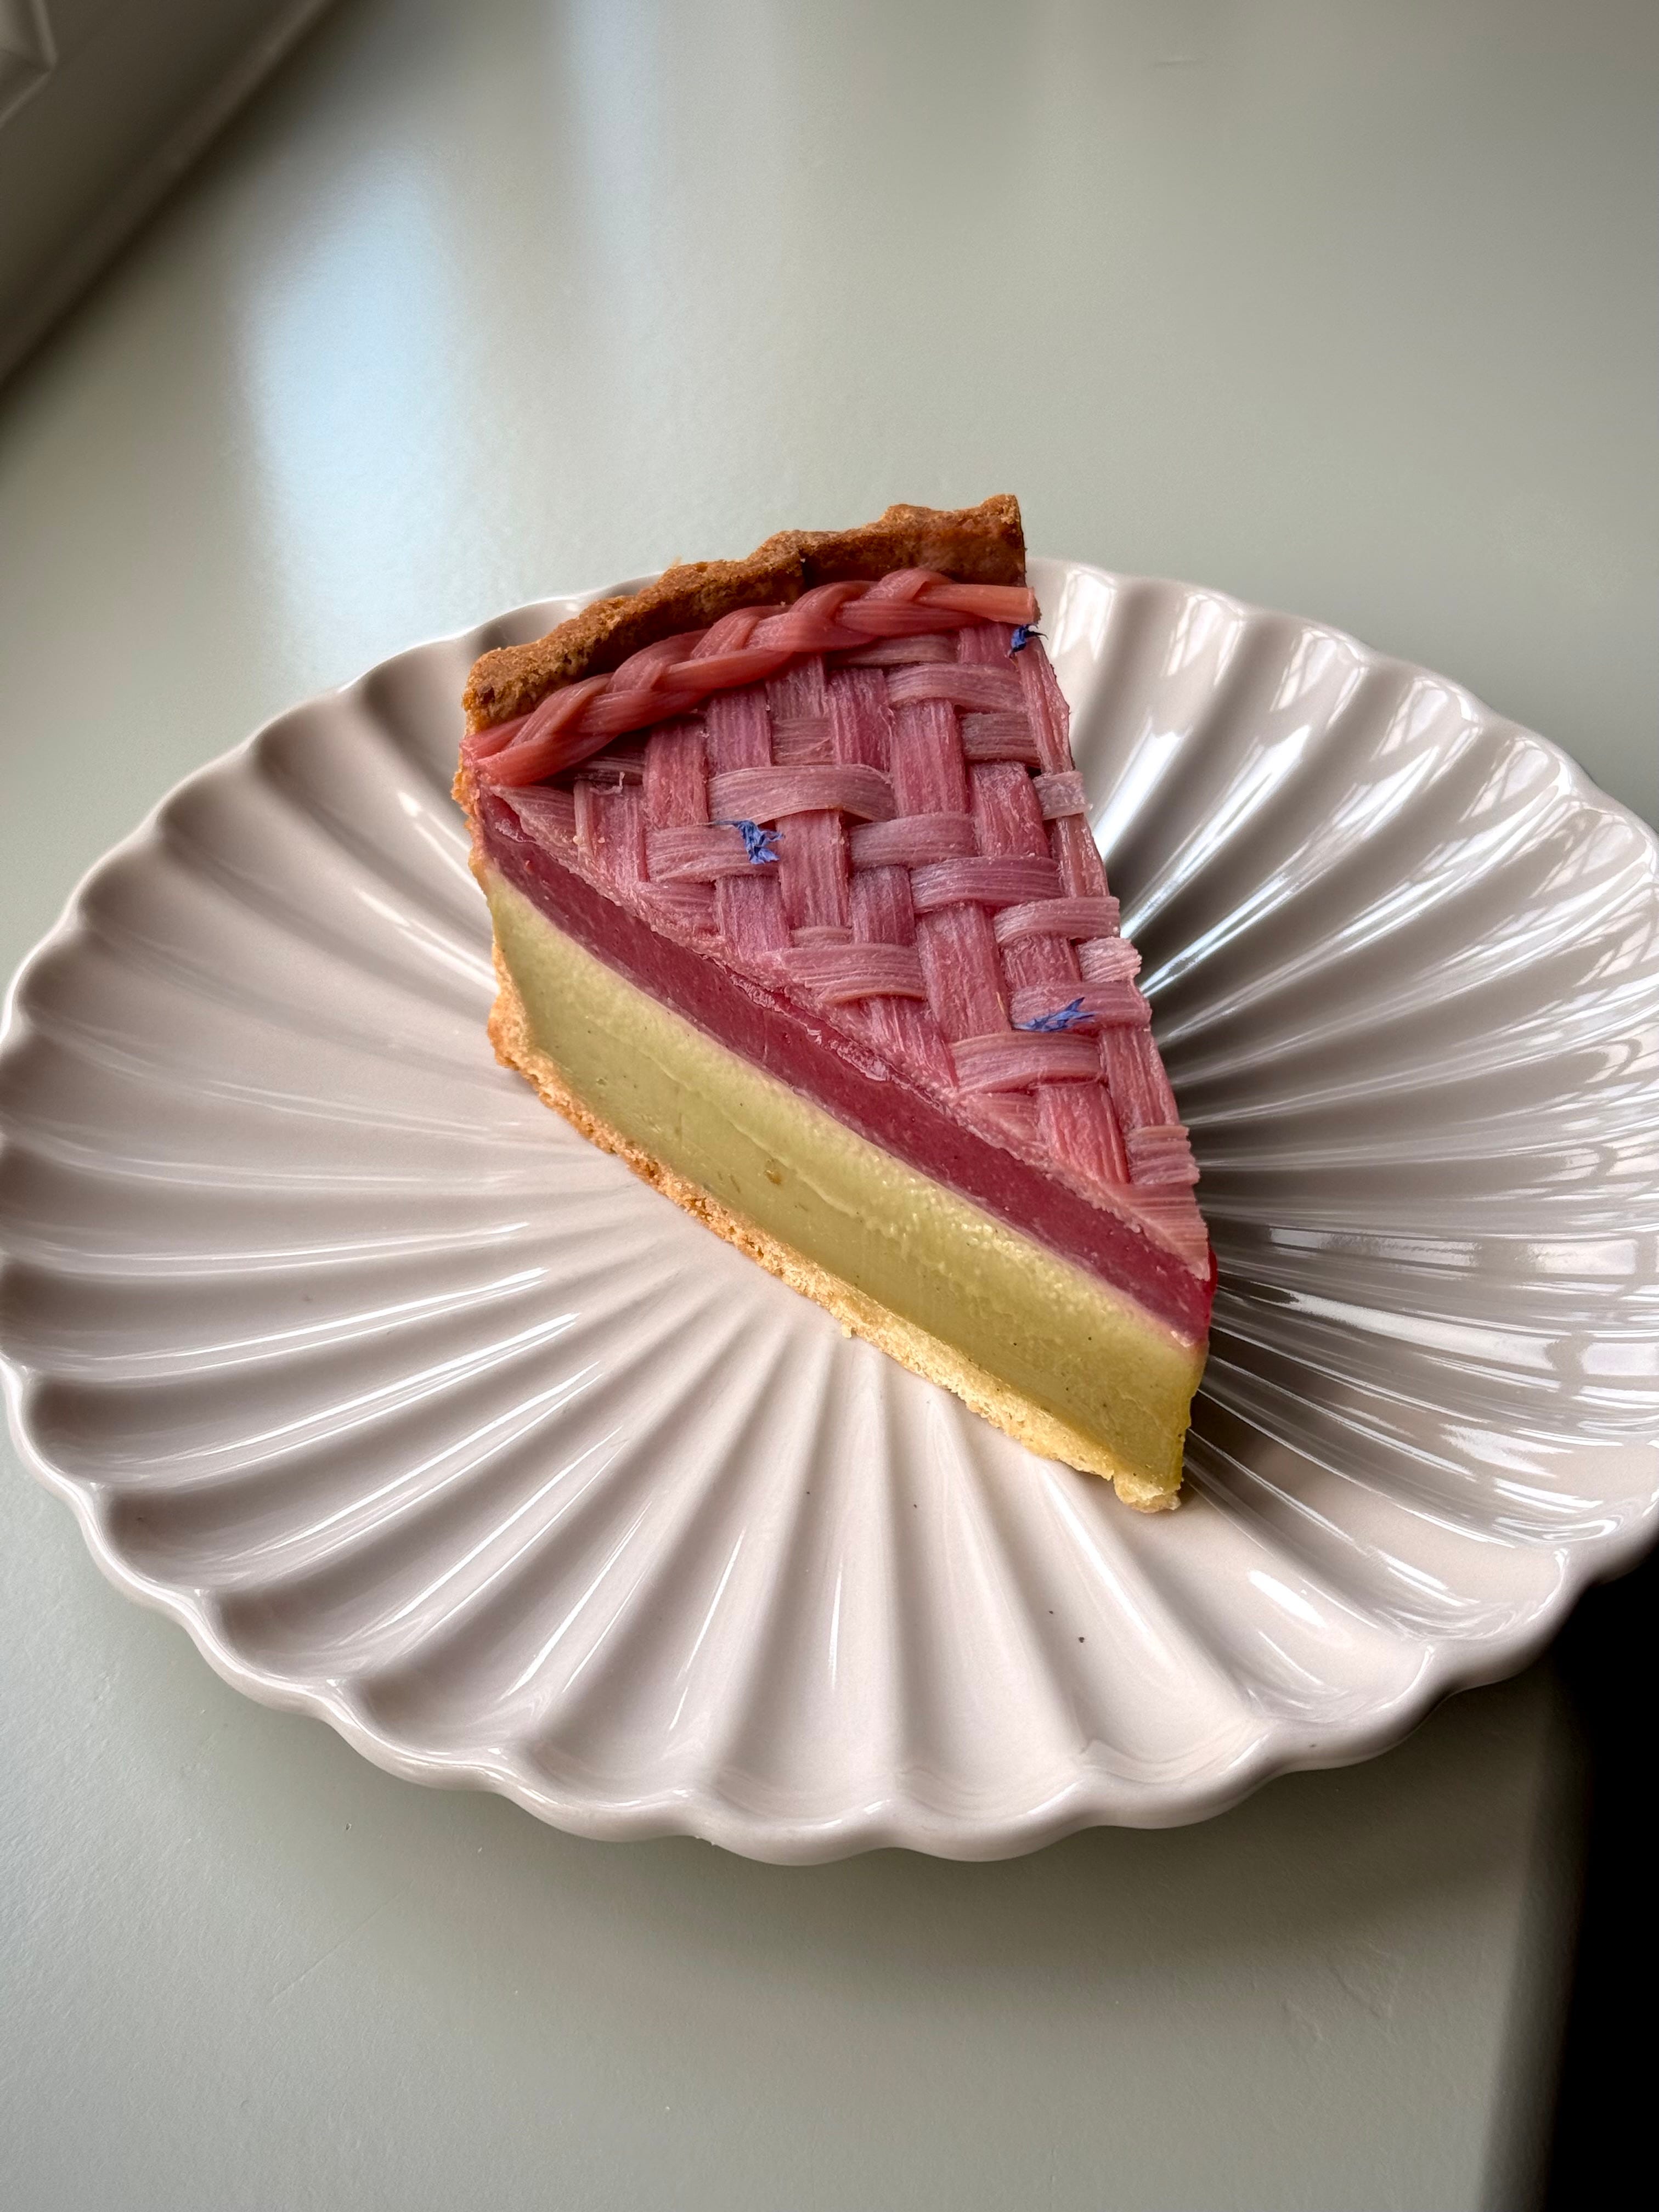
*drumroll please* FINALLY we get onto my now yearly tradition of driving myself absolutely insane weaving, plaiting, braiding, crocheting (I joke but was tempted to try) rhubarb into ways no one should really be spending their time doing but I do it anyway because I have officially lost the plot. Like please tell me why I am competing with past rubes to beat last years tart? What is this unnecessary and unhealthy competition that I have with myself??? I’ll save these questions for therapy but for now, let me introduce you to this years pretty little tart – my woven (lol) Forced Rhubarb tart with a baked Pistachio Custard and roasted Raspberry Jelly.
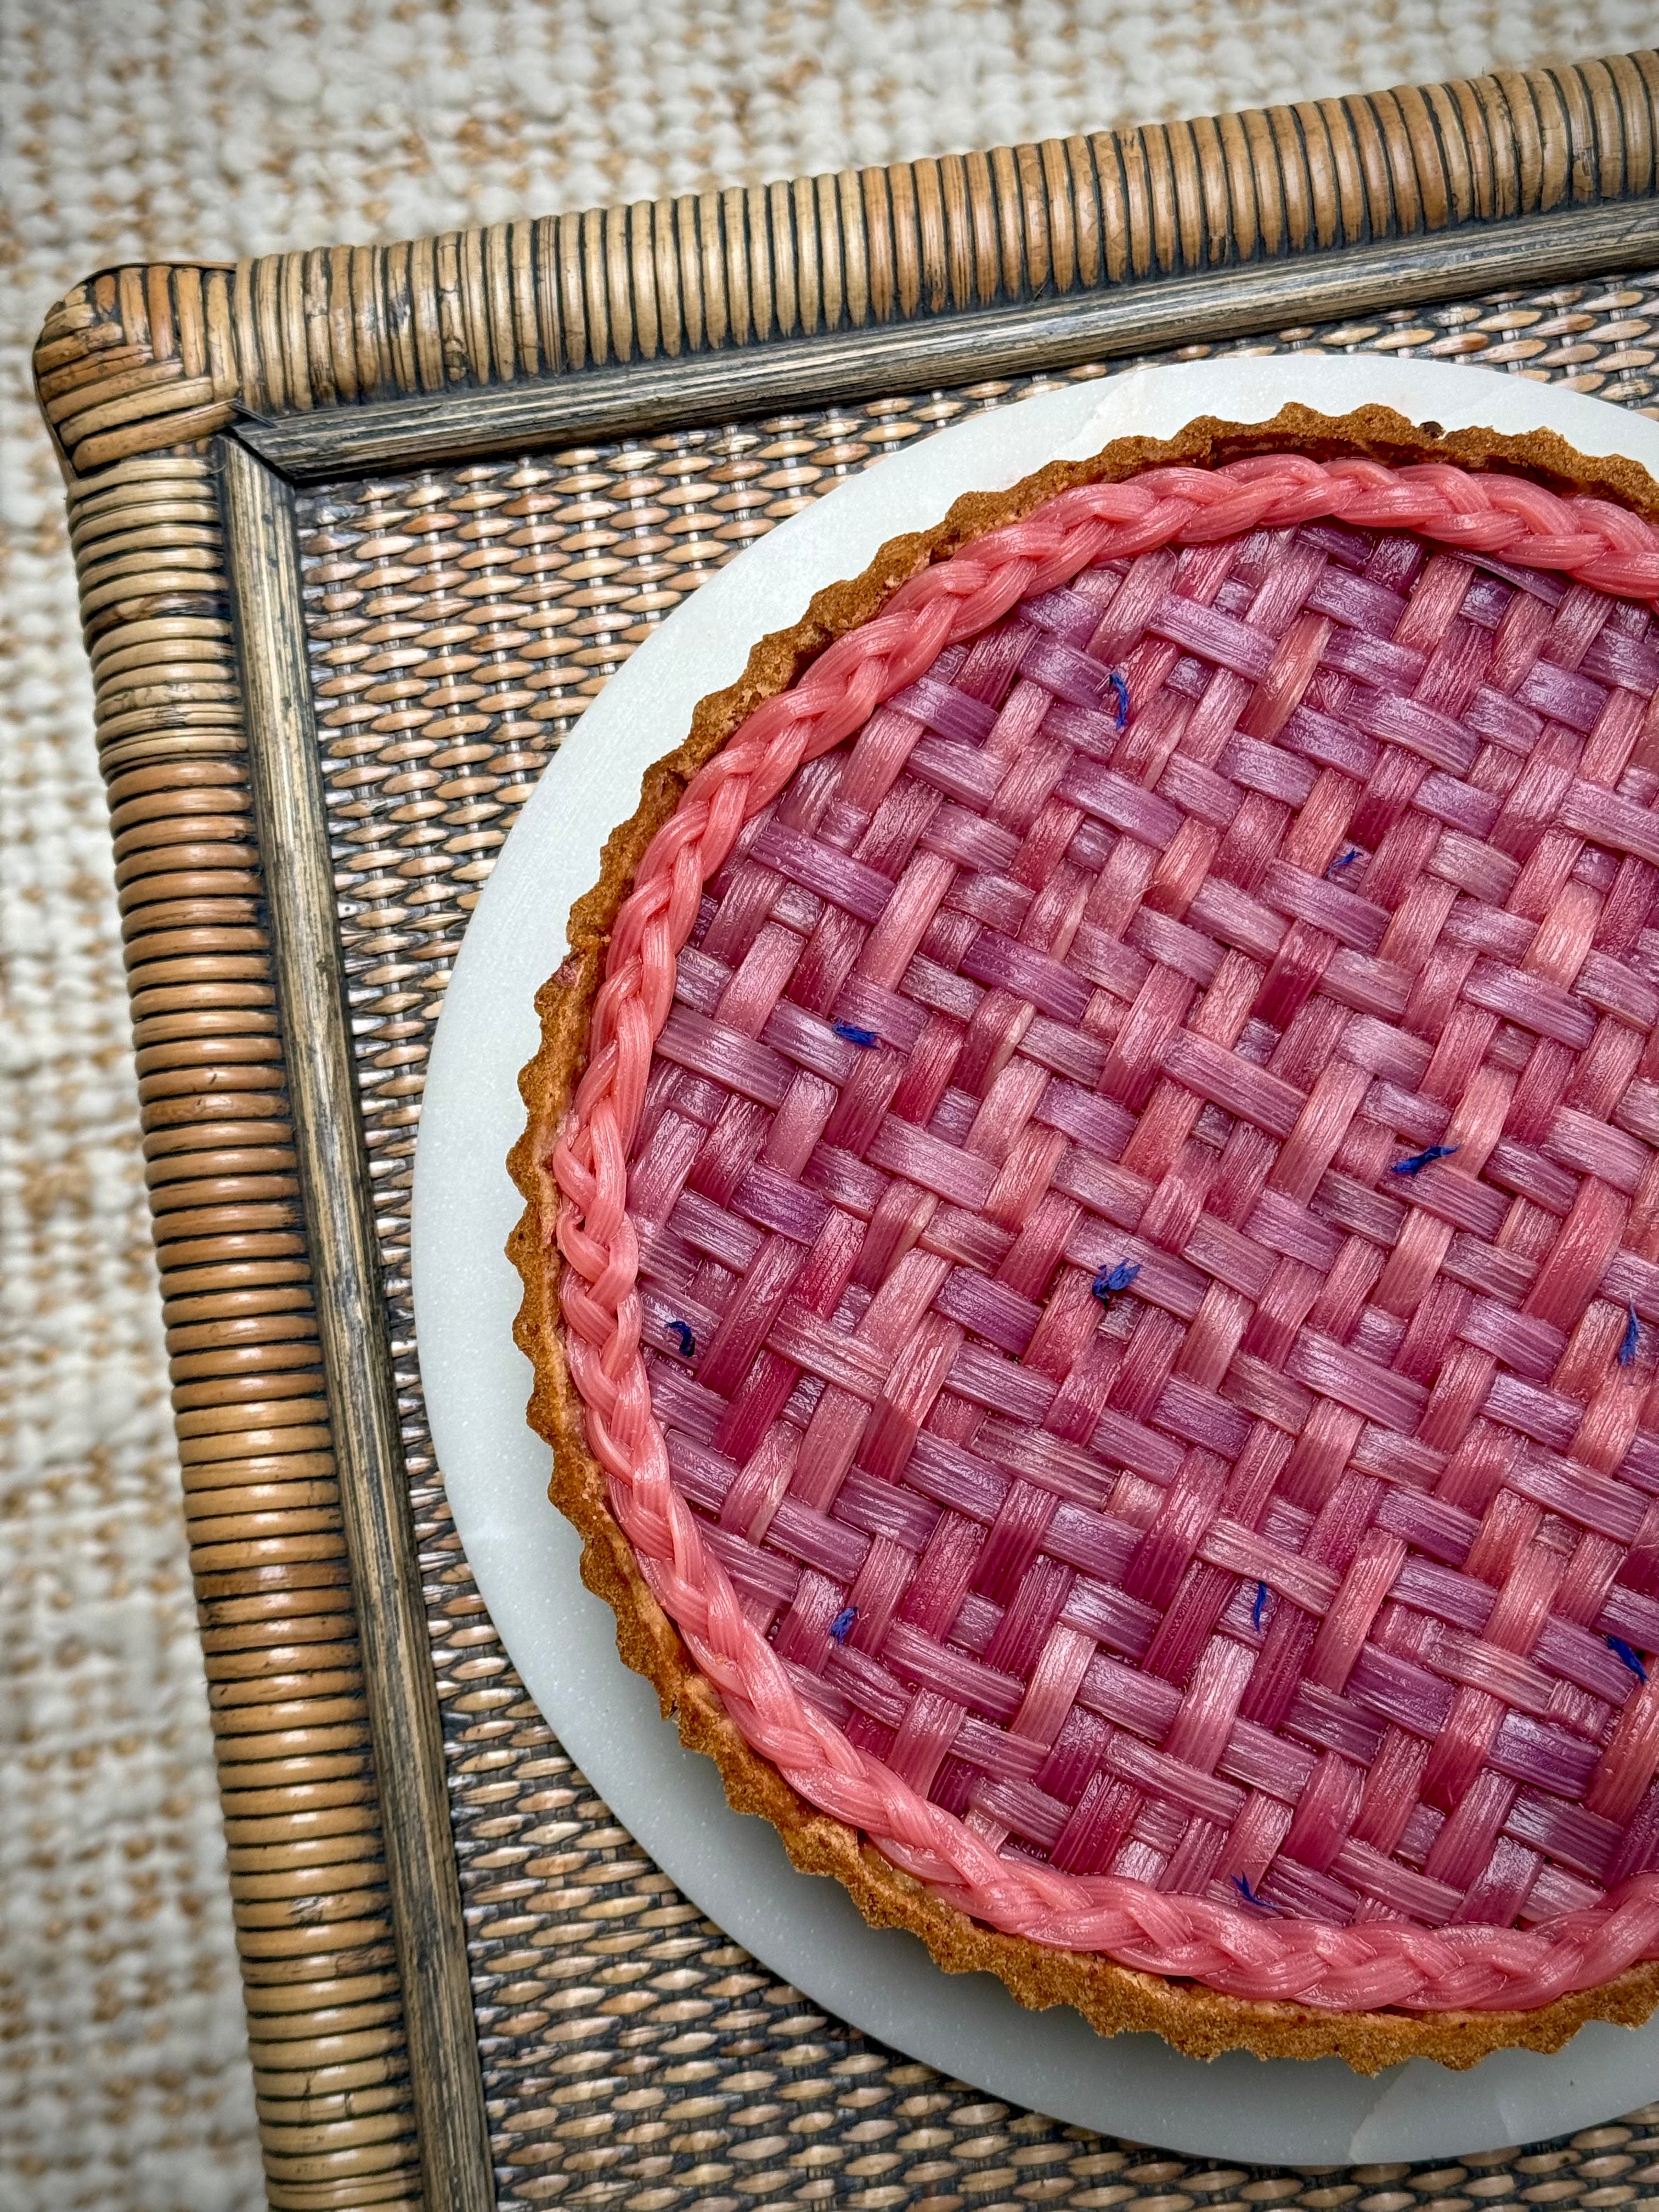
Existential crisis parked, this version features new flavours and a new way to play with forced rhubarb. Just a little reminder on what forced rhubarb is as I seem to have a tonne of messages asking how I have managed to get my hands on it so early in the year and this is where I kindly draw your attention to the word FORCED. This baby doesn’t want to grow this early in the year but like most children of immigrants born in the 70’s and 80’s, they have been forced to overachieve and boy, has that micro-parenting paid off (I say that with tender love and care – I now have two degrees which I now only apply whenever I am making gingerbread houses but shout out mum and dad).


Forcing rhubarb has been a long game process, starting back in 1877. More delicately flavoured and sweeter than normal rhubarb, the forced variety is also much more tender with vivid pinky, cerise red stalks. Grown in dark, warm environments, often covered with pots and buckets for additional warmth, the plants grow quickly as the rhubarb searches for light. Growing forced rhubarb is a real labour of love – it’s harvested by candlelight to maintain the tenderness and to ensure the crowns are not exposed to too much light. If they are, they’ll stop growing, allowing photosynthesis to occur, producing a bitter end product.


Now you know a little bit of background on it, hopefully now you’ll understand my fascination and appreciation of it. Treating produce that has taken years to grow with care and love, to showcase its versatility and beauty is something I never want to stop doing. Food is a privilege and I count myself extraordinarily lucky to be able to enjoy and reap all its rewards. Two years ago, we tessellated. Last year we wove one and plaited another. This year we are combining the two into one.
Where do I go from here? No idea but I’m down to my last 3 stalks of rhubarb after my accidental 8kg mis-order and yet dare I say I am tempted to buy another bundle to make another tart for old madness sake?? I’ll see how chaotic I am feeling next week and maybe I truly will crochet the crap out of it but for now, this one will do.
I’ve included PLENTY of detail, lots of pictures and videos in the below for a fully fleshed out recipe but my KEY piece of advice to you all is have patience. And have it by the bucketful. PLEASE also read through the entire method once before you begin so you understand the timings of each component. This is not a one day bake it all sort of recipe. If you couldn’t give two hoots about weaving rhubarb (cause truly who does have the time??? I didn’t and yet here I am), it’s still an incredibly solid bake in terms of flavours. Use the below as a guide but above all else, inspire yourself, push yourself and have fun with it. It’s only baking, after all.
Recipe Makes: 1 x 24 cm / 10 inch deep tart tin with a loose bottomed based (approx. 2 inch deep to get a hefty layer of custard)
Recipe Serves: 8
