

Causing Christmas Chaos
With my Chocolate & Dulce de Leche House (yes, house!!), Mixed Berry Pavlova, Black Forest Gateau, a Self-Saucing Chocolate & Brandy Pudding & the BEST Tiramisu in town.


Hey Friends!
Tis the season for fun and a whole lotta yum. As a self-confessed carb fiend, the winter season is truly where I come alive. It’s all bread, comforting, beige good mood food over here and I am not mad at it one single bit.
The one thing I am mad at, and this happens every single year, without fail, is that I wait for December to roll around. I count down the days till I can blast the Bublé on repeat. I live for cosy season and now it is upon us, I feel horrendously behind. Like how are we a week away from Christmas??? How is Christmas nearly here? HOW HAVE I NOT EVEN STARTED MY GINGERBREAD HOUSE YET???????


I had ambitiously planned to begin making it on the 1st December but forgot to factor in life, work, baking disasters, general winter colds and flu’s like the silly soss I am. Team that with the plethora of festive recipes I had wanted to develop, write, film and share with you all, is bringing me out in a mild sweat. But will I ever l learn my lesson? No. Will I catch myself in manic montage on December 23rd attempting to make said gingerbread house? Probably yes but if you can’t tell yet, ya girl loves (and lives for) the drama.
I HUGELY APOLOGISE for being late on delivering this newsy to you – I have had a difficult last few weeks compounded with the dreaded Christmas flu so I am wallowing in a puddle of self pity and sadness as I truly spend my whole year gearing up for Christmas and I’ve fallen short on all the deliciously filthy magic I wanted to share with you. So sorry sorry sorrrrry but from the girl who got e.coli on her honeymoon, are we even surprised this is how the year is ending???
I hope you are all faring up well amongst the Christmas chaos? Whilst the done thing around this sort of time is a gift giving guide, I’m saving you from another one and bypassing that this year because REALLY what these gift guides are all about is people plugging their own books in amongst a hubble and rubble of kitchen gadgetry that they swear you *must* need. So let’s just get down to the nitty gritty and say One Bake Two Ways is currently available at over half price on Amazon UK (just £10.99!!) and with 30% over on Amazon US. A lovely little stocking filler or gift for any keen baker or sweet toothed fiend in your life.
Now the pleasantries are done, shall we get to the good stuff?
P.s please note, it is a LONG newsy, so for you to find the main bake, you may need to open in your browser to find.

Not to send any of you into a blind panic but we are less than a week away from Christmas so we are overloading you with the dessert options today because let’s be honest folks, that’s what we all unbuckle our belts for at the end of the day.
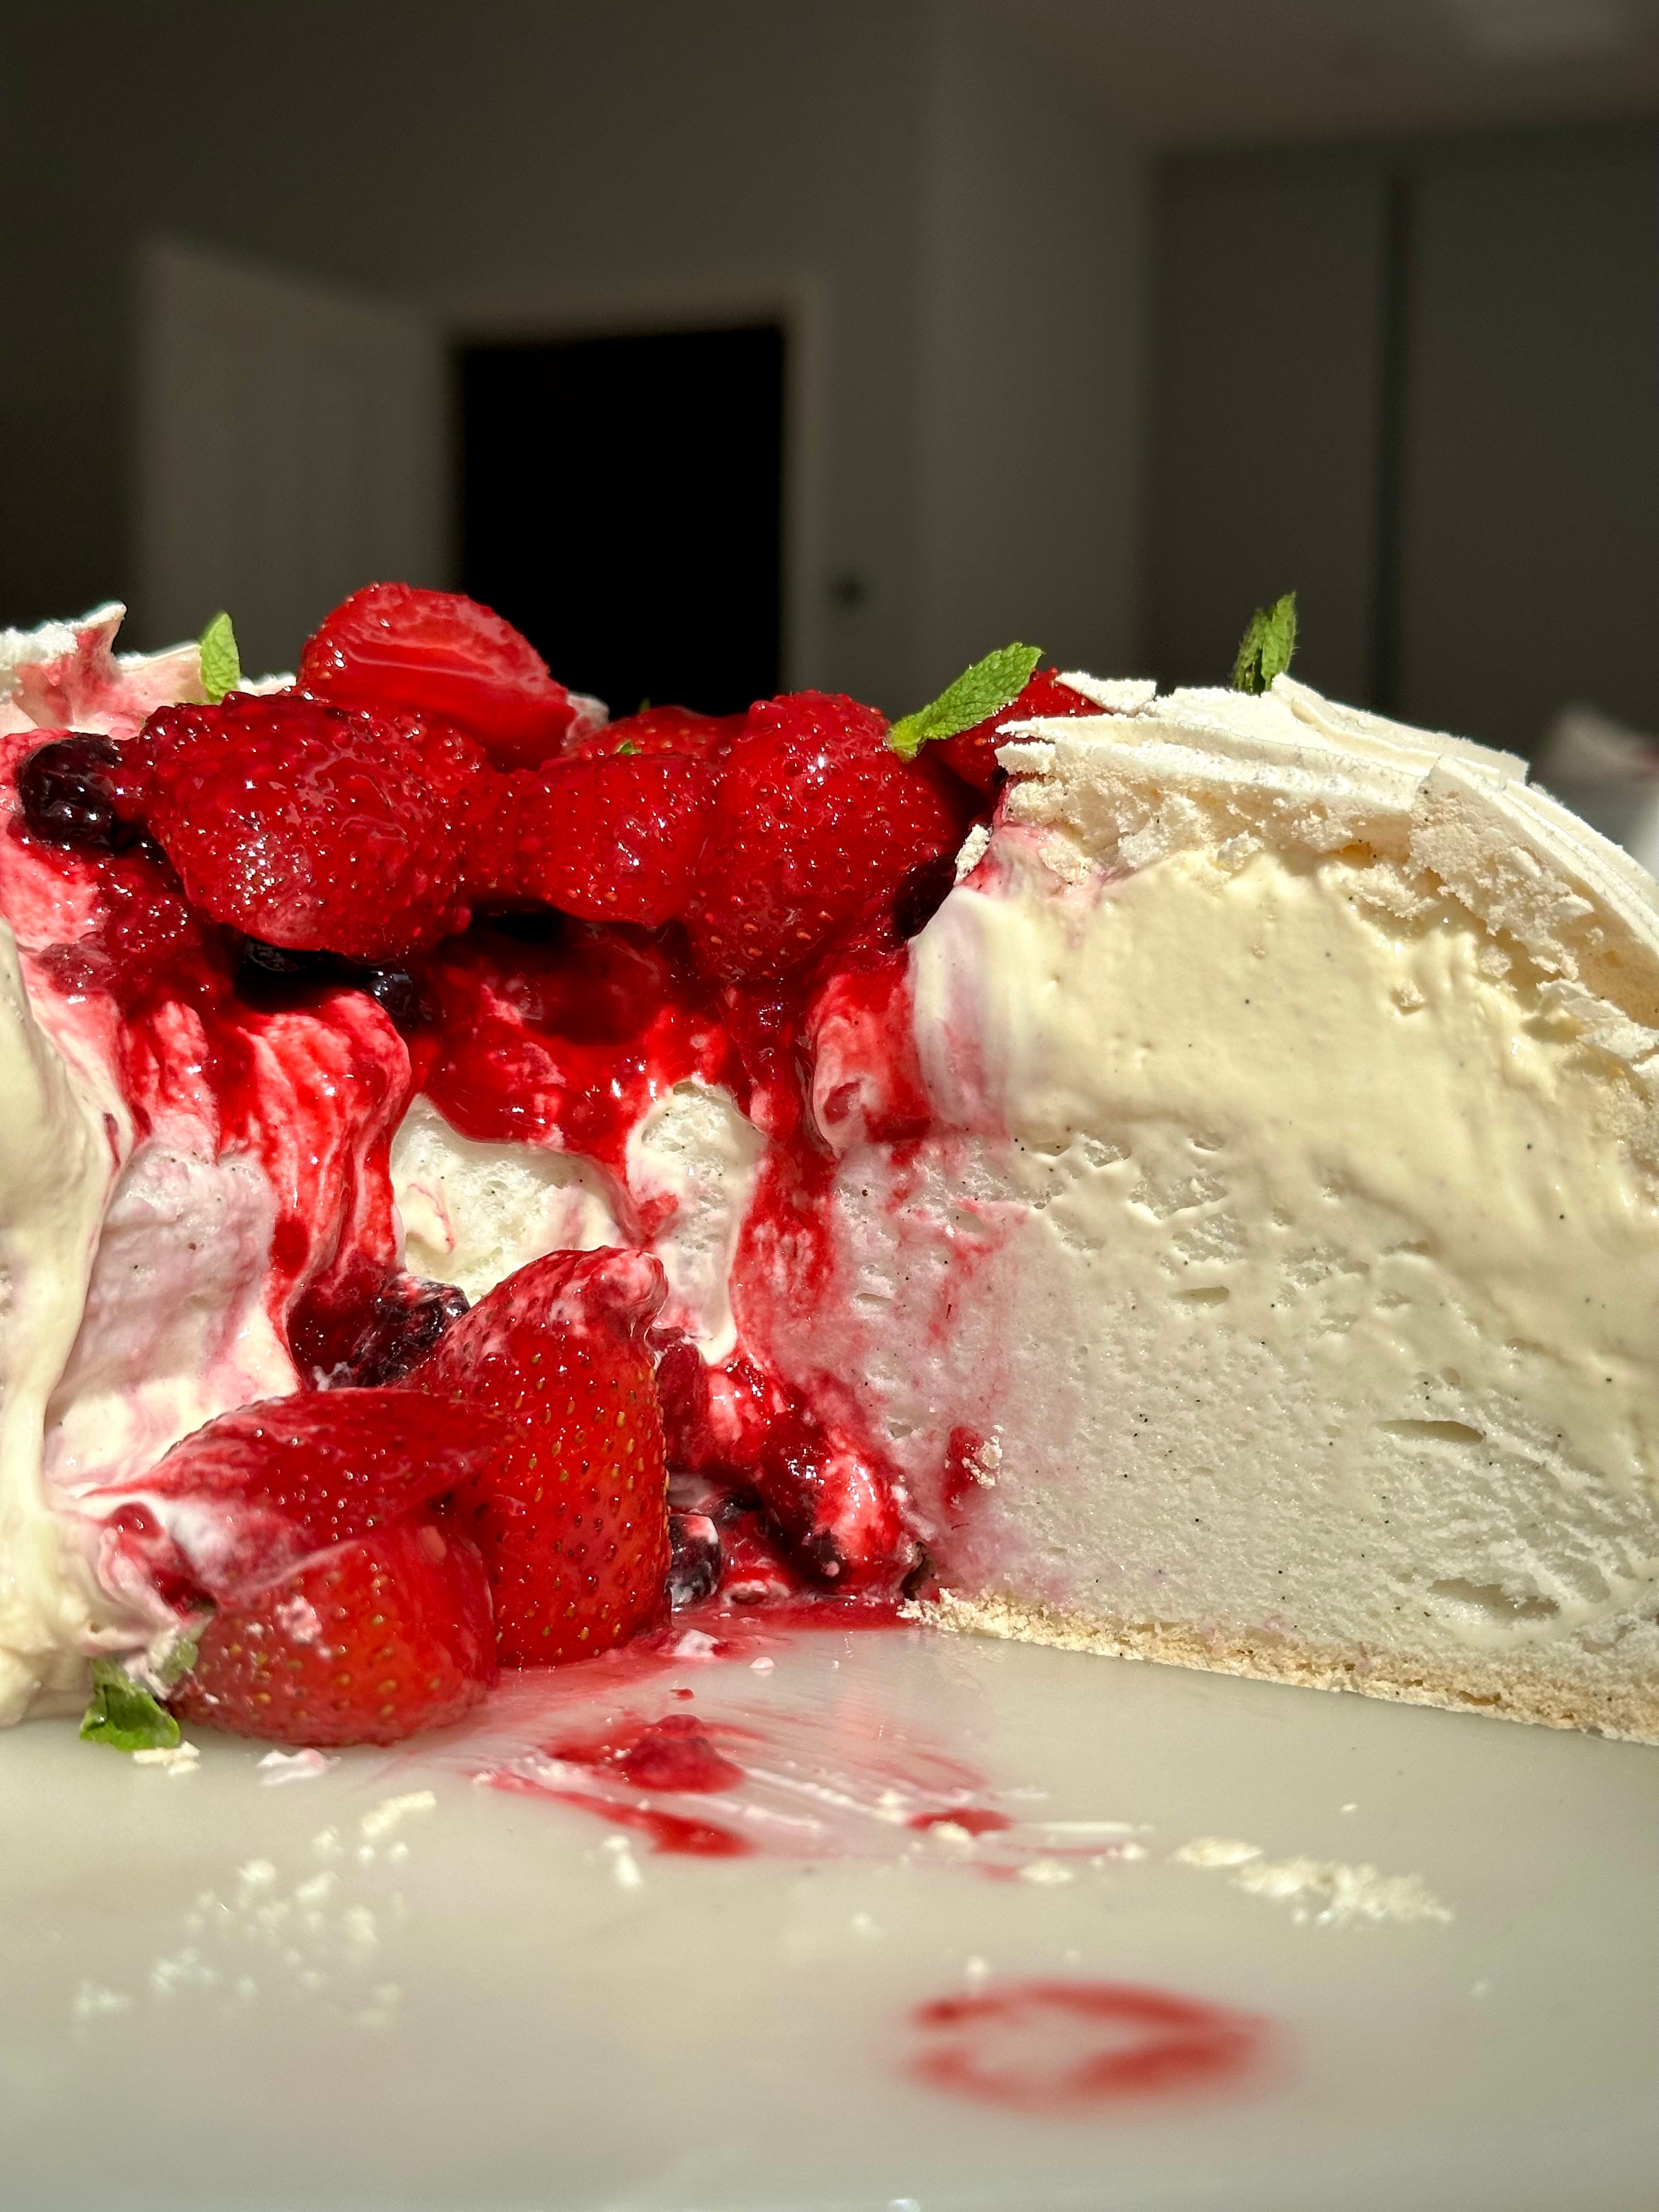
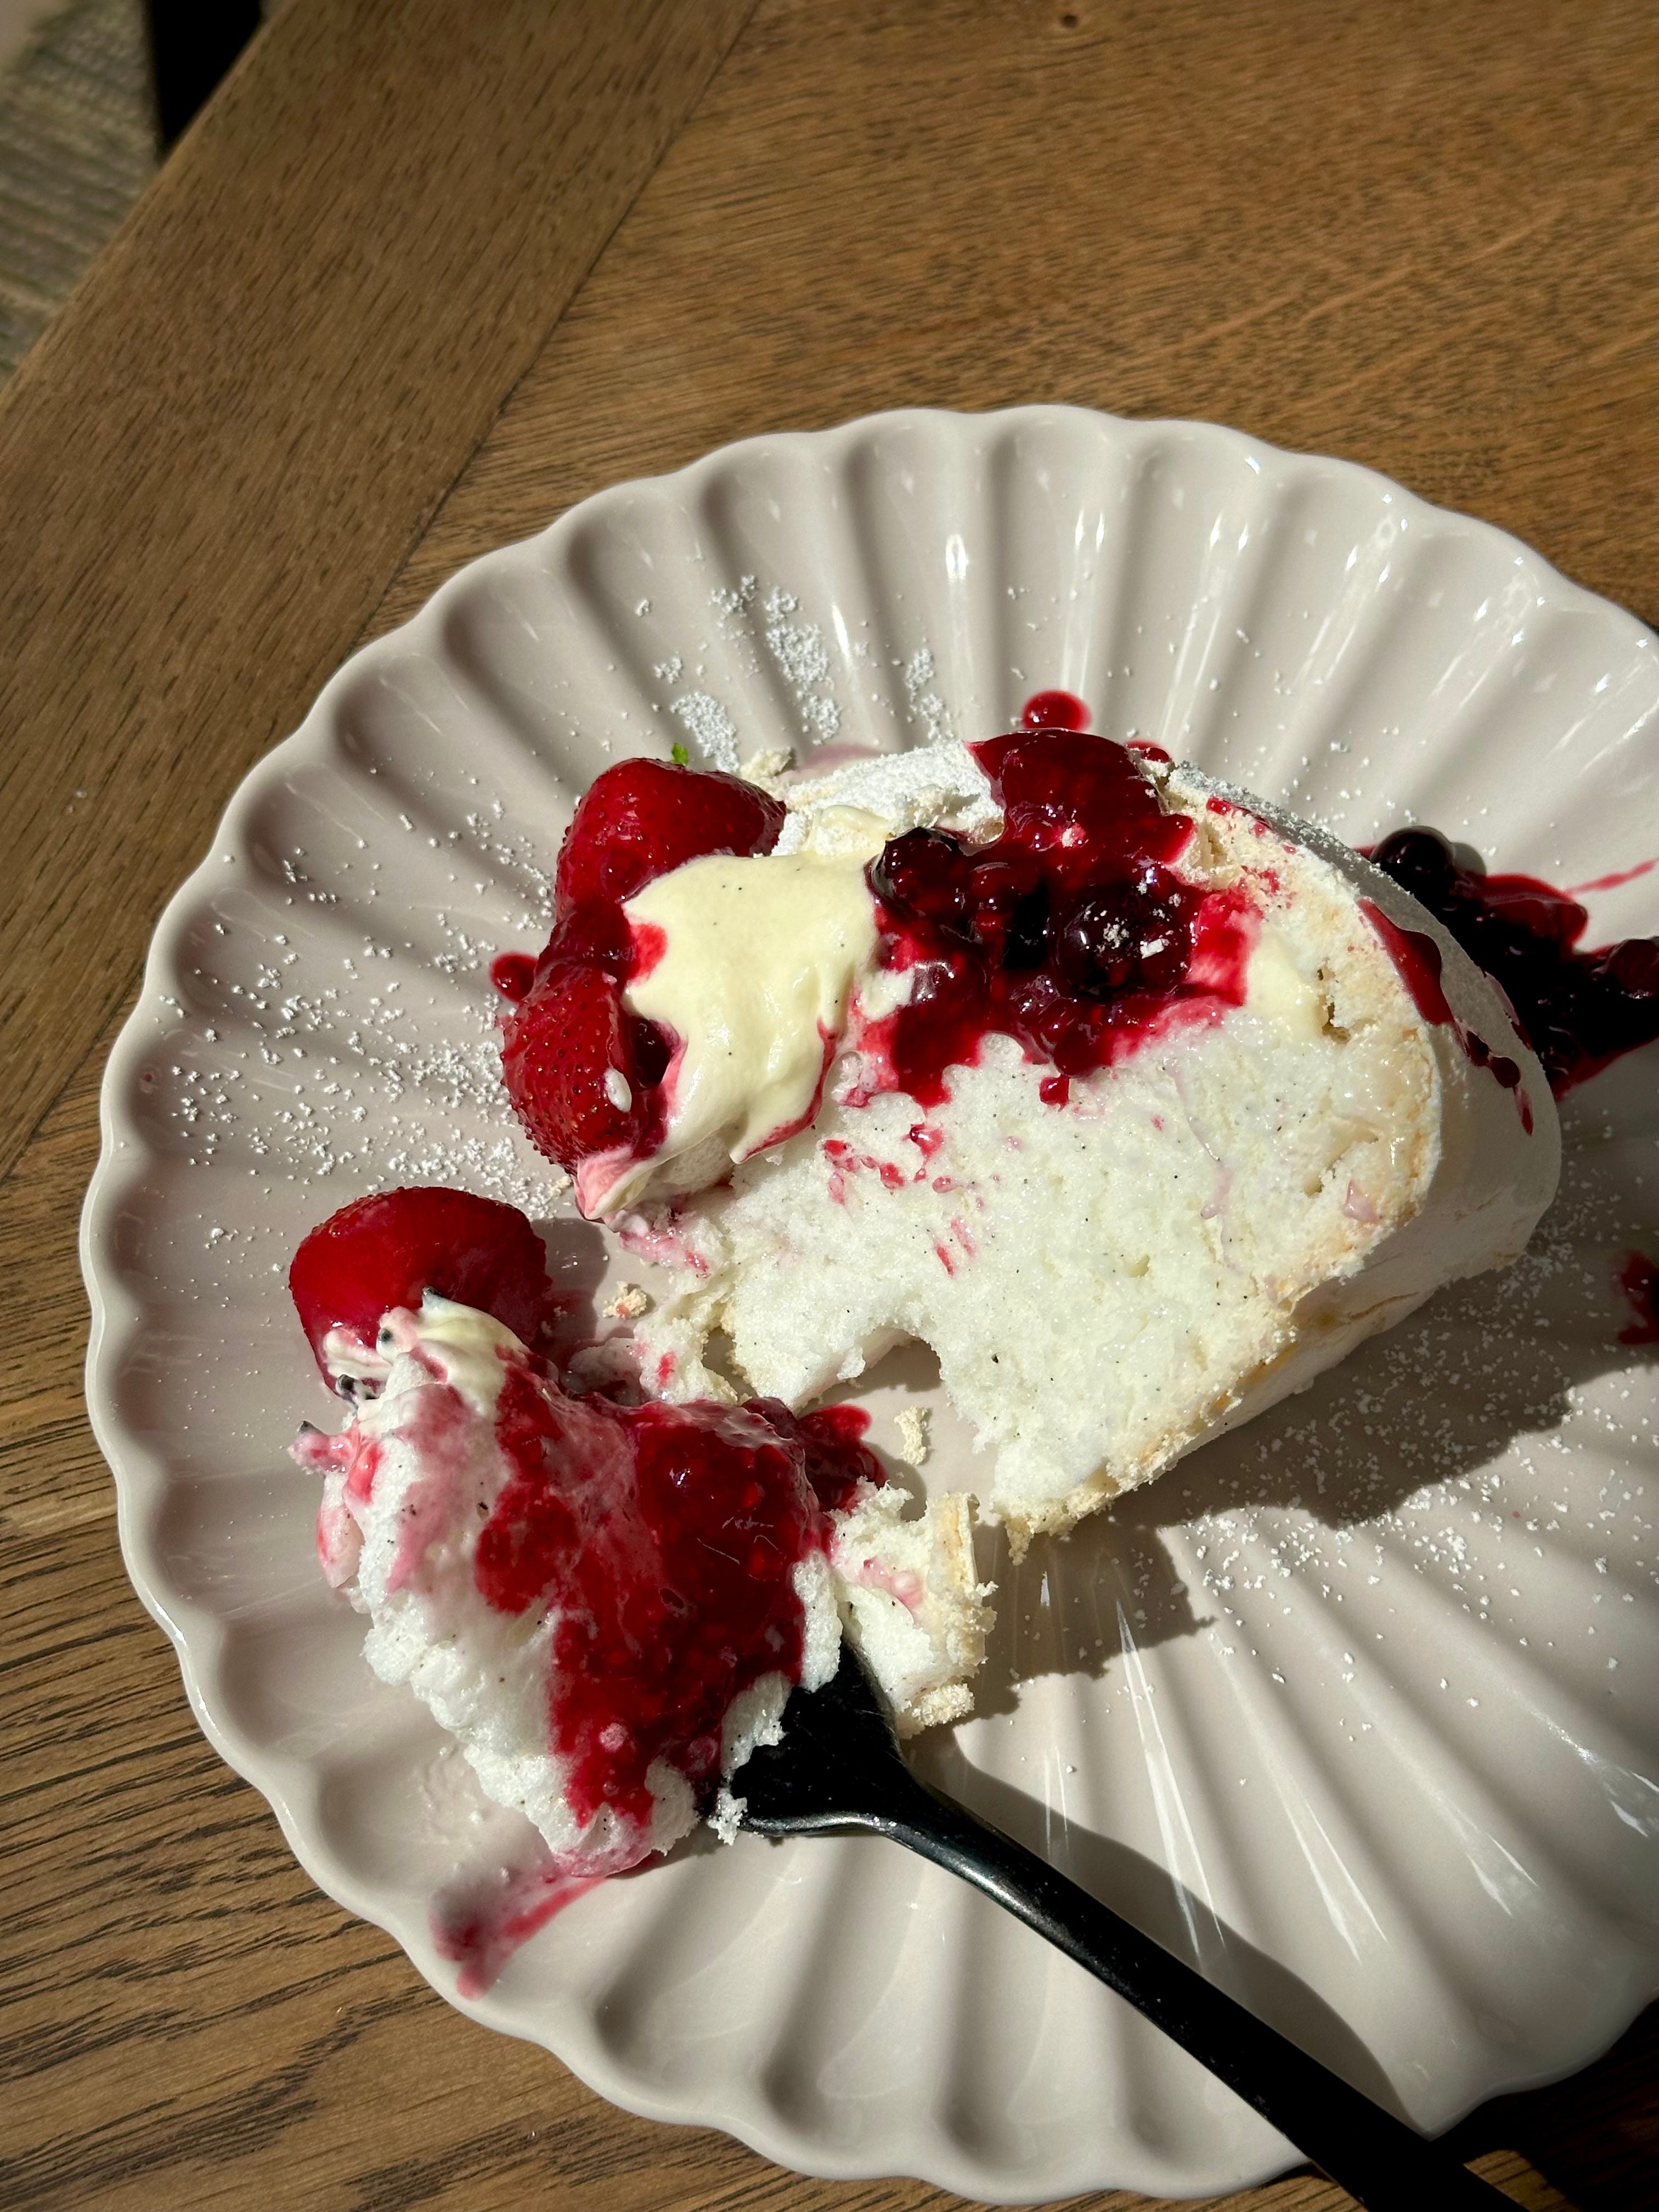
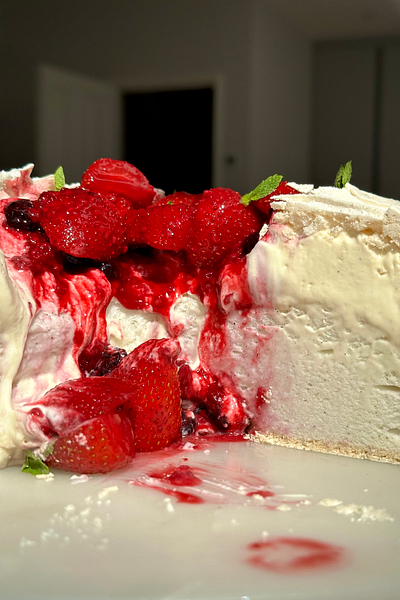
First up, we have a dessert lots beloved by lots but feared by many. My Mixed Berry Pavlova IS THAT GIRL. She’s voluptuous (sounds rogue describing a dessert like that but when you see her, you’ll get it), mallowy in the middle, crisp and crunchy on the outside, topped with a velvety smooth crème légère (custard folded through whipped cream) and finished with a generous drizzling of a mixed berry compote. Adorned with a few mint leaves for a pop of colour and a hefty dusting of icing sugar, it’s a great prep-ahead pud.
Nothing screams Christmas more than a Black Forest Gateaux. When growing up, we were treated to a frozen rendition from the supermarket (not knocking it, we used to demolish them) and I loved it so much, it was the very first cake I attempted to make when I first got into baking (I am going to furiously scroll through my phone to see if I can find said picture). Made up of tender, moist, rich chocolate sponges, soaked in Kirschwasser, topped with whipped cream and cherries – my current version is slightly bougier than the shop bought ones and so much more tastier (I promise I am not biased…).


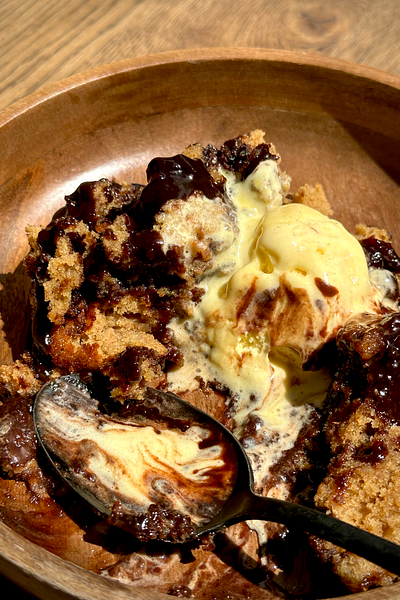
If you’re thinking the first two options sound like far too much work, then let me offer you up a pud which takes a fraction of the time and hits you with the same amount of yum. My Self Saucing Chocolate & Brandy Pudding is easy, speedy and deliciously filthy. Made up of a moist ginger sponge, sitting on top of a hidden layer of brandy spiked chocolate sauce and finished with a scoop of vanilla ice cream to serve – it’s comforting Christmas indulgence in a bowl.
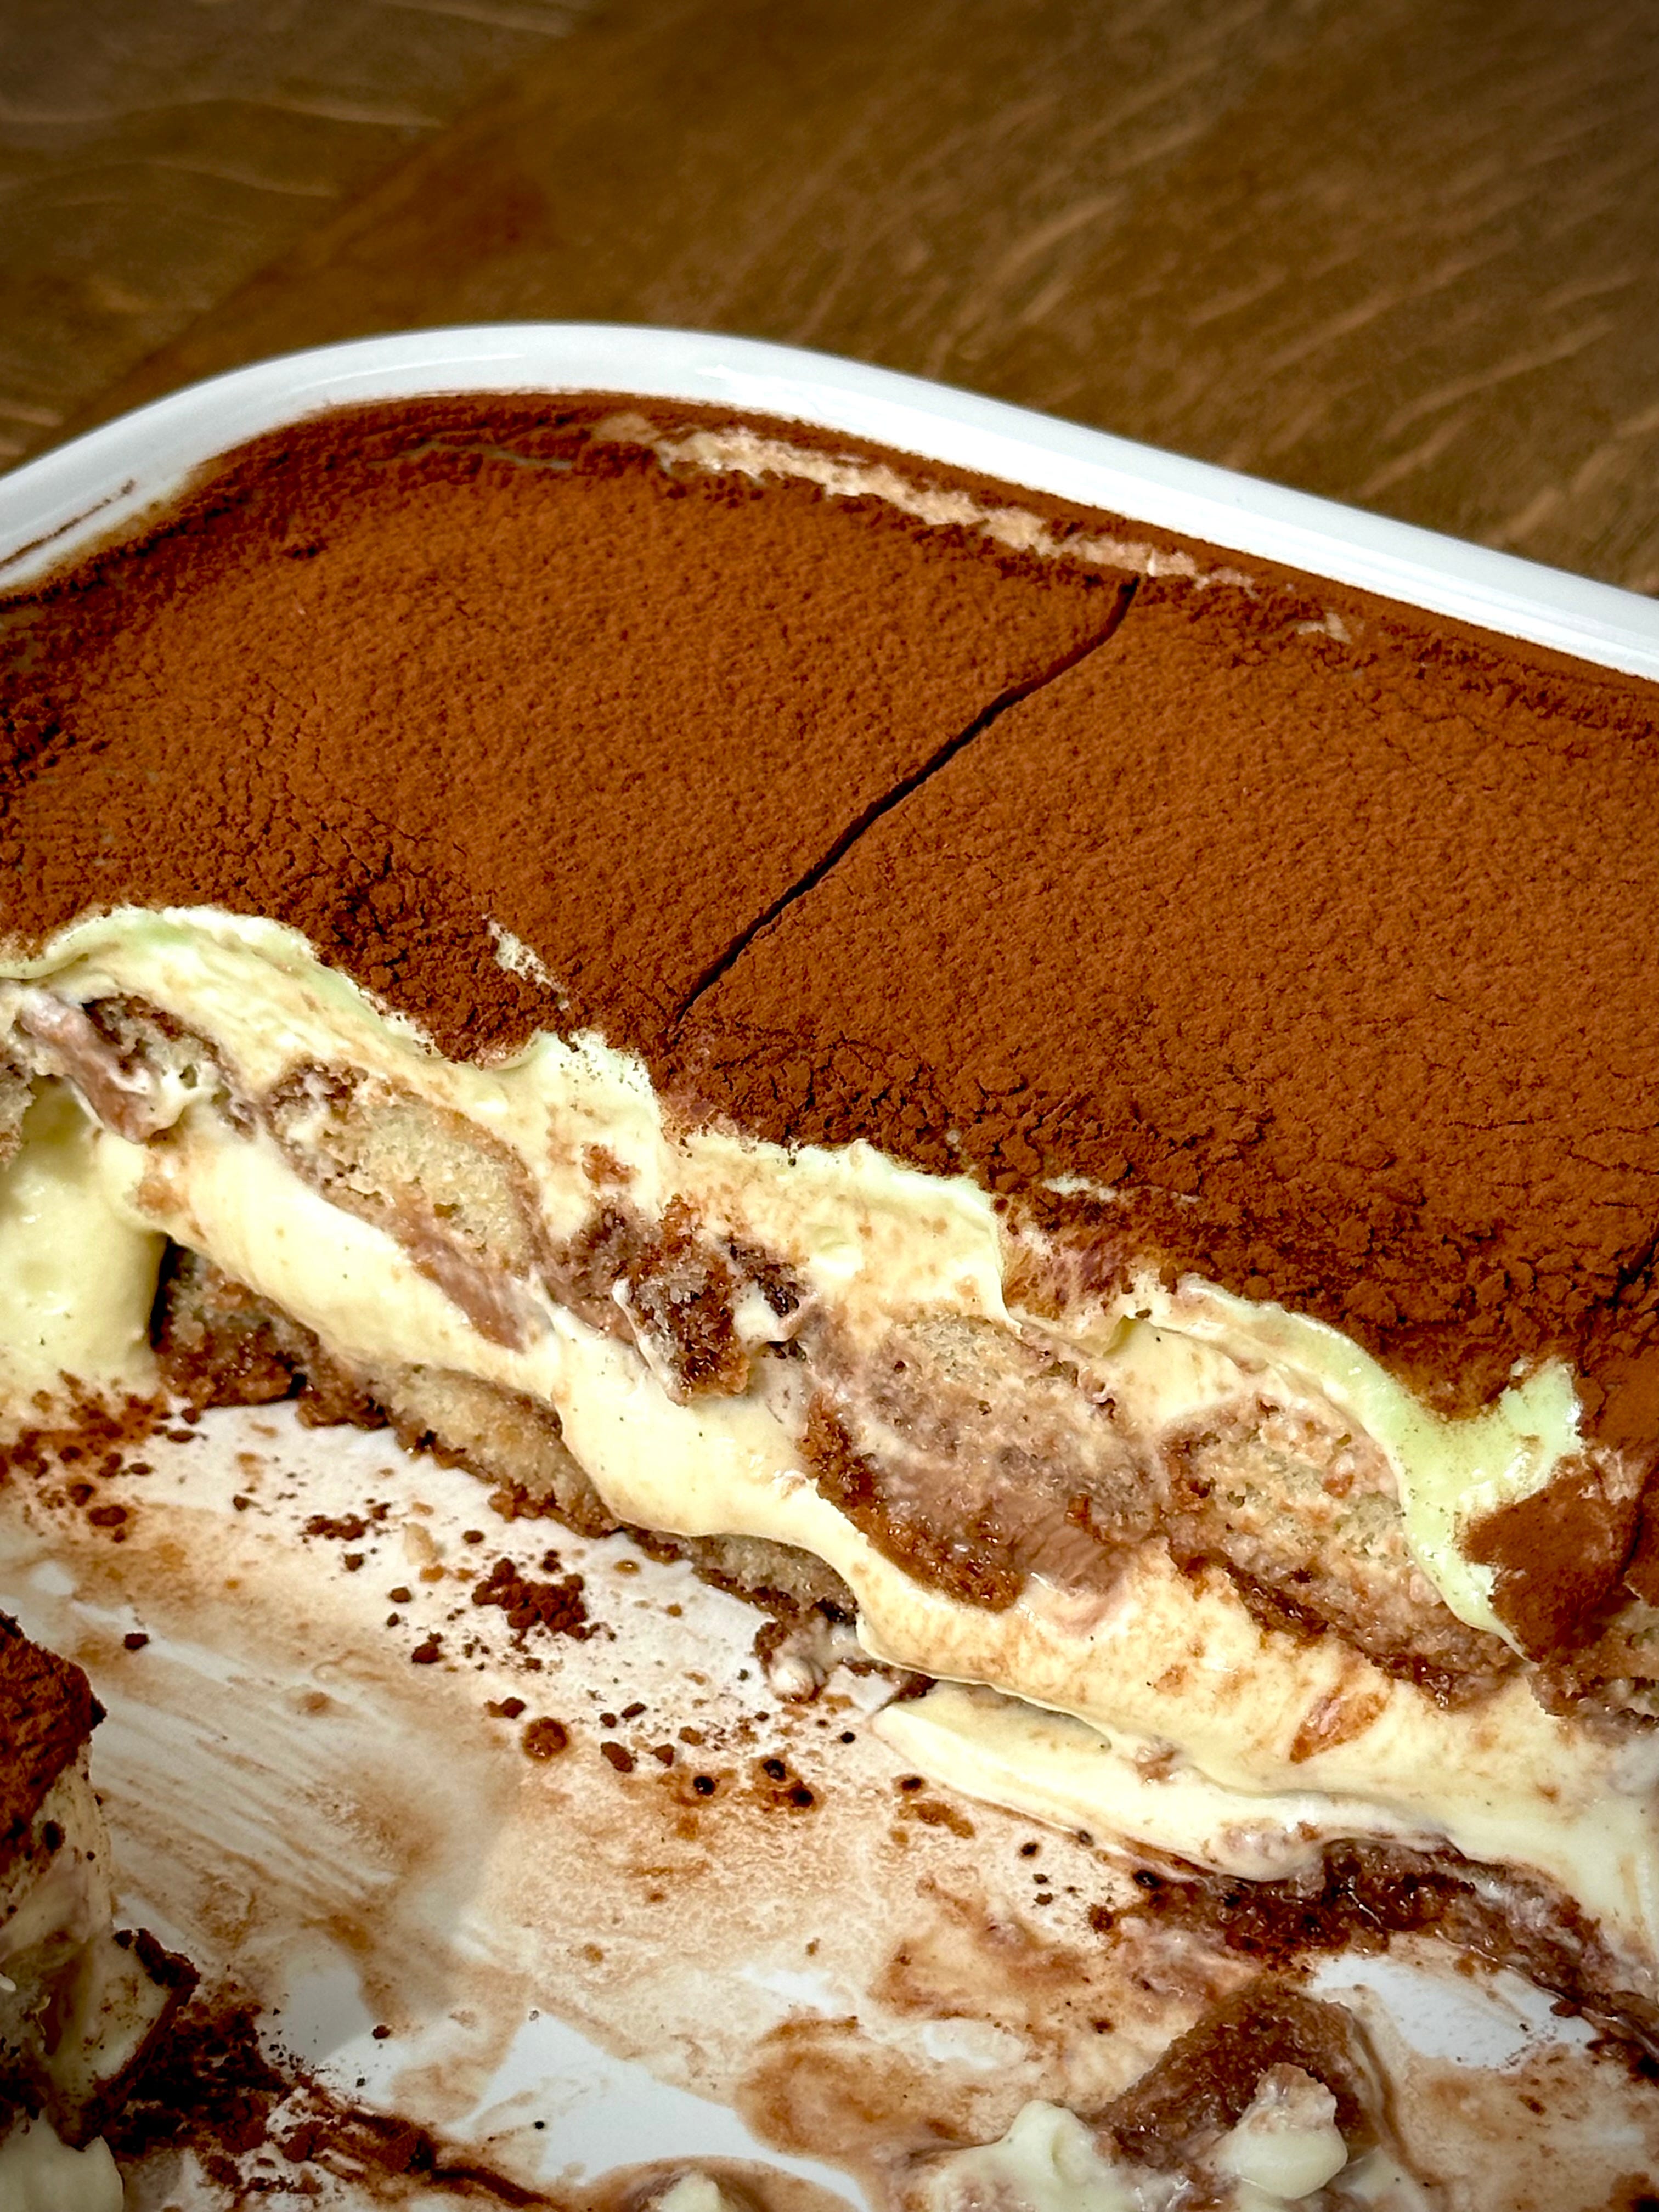
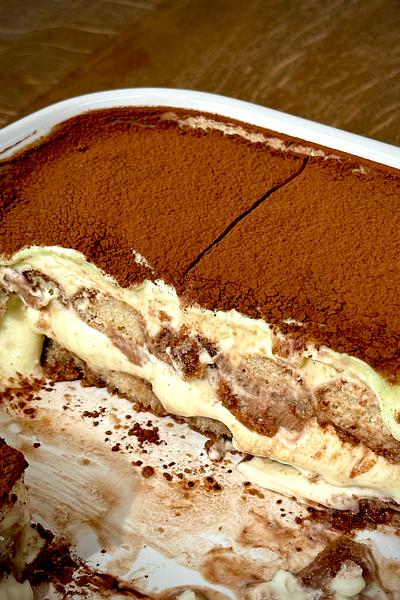
Next is my Malt & Milk Chocolate Tiramisu from my book One Bake (which is on offer, not sure if I have already previously mentioned this…!). This tiramisu, hands down, is the best I have ever had. I am not a fan of the traditional sort – coffee in a pud? No thanky. So we have switched it out in favour for hot chocolate soaked lady fingers, a malt sabayon and a puddles of milk chocolate ganache. It is one of the very best no bake desserts you can make – sumptuously soft, deliciously decadent and wickedly easy to make.


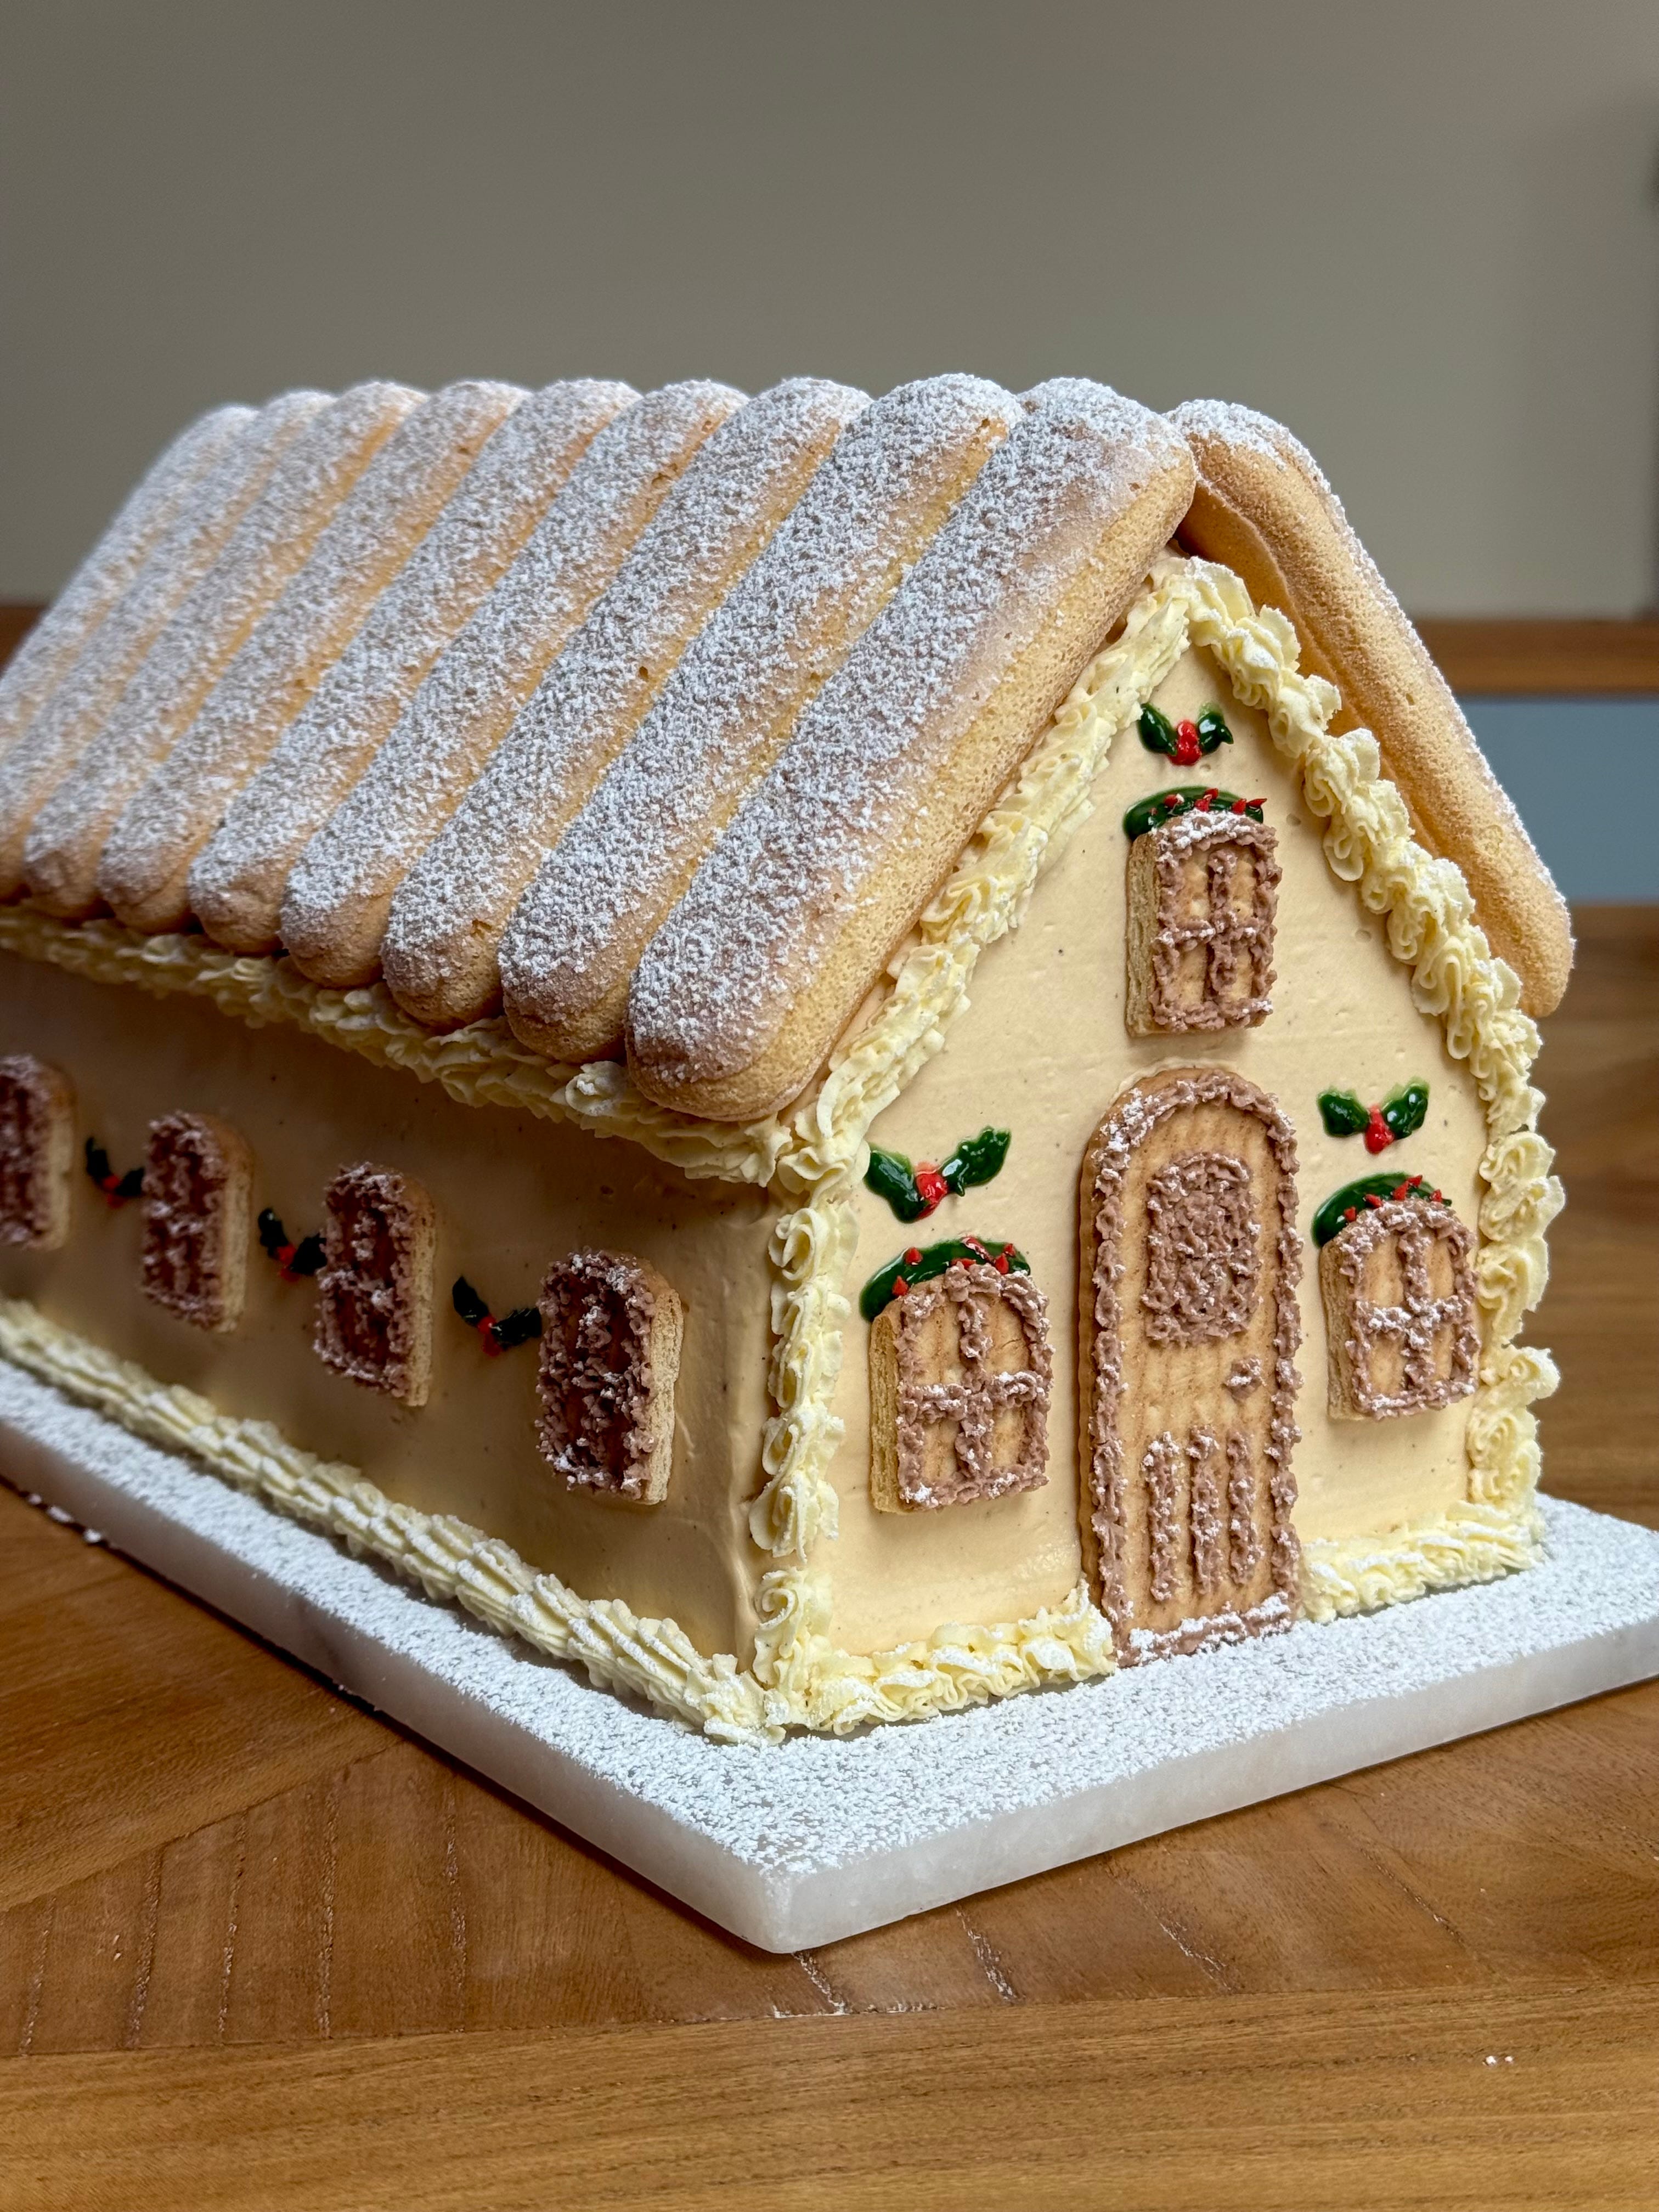
Finishing up the plethora of desserts this week, we have my Chocolate & Dulce de Leche House. Yup, HOUSE. When I mentioned making a gingerbread house for this year, someone slid into my dm’s and said I should sack that off in favour for a tiramisu house. And that folks, is exactly what I did. Three times. And each time it flopped so here we are with a cake version instead. 6 layers of chocolate genoise soaked in malt syrup, a layer of chocolate feuilletine, a layer of dulce de leche all smothered, wrapped and covered with a chocolate whipped mascarpone. Deliciously cute and the ultimate showstopper cake for Christmas Day.

Starting off this weeks menu strong with a bake which people love to eat but fear to make. My Mixed Berry Pavlova looks like it’ll cause you no end of problems but I am here to reassure you that you can make and plate this delicious mountain of meringue because it is VERY EASY.
But sometimes it’s the easy bakes which are the hardest to make. I have a few top tips which I recommend following to ensure you get that beautifully crisp, tall finish and fluffy, soft, melt in the mouth middle:
Clean your mixing bowl with lemon and wipe until clean to ensure there is no fat residue in the bowl - any hint of yolk will result in unstable whites which will leave you with little volume. Little volume means a sad pav which leads to heartbreak.
Use fresh egg whites that are a few days old (I know this is a slight contradiction) as opposed to cartoned whites (this goes for when you’re making SMBC too) for a more stable meringue. The cartoned whites often have a weaker protein structure thanks to the pasteurization process they go through, meaning less volume in your whites.
Don’t overbeat your whites before you begin to add sugar. If you do, you will start to break down the protein structure.
Make the pav a day before and change your dinner plans so you don’t use that oven cause this baby needs to sit and dry out in the oven overnight.
Go low and slow when adding the sugar to the egg whites to ensure the meringue base isn’t grainy (use caster sugar or superfine sugar only) and to prevent any weeping when it bakes.
You want to use caster sugar – not granulated if possible. Caster sugar has finer sugar crystals, meaning they dissolve easier when introduced to the whites. If you have granulated, pulse in a food processor.


Whilst the above does sound all doom and gloom, when you nail the basics, you’re onto a winner every single time.
My version sees a mountain of meringue piled up high, topped with a vanilla crème legere and finished with a generous drizzling of mixed berry compote. It’s the perfect mix of crunchy, crisp, smushy, smooth, soft, sweet and tart. IF, and this is a huge if, your pavlova collapses once it is out of the oven (a – I guarantee you didn’t follow the above tips or b – removed it too early) then never fear. Turn the crumpled meringue into Eton Mess and no one will know anything different. Work smarter, not harder people!
Recipe Makes: 1 x Large Pavlova
Recipe Serves: At least 12
Y O U – W I L L – N E E D –
Pavlova
6 Large Eggs, whites only
325 g Caster Sugar
1.5 tsp White Wine Vinegar
1.5 tsp Cornflour/starch, sifted
1 tsp Vanilla Bean Paste/Powder
Roasted Berry Compote
350 g Frozen Berries
25 g Caster Sugar
2 tsp Cornflour
200 g Fresh Strawberries
Vanilla Crème Legere
250 ml Full Fat Milk
1 tsp Vanilla Bean Paste
3 Large Eggs, yolks only
50 g Caster Sugar
10 g Plain Flour, sifted
12 g Cornflour, sifted
300 ml Double Cream, fridge temp
M E T H O D –
Preheat your oven to 120C Fan/140C/280F/gas mark 1.
For the pavlova, add your egg whites to a mixer bowl and use the whisk attachment to mix on a medium speed until your whites are stiff but not dry. When you are introducing air to the whites, the proteins are stretched which creates bubbles. The whites will go from liquid, to bubbly (think frogspawn), to soft, medium and then stiff peak. When they have reached this point, reduce the speed to a low setting. You will know if you have overmixed as the whites will start to separate. If this happens, don’t use these whites as they won’t provide the structure or stability your pav needs, meaning it will likely collapse once out of the oven.
Whilst mixing on low, introduce the caster sugar 1 tbsp at a time, mixing well between each addition. This is a slow and boring process but giving this time now will reduce the chances of a grainy meringue, which in turn will prevent the pav from weeping sugar when it is baking in the oven. This took me about 15 minutes in total to add and will leave you with a soft, velvety texture. Test for any graininess by rubbing some of the mix between two fingers.
Once all the sugar has been incorporated, add in the vinegar, cornflour and vanilla and whisk well. We want a stiff, glossy peak so mix it for a further 5 mins once everything has been added. You should be able to confidently turn the mixer bowl upside down without any movement - if your mix is loose, you either a) had traces of fat or grease in your mixer bowl/whisk, b) didn’t mix your whites far enough before introducing the sugar or c) haven’t introduced enough air so try mixing for a further 5 minutes on a medium speed to see if that helps with the stability.
Use a spoon or spatula to transfer the mixture onto greaseproof paper - for a circular shaped pav, trace a dinner plate or cake tin base onto the back of your baking paper, before flipping over and using as a guide. l used a 18 cm / 7 inch cake tin for mine.
Pile the meringue high for a domed shape (you will get a more mallowy filling this way - if you opt for a larger surface area base, you will get a chewier middle). It’s gonna look ridiculous and too tall but trust me. Use an offset palette knife to smooth the sides and the top. If you want a fancy decorative side, you can use your palette knife to drag the meringue from the base to the top for indentations or leave smooth for a fuss free affair.
Place into the oven on a shelf no higher than the middle and bake for 20 minutes. Baking at a higher temperature will help bake the shell first, providing structure for your pav.
After 20 minutes, drop the temperature down to 100C Fan/120C/250 F/ Gas Mark ½ and bake for a further 1 hour 50mins.
It is important that you DO NOT OPEN THE OVEN DOOR AT ANY POINT. Even once the 1hr 50 is done. Turn your oven off, don’t open the door and allow the pav to gently cool. Leave to sit to dry out overnight and only open that oven door the next day. Gently remove from the greaseproof paper and construct just an hour or so before serving.
In between the cooling of the pav, make your roasted berry compote by adding the frozen berries, caster sugar and cornflour to a pan. Mix well before placing over a medium heat.
You want to cook the berries until they have thawed and softened, whilst still retaining their shape. Once a light syrup has started to form, remove from the heat and add in the strawberries (I like to do a mix of half sliced and half whole) and mix well. Leave to one side to cool.
Before serving, make your vanilla crème legere. Start by adding the milk and vanilla to a pan and placing over a medium heat.
Into a bowl, add the egg yolks, caster sugar, cornflour and plain flour and whisk well with a balloon whisk until fully combined – you want to work through the gritty stage until the yolks are fluid and smooth.
When the milk is warm, pour half onto the whisked egg yolks and stir quickly to avoid curdling. When mixed, pour back into the saucepan and heat. Stir constantly otherwise this baby is going to get thick and lumpy real quick.
When the custard has thickened, take off the heat, transfer to a shallow tray, place over some clingfilm or greaseproof paper to prevent a skin from forming and leave to cool.
When cooled, pour the double cream into a large mixing bowl. Use the whisk attachment to mix until it reaches a medium to stiff peak.
Pour in the cooled custard and lightly fold in, before popping into the fridge until ready to construct.
When you are ready to serve, place your pav onto your serving plate. If the roof of the pav hasn’t dropped, lightly score around the edge to remove. This will prevent your pavlova from cracking and breaking when you add your toppings and to give more room for the crème legere.
Gently spoon the whipped custard to the pavlova cavity and pile as high as you wish. Top with your mixed berry compote, lightly dust with icing sugar and serve.
NOTE: This is best eaten on the day - any leftovers or scraps can be used for an Eton Mess. You can store your cooked pav in an airtight container but do not leave exposed in the fridge or at room temp - meringue is porous, so it LOVES moisture. Keep windows and doors closed and heating turned off.
I do not care what any internet list may say, Black Forest Gateau is one of the best cakes around. Whether its store bought, whether it’s frozen, whether it’s from a bougie bakery in a form that doesn’t resemble a cake one single bit or whether it’s homemade. One thing I know for certain is that cake is going to get destroyed.
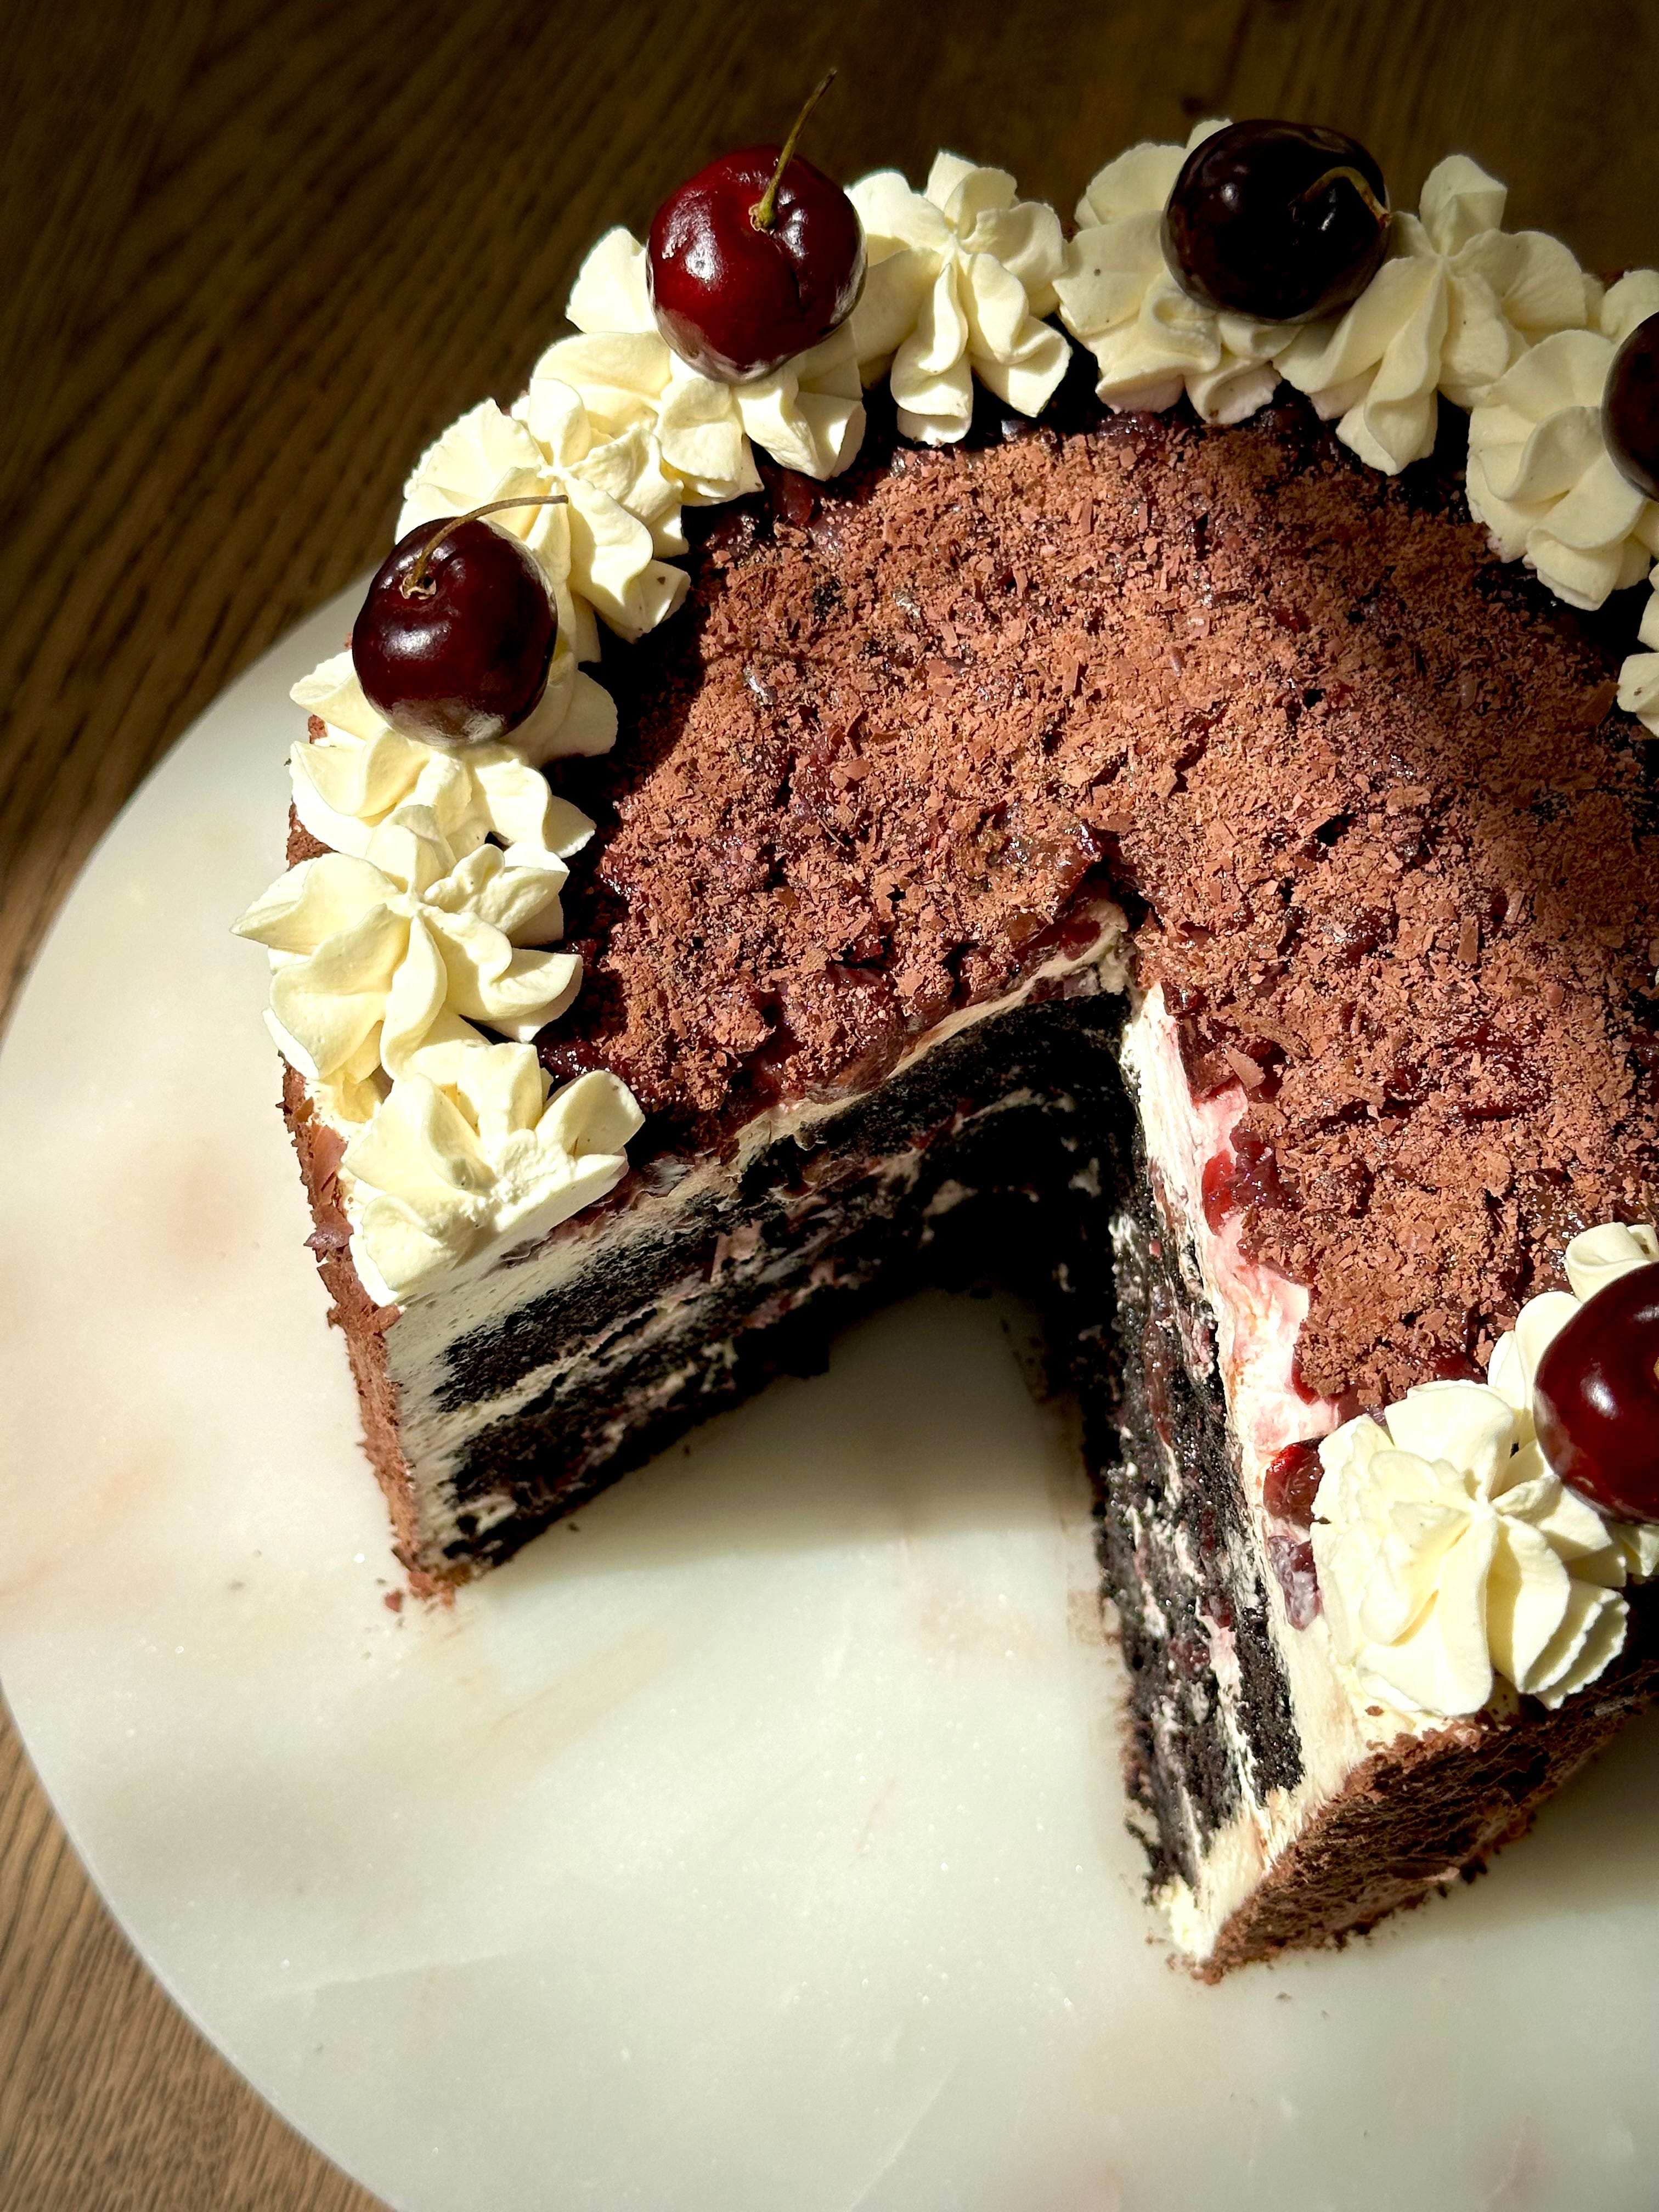
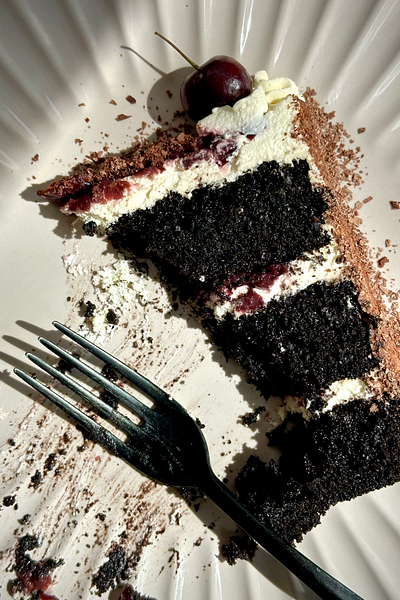
This cake for me screams frozen gateau that we would eat at Christmas when we were younger. Not sure if it is the nostalgia I love about this cake or the actual flavour combination that I love more. You know me, I adore a good filthy cake, and this is exactly that. We’ve got a deliciously moist chocolate sponge (you know I can’t resist a black cocoa sponge) soaked in a kirsch syrup, sandwiching cherries (I went for a medley of tinned, kirsch soaked and fresh) and vanilla bean whipped cream and finished with a generous coating of shaved dark chocolate and topped with fresh cherries. The flavour combo of chocolate and cherries is truly elite – a match made in spongey, cakey heaven.
Would I recommend you making this recipe? Absolutely. A real crowd pleasing bake (you can keep it booze free if you wish and just opt for the light syrup which comes in the tin) and one that just gets better the longer it sits making it perfect for a post dinner celebration, a pre bedtime sneaky snack, a sly slither at breakfast the next day, elevensies, brunch, lunch and a little something to nibble on anytime you open the fridge.


The recipe below makes 4 x 18 cm / 7 inch sponges and the method will tell you to only use 3. Why? Because if you are making good chocolate sponge, why not make more? I’ll always bake an extra sponge when making choccy cake so my emergency cake stash in the freezer is always well stocked – which at this time of year, is a must. If you are wanting to scrap the additional layer, spread the batter amongst 3 x 23 cm / 9 inch tins instead but timings may need to be adjusted to suit.

Recipe Makes: 4 x 18 cm / 7 inch sponges
Recipe Serves: 12
Y O U – W I L L – N E E D –
Sponge
330 g ‘00’/Plain/AP Flour, sifted
15 g Baking Powder, sifted
170g Black Dutch Processed Cocoa Powder, sifted
660g Light Muscovado (this is not an error)
Pinch of Sea Salt
3 Large Eggs
300g Natural Yoghurt or Buttermilk
150ml Vegetable Oil
330ml Freshly Brewed Coffee (sub for hot water but I promise, you can’t taste the it)
Cherry Filling
400 g Cherries (I used a mix of kirsch soaked, tinned & fresh)
25 ml Kirsch Syrup (I used the juice from the cherry jar)
Whipped Cream
750 ml Double/Whipping Cream
1 tbsp Kirsch Liqueur, optional
40 g Icing Sugar, sifted
1.5 tsp Vanilla Bean Paste
To Finish
Bar of Dark Chocolate, grated/shaved
12 Cherries, fresh & whole
M E T H O D –
Preheat the oven to 150°C Fan/170C/340F/Gas Mark 3 and grease and line 4 x 7 inch / 18 cm cake tins.
For the sponge, add all the dry ingredients to a bowl and mix.
In a separate bowl, add all the wet ingredients and mix until smooth.
Pour the wet mix into the dry and use the balloon whisk to combine. Switch out to a rubber spatula and use to clean the sides and bottom of the bowl to make sure there are no flour pockets. When there are no visible streaks of flour left, evenly distribute the batter between the four tins.
Pop in the oven and bake for 30 to 32 minutes.
Allow the sponges to sit in the tins cooling for 10 minutes before turning out and wrapping in clingfilm to cool. Do this whilst the sponge is still warm to retain the moisture. No one likes a dry sponge!
Whilst your sponges are cooling, drain your cherries (if you are using tinned but keep the reserved syrup if you are opting for booze free) and finely chop up. The chunkier you leave the cherries, the more they will drag through the sponge when you are slicing - the finer you go, the cleaner the end slices.
Once your sponges have cooled, trim any domed tops off using a serrated knife. Use a pastry brush to liberally brush the tops of the sponges with the cherry syrup/kirsch.
Make the whipped cream by adding all the ingredients into a stand mixer bowl. Using the whisk attachment, mix on a low to medium speed until you just hit medium peak. You want this to be silky smooth whilst having a bit of body to it. Do not be tempted to take this to stiff peak otherwise your cream will curdle and will look grainy.
Place your first soaked sponge onto your serving plate. Add ¼ of the cream onto the first layer and use an offset palette knife or back of a spoon to spread into an even layer.
Pipe a line of cream around the edge to create a dam. Add 1/3 of your chopped cherries into the middle, gently spreading for an even layer. Add the second sponge on top.
Repeat the cream and cherry process.
Add the final sponge on top and use the remaining ½ cream to crumb coat and final coat - make sure you reserve a small amount at the end to pipe your rosettes on top. Place the cream coated cake into the fridge to set for 1 hour.
Gently press the chocolate shavings into the side of the cake and top the cake with the remaining chopped cherries, leaving a 1cm gap around the edge.
Transfer any remaining cream into a piping bag with a nozzle of your choice fitted and pipe around the outer edge, framing the chopped cherries middle.
Nestle the fresh cherries (stems on for max aesthetics!) into the cream and place in the fridge until serving.
Slice with a hot knife and enjoy.
Moving onto the easy option on the menu today – my Self Saucing Chocolate & Brandy Pudding.
As much as I love a big old, stacked, multi layered bonanza of a cake, I also really love the ease and simplicity of a tray bake. A bake you can grab a big old spoon, scoop out what is clearly a double sized portion and plonk into a bowl, ready to be attacked.
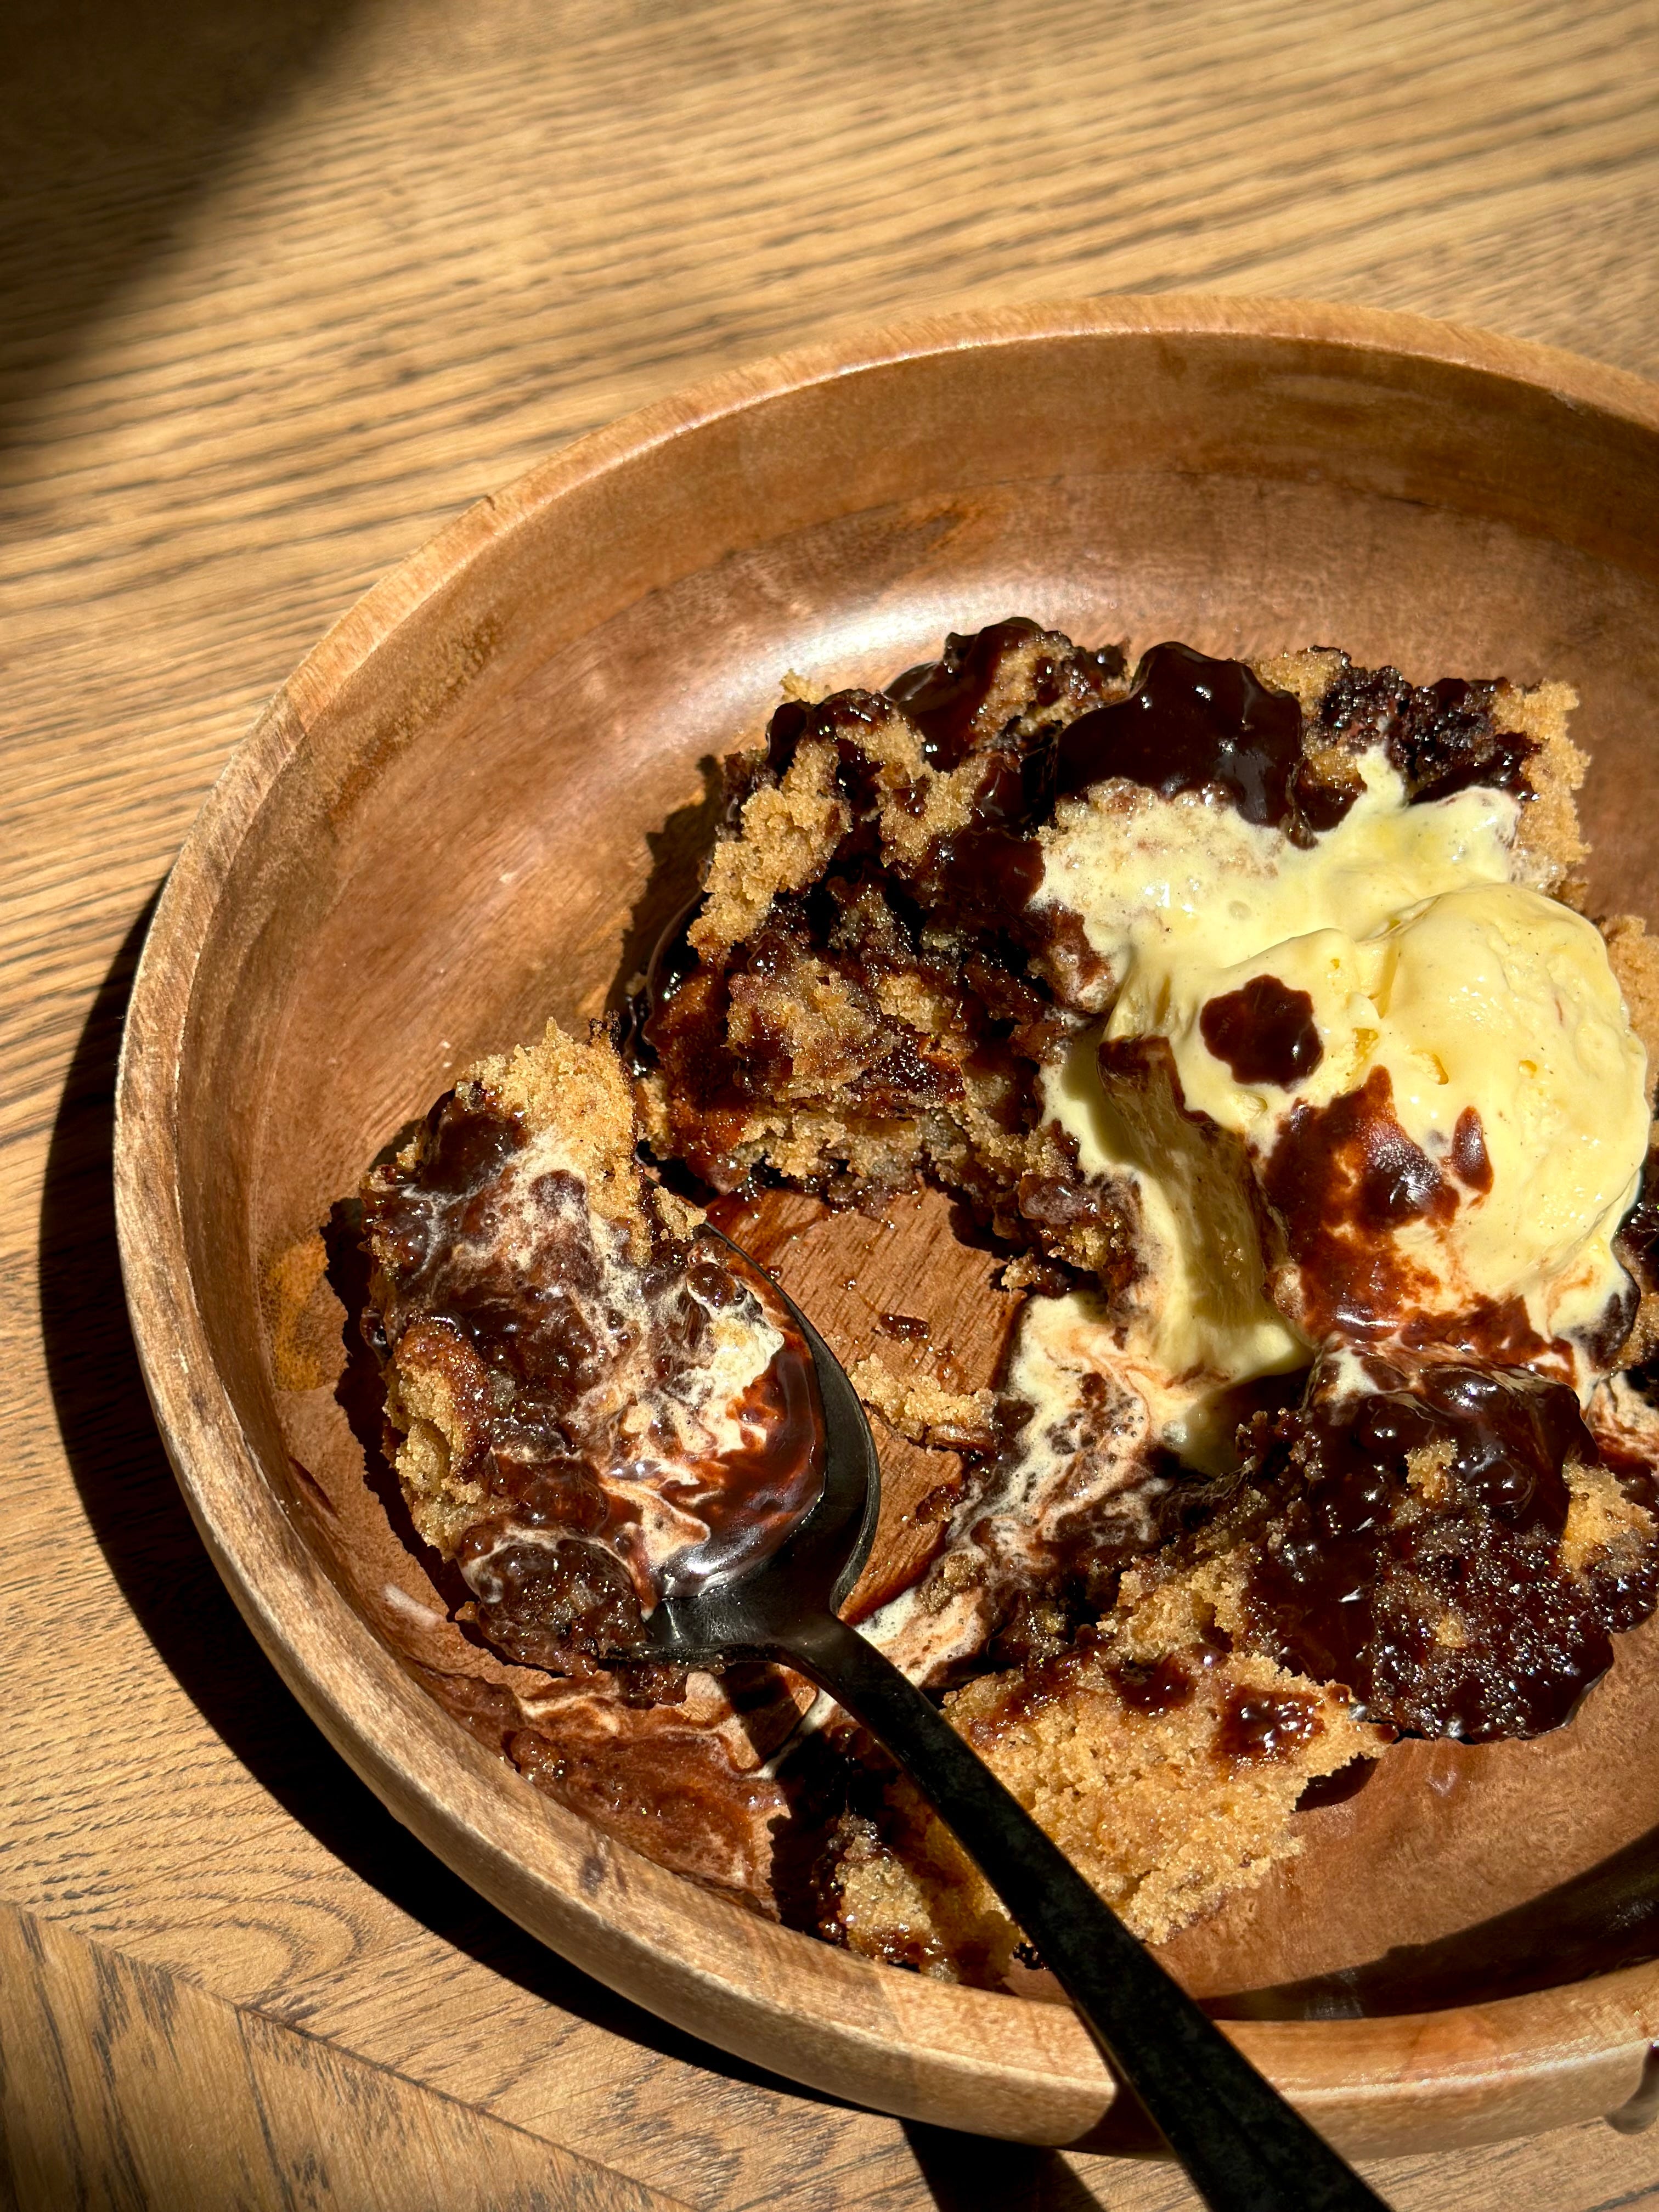
No fuss, no frills, just big, tasty flavours for some real good mood food. When I think of this tray-cake, I imagine eating it stonkingly hot, drowning in a vanilla overdosed crème anglaise on a cold winter’s day. Equally, I also imagine eating this cold, topped with a scoop or two of vanilla ice cream on a warm summer’s day.
If you can’t do the math’s here, this is a bake great all year round. Sticky, delicious, lick the bowl clean sorta filth. Just my cup of tea. And talking of tea, if you are wanting to make this into individual portions to serve up to guests at a dinner party this Christmas, just divide the recipe by two and then divvy up the sauce and batter into individual ramekins and bake for 1/3 of the time listed in the recipe.
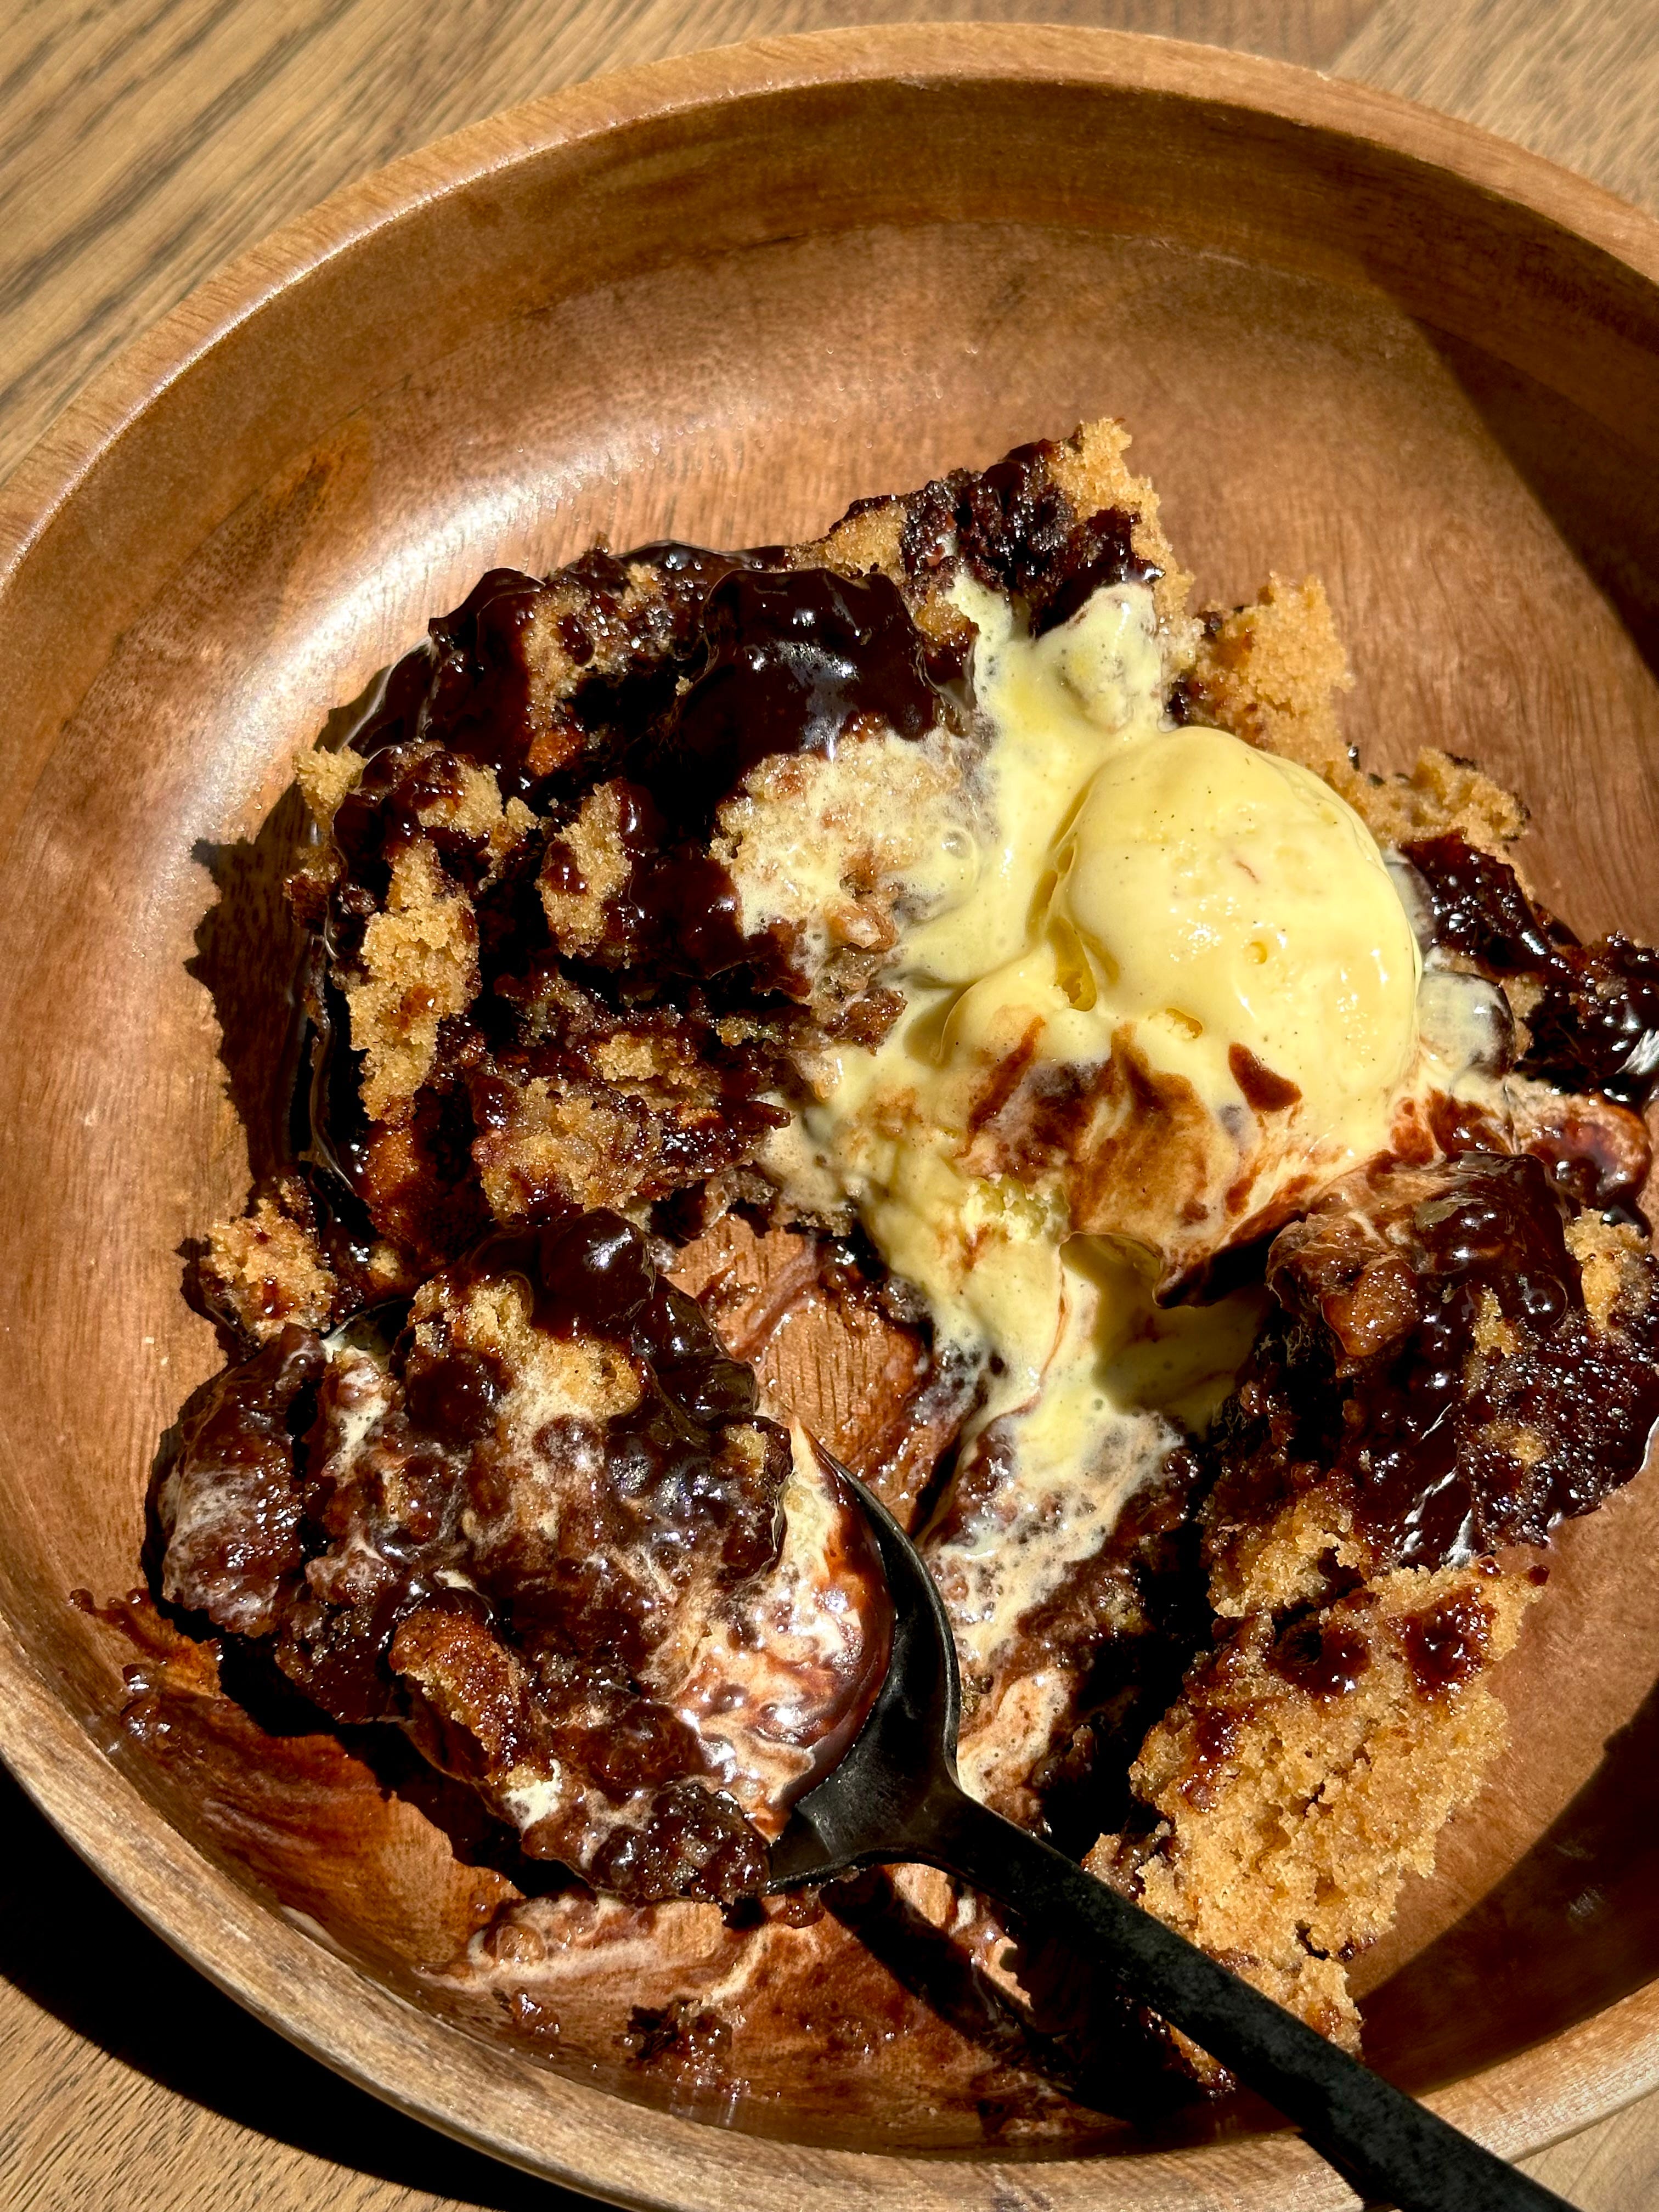
Made up of a moist ginger and date sponge studded with dark chocolate, sitting on top of a hidden brandy spiked chocolate and orange sauce, she’s the festive decadence you have been looking for. Using our new All Things Butter Brandy Butter (note I am a equity partner but will only ever recommend quality products I trust and use to you all) for that touch of warmth of background boozy note, this is a great alternative to a Christmas Pudding. If all of this floats your boat bar the brandy (I get it, we have little ones to also feed!), sub out the Brandy Butter for equal quantity unsalted for the same pud, same yum just now for everyone’s tums!.
This is such an easy recipe to make and a real heart warmer. Nothing like some comforting rich, chocolatey, mildly boozy, saucy goodness for the soul.
Recipe Makes: 20 by 30 cm / 8 by 12 inch deep baking tray
Recipe Serves: Depends on your scooping size but at least 10 to 12
Y O U – W I L L – N E E D -
Date Puree
225 g Medjool Dates, destoned
350 ml Boiling Water
1 tsp Bicarbonate of Soda
Sauce
150 ml Water
245 g Double Cream, fridge temp
225 g Dark Brown Sugar
100 g All Things Butter Brandy, diced
20 g Dark Chocolate, chopped
30 g Cocoa Powder, sifted
Pinch of Salt
Sponge
115 g All Things Butter Unsalted, room temp
75 g Dark Brown Sugar
75 g Light Brown Sugar
1 tsp Vanilla Bean Paste
2 Large Eggs
260 g Plain Flour, sifted
2.5 tsp Baking Powder, sifted
1.5 tsp Ground Ginger
Pinch of Salt
1 Bulb/20 g Stem Ginger, finely grated
35 g Dark Chocolate, chopped
40 g Milk Chocolate, chopped
1 Extra Large Orange, zest only
M E T H O D -
To begin with, we want to get rid of the skins on the dates for a silky-smooth puree.
Add the dates to a bowl, along with the boiling water. Sprinkle in the bicarbonate of soda, give it all a stir and allow them to sit and soften for approx. 20/25 mins.
Once softened, drain the water and remove the skins from the dates. Fill the bowl back up with 275 ml of water before blitzing using a hand blender or popping into a food processor. We want to make sure there are no lumps, and it is lovely and smooth so keep going until you’ve reached this consistency. Leave to one side.
In the meantime, pop the oven on to 160°C Fan/180°C/gas mark 4 and grease a large deep 35 x 25 cm baking tray.
Add all the ingredients for the sauce into a saucepan and mix well using a balloon whisk. Let the butter and chocolate melt, bringing the sauce up to boil before turning the heat down and reducing to a simmer for a few mins. Once slightly thickened, take off the heat and allow to cool whilst you get cracking with the sponge.
Cream together the room temp butter, sugar and vanilla in a stand mixer until light and fluffy. Add in the eggs one by one, making sure you mix well between each addition – we want the mixture to be fully emulsified before moving on.
Sift in the flour and ground ginger, mixing well before folding in the chopped stem ginger, date puree, chocolate and orange zest.
Transfer the cake batter to the greased tin before pouring on top the cooled brandy and chocolate sauce.
Pop the tray in the oven for 30 to 32 minutes until the sponge is just cooked through.
Once removed, leave to sit for 5 to 10 minutes before tucking in with a serving of vanilla ice cream.
Next up is one of my all time faves – my Malt and Milk Chocolate Tiramisu. Not to commit blasphemy, but I’m not a fan of the traditional tiramisu – as much as I love a morning cup of coffee, I don’t enjoy the flavour in my desserts so have played around with the flavour combinations of the years (much to many Italians dismay might I add) but I will always, always, ALWAYS come back to my tried and tested, beloved by all, incredibly moreish, unbelievably delicious combination of malt and milk chocolate.
Now I know I say this a lot but this time, I truly mean it. It’s like when you ask a mother who their favourite child is and she’ll say all of them but really, deep down, we all know there is secretly one who comes out on the top tier. It’s unspoken in my family that it’s me. I am the golden child. Well not so unspoken anymore but this my friends, this Malt and Milk Chocolate Tiramisu is the baking equivalent of my favourite child.
I’ll tell you that every recipe I share with you all are great. That they are all brilliant. That they will all go on to make many of you very very happy. But this. This recipe is truly the King and Queen of them all. It’s so stupidly simple and easy to make but good sweet lord, it is insanely delicious. This even got the approval from my very hard to please partner James who risked his gluten free intolerance when I caught him red handed eating it straight from the tray with his head stuck in the fridge. That my friends, is when I knew we had a winner on our hands.
I did something similar and made a lemon curd and white chocolate version a while back and whilst that is also sensational, the simplicity and flavours in this naughty little number is just divine. Malty, chocolatey goodness, that isn’t sickly sweet but instead leaves you craving more.


This is the dessert which I would implore you to make. Simple, straight up delicious flavours, with minimal fuss but maximum enjoyment. I promise you; you have just found your new favourite dessert.
I have no doubt, you too will be caught gobbling straight from the tray, head in the fridge.
I guarantee it.
Recipe Makes: 18 by 24 cm / 7 by 9 inch dish (or just whatever you have)
Recipe Serves: 12 to 15
Y O U – W I L L – N E E D –
Lady Finger Soak
400 ml Water
75 g Chocolate Ovaltine or Hot Chocolate Powder
25 g Caster Sugar
400 g Lady Fingers
Ganache Layer
200 ml Double Cream
175 g Milk Chocolate, chunks/callets
Pinch of Salt
Malt Cream
150 g Caster Sugar
4 Large Eggs, yolks only
500 g Mascarpone Cheese, room temp
400 ml Double Cream, fridge temp
1.5 tsp Vanilla Bean Paste
75 g Malt Powder/Horlicks
25 g Caster Sugar
To Finish
Cocoa Powder, sifted
M E T H O D -
Start with the malt chocolate lady finger soak. Add the water, caster sugar and Ovaltine (or hot chocolate if that’s what you are using) into a small saucepan and place over a medium heat.
Allow to simmer for about 10 to 15 mins. B now the colour will have deepened slightly and the flavour intensified. When done, remove from the heat and leave to cool.
Next, make the chocolate ganache. Pour the double cream into a saucepan and gently warm over a medium heat. When near boiling, remove from the heat and add the milk chocolate. Cover the pan with the lid for 2 minutes before mixing until smooth. Leave to cool.
For the malt cream, add the egg yolks and caster sugar to a heatproof bowl. Mix well using an electric hand whisk until smooth.
Sit the bowl on top of a pan of simmering water to gently cook the yolks for approx. 10 mins. It’s important you keep on whisking the yolks with the electric hand whisk whilst they are cooking to ensure the bottom of the bowl doesn’t catch - by the time the yolks are cooked, the mixture should be pale and thick.
Carefully remove the bowl from the heat and allow to cool for 15 mins before adding the mascarpone to the cooked yolks and mixing well using a whisk attachment.
Pour in the double cream, caster sugar, vanilla paste and malt powder (aka horlicks) and mix again until the cream reaches medium peak. You want this to be holding well whilst still being smooth and spreadable.
To assemble, grab yourself a deep dish approx. 18 cm by 24 cm and spread a third of the cream over the bottom and level out evenly.
Dollop spoonful’s of the cooled chocolate ganache on top and use the back of a spoon to swirl.
Dip the sponge fingers into the cooled malt chocolate soak, letting them sit for a minute or so (I prefer less for more bite but go as soggy as you wish) and layer on top of the cream.
Repeat the cream, ganache and sponge finger process one more time before finishing with a smooth layer of cream and pouring on top the remaining chocolate ganache. If your ganache isn’t pourable or is a little too thick, add an additional 50 ml of double cream to your ganache and gently heat to loosen. Allow to cool before using because we don’t want to end up with melty mush.
Use an offset palette knife or back of a spoon to spread before dusting the entire top with cocoa powder.
You can serve this straight away for a softer serve or pop in the fridge overnight for best results.
And finishing up the recipes for this week, is my Chocolate & Dulce de Leche House. Yes, house. Because if we are doing a Christmas showstopper, we are going to go extra.
I can’t take any of the credit for this brainwave though because I have someone on Instagram to thank for it for suggesting I bin off the traditional sort and make a tiramisu version instead – which upon my first reading puzzled me. Then upon my re-reading, I realised this person was a genius because yes, tiramisu at any time of year is a wonderfully easy, crowd pleasing pud to whip up but at this time of year?? When everything is about speed, efficiency, multitasking, multi-feeding, multiple courses and of course…how it all looks? Genius.
Well guess what guys, it wasn’t genius. It was nothing short of a total shit show. I tried 3 times and each time it slumped into a mound of mush so whilst I ain’t no quitter, I also am not about to make a fool of myself for the fourth time so we sacked it off for sponge because I knew that wouldn’t fail me. 6 layers of chocolate genoise soaked in malt syrup, a layer of chocolate feuilletine, a layer of dulce de leche all smothered, wrapped and covered with a chocolate whipped mascarpone. Deliciously cute and the ultimate showstopper cake for Christmas Day.

And yes, I get it – it does look like a lot of work but I assure you it’s a total breeze. All you need to have is a solid day to get this done and is essentially 2 sheets of sponge stacked up and then decorated to look jazzy. Whilst I have also shared a recipe for my go to shortbread below for any decorative features, you can cheat like me and use store bought biscuits because why work harder when you should ALWAYS be working smarter?!


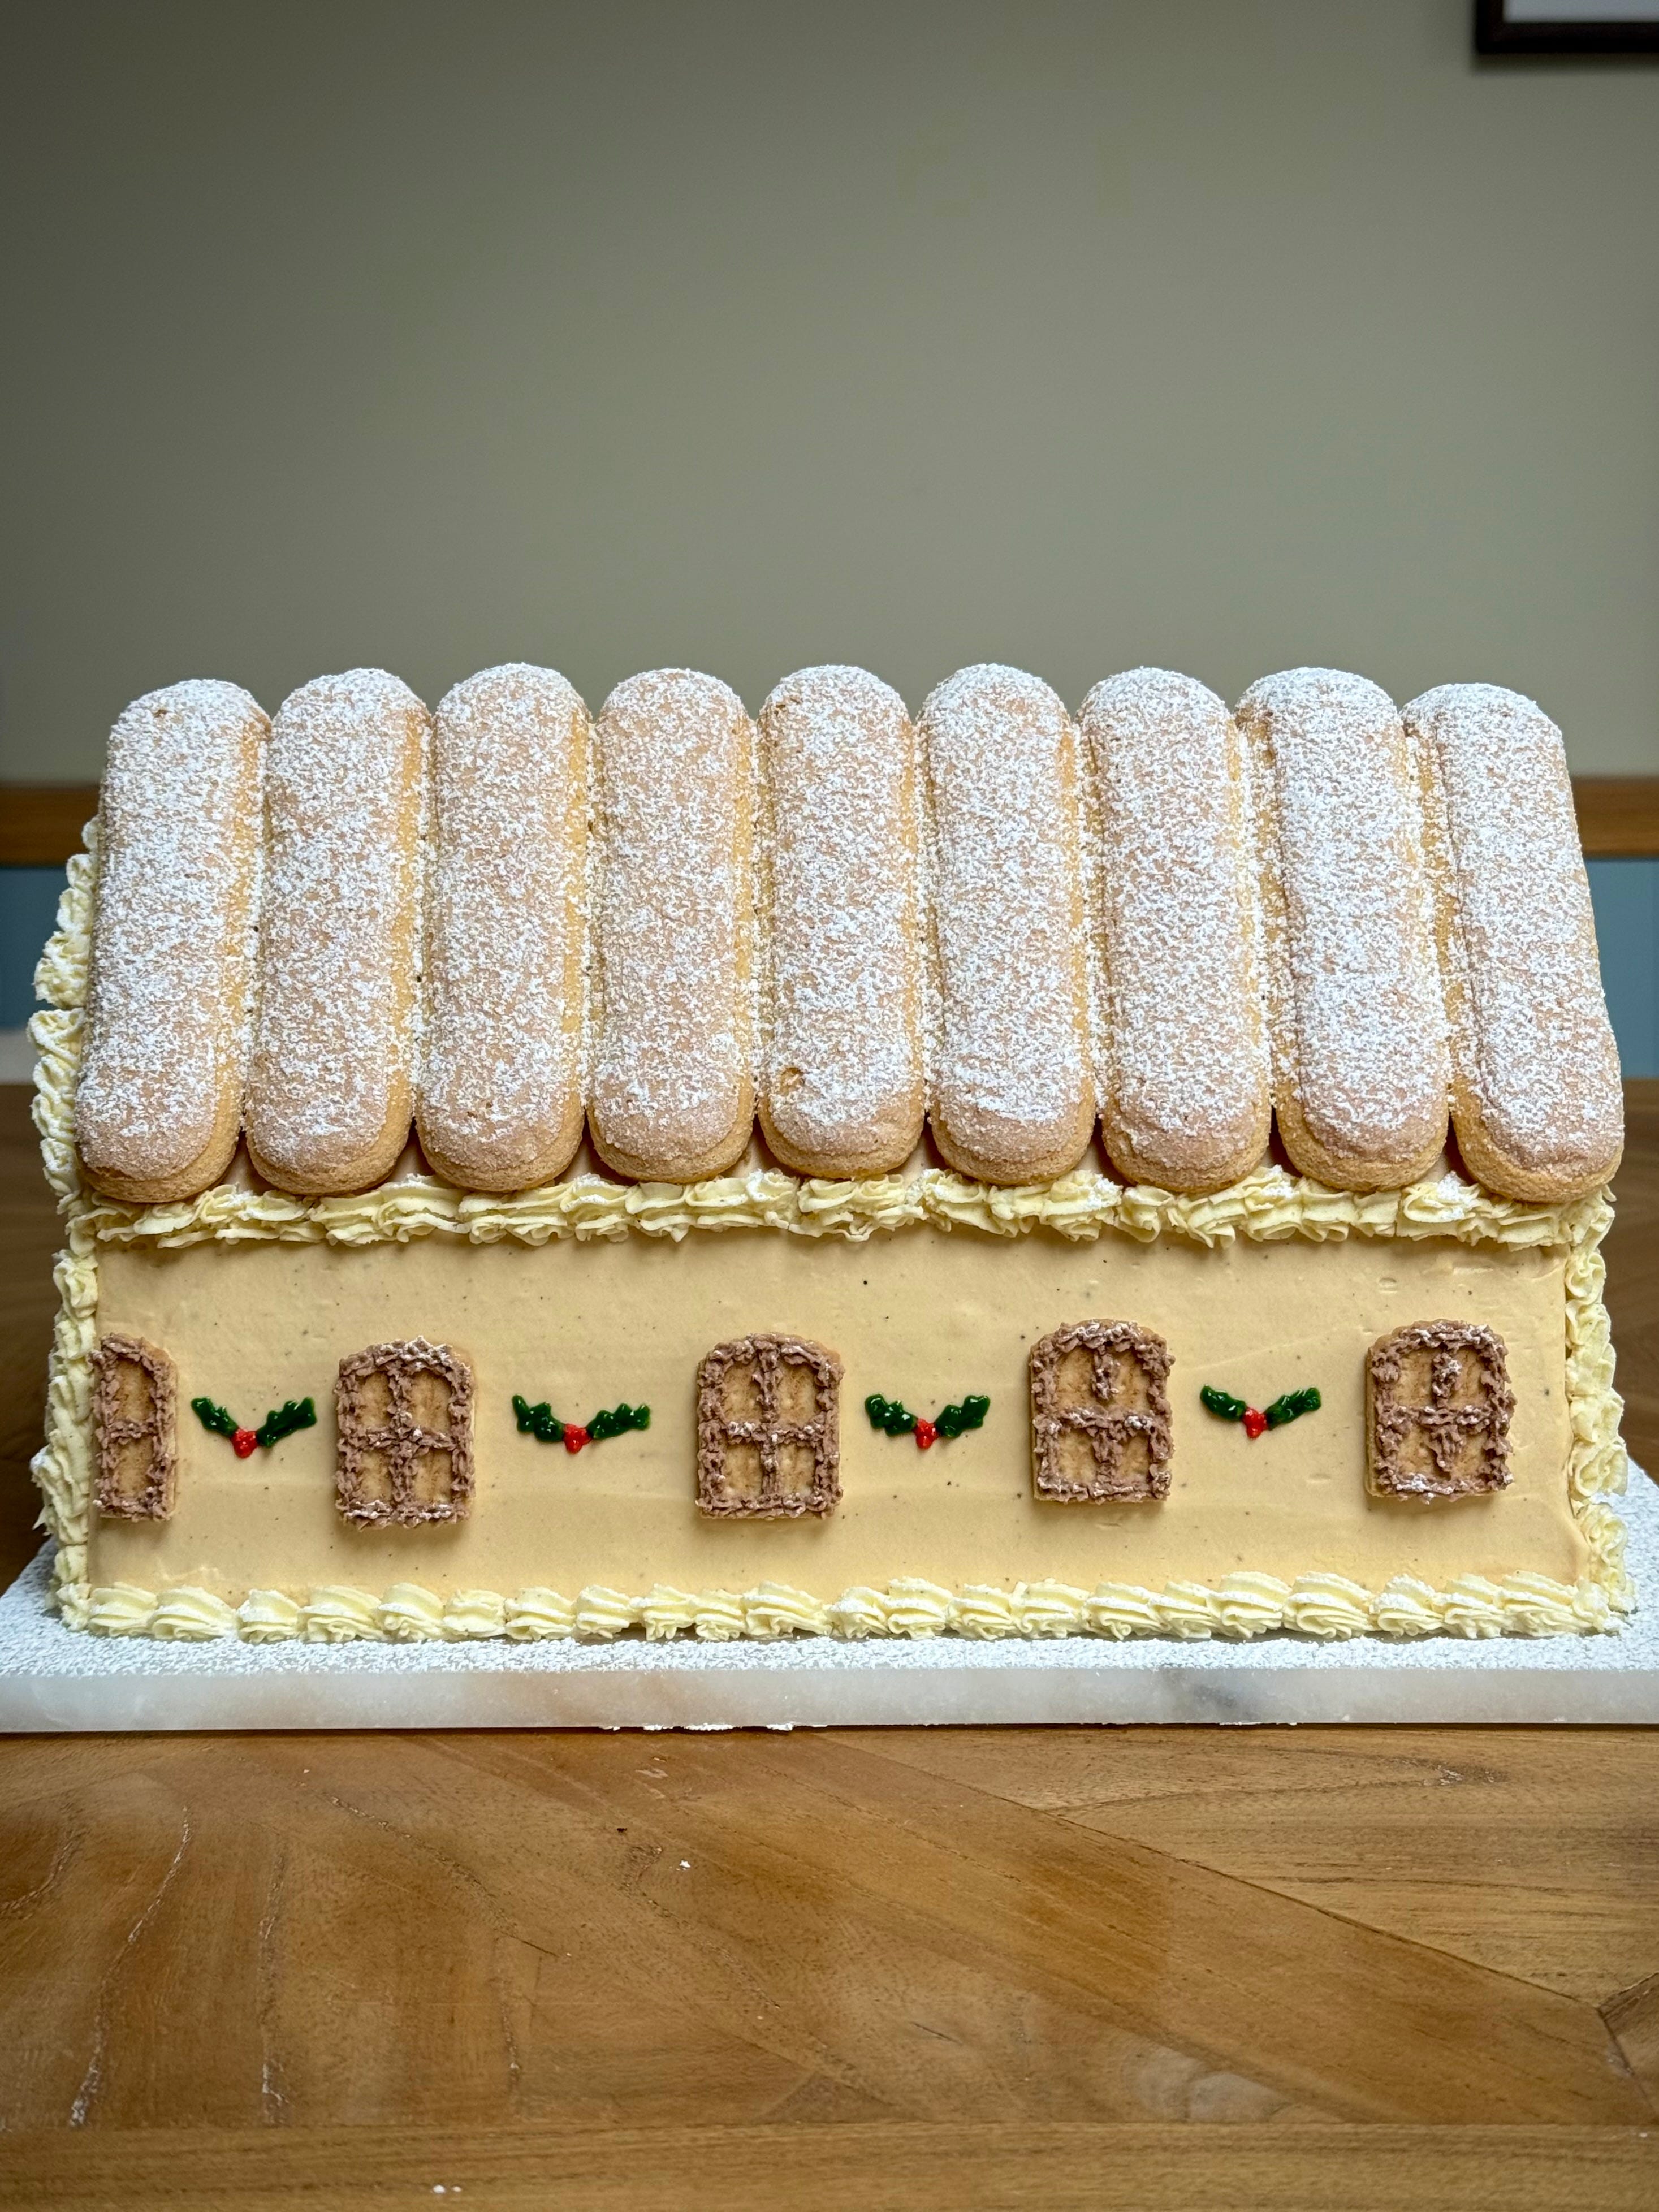
I’ve included lots of detail in the method below to make sure all goes to plan, including measurements for each sponge layer. The past architect in me is screaming. Who said those two degrees went to waste?!
Recipe Makes: 1 Cake House
Recipe Serves: A lot – but also keeps well for a few days provided you don’t oversoak the layers of sponge.
