

Cake You Gotta Make
Two lots of sweet servings this week with my favourite French Fraisier Cake and Coconut, Passionfruit & Caramelised White Chocolate celebration cake PLUS some BTS on the NEW BOOK. Yay!


Hey Friends!
Yes, that’s right…me again. Never did I think there’d be a week where I’m dropping into your inboxes twice in one week but here we are and this time, I promise it comes with the delicious goods I promised over on Instagram earlier this week.
A HUGE thank you to everyone who has already pre-ordered the new book. SPOILER ALERT if you missed yesterday’s impromptu drop in, you’d have missed the rather exciting news that my debut baking book is FINALLY available for pre-order with a UK release date of May 23rd and a US release date of June 4th (info still tbc). I am SO pleased I got to share the news with you all first prior to the announcement going out on socials a little later this evening (tbc, as we are experiencing a minor technical issue BOO HOO) and as a little token of thanks for being here, you can pre-order the book from Waterstones and receive a £6 discount if you use code ONEBAKE6 at checkout before midnight 22nd May.
Just as an FYI, when you pre-order, you won’t pay for anything UNTIL it ships…so think of this as a present to future you. Future you deserves this!
My US friends have told me that the book is already available for pre-order on amazon but will send on and share any pre-order links for any specific sites as soon as I get them, but I am SO excited for you all to get your hands on the book. I know I am incredibly biased when I say this, but this book truly is special. Everything from the design, the front cover (it has a jacket sleeve with reversed colouring on the hardback cover), text, photography and style has been thought of and this book truly is an extension of me in every way.
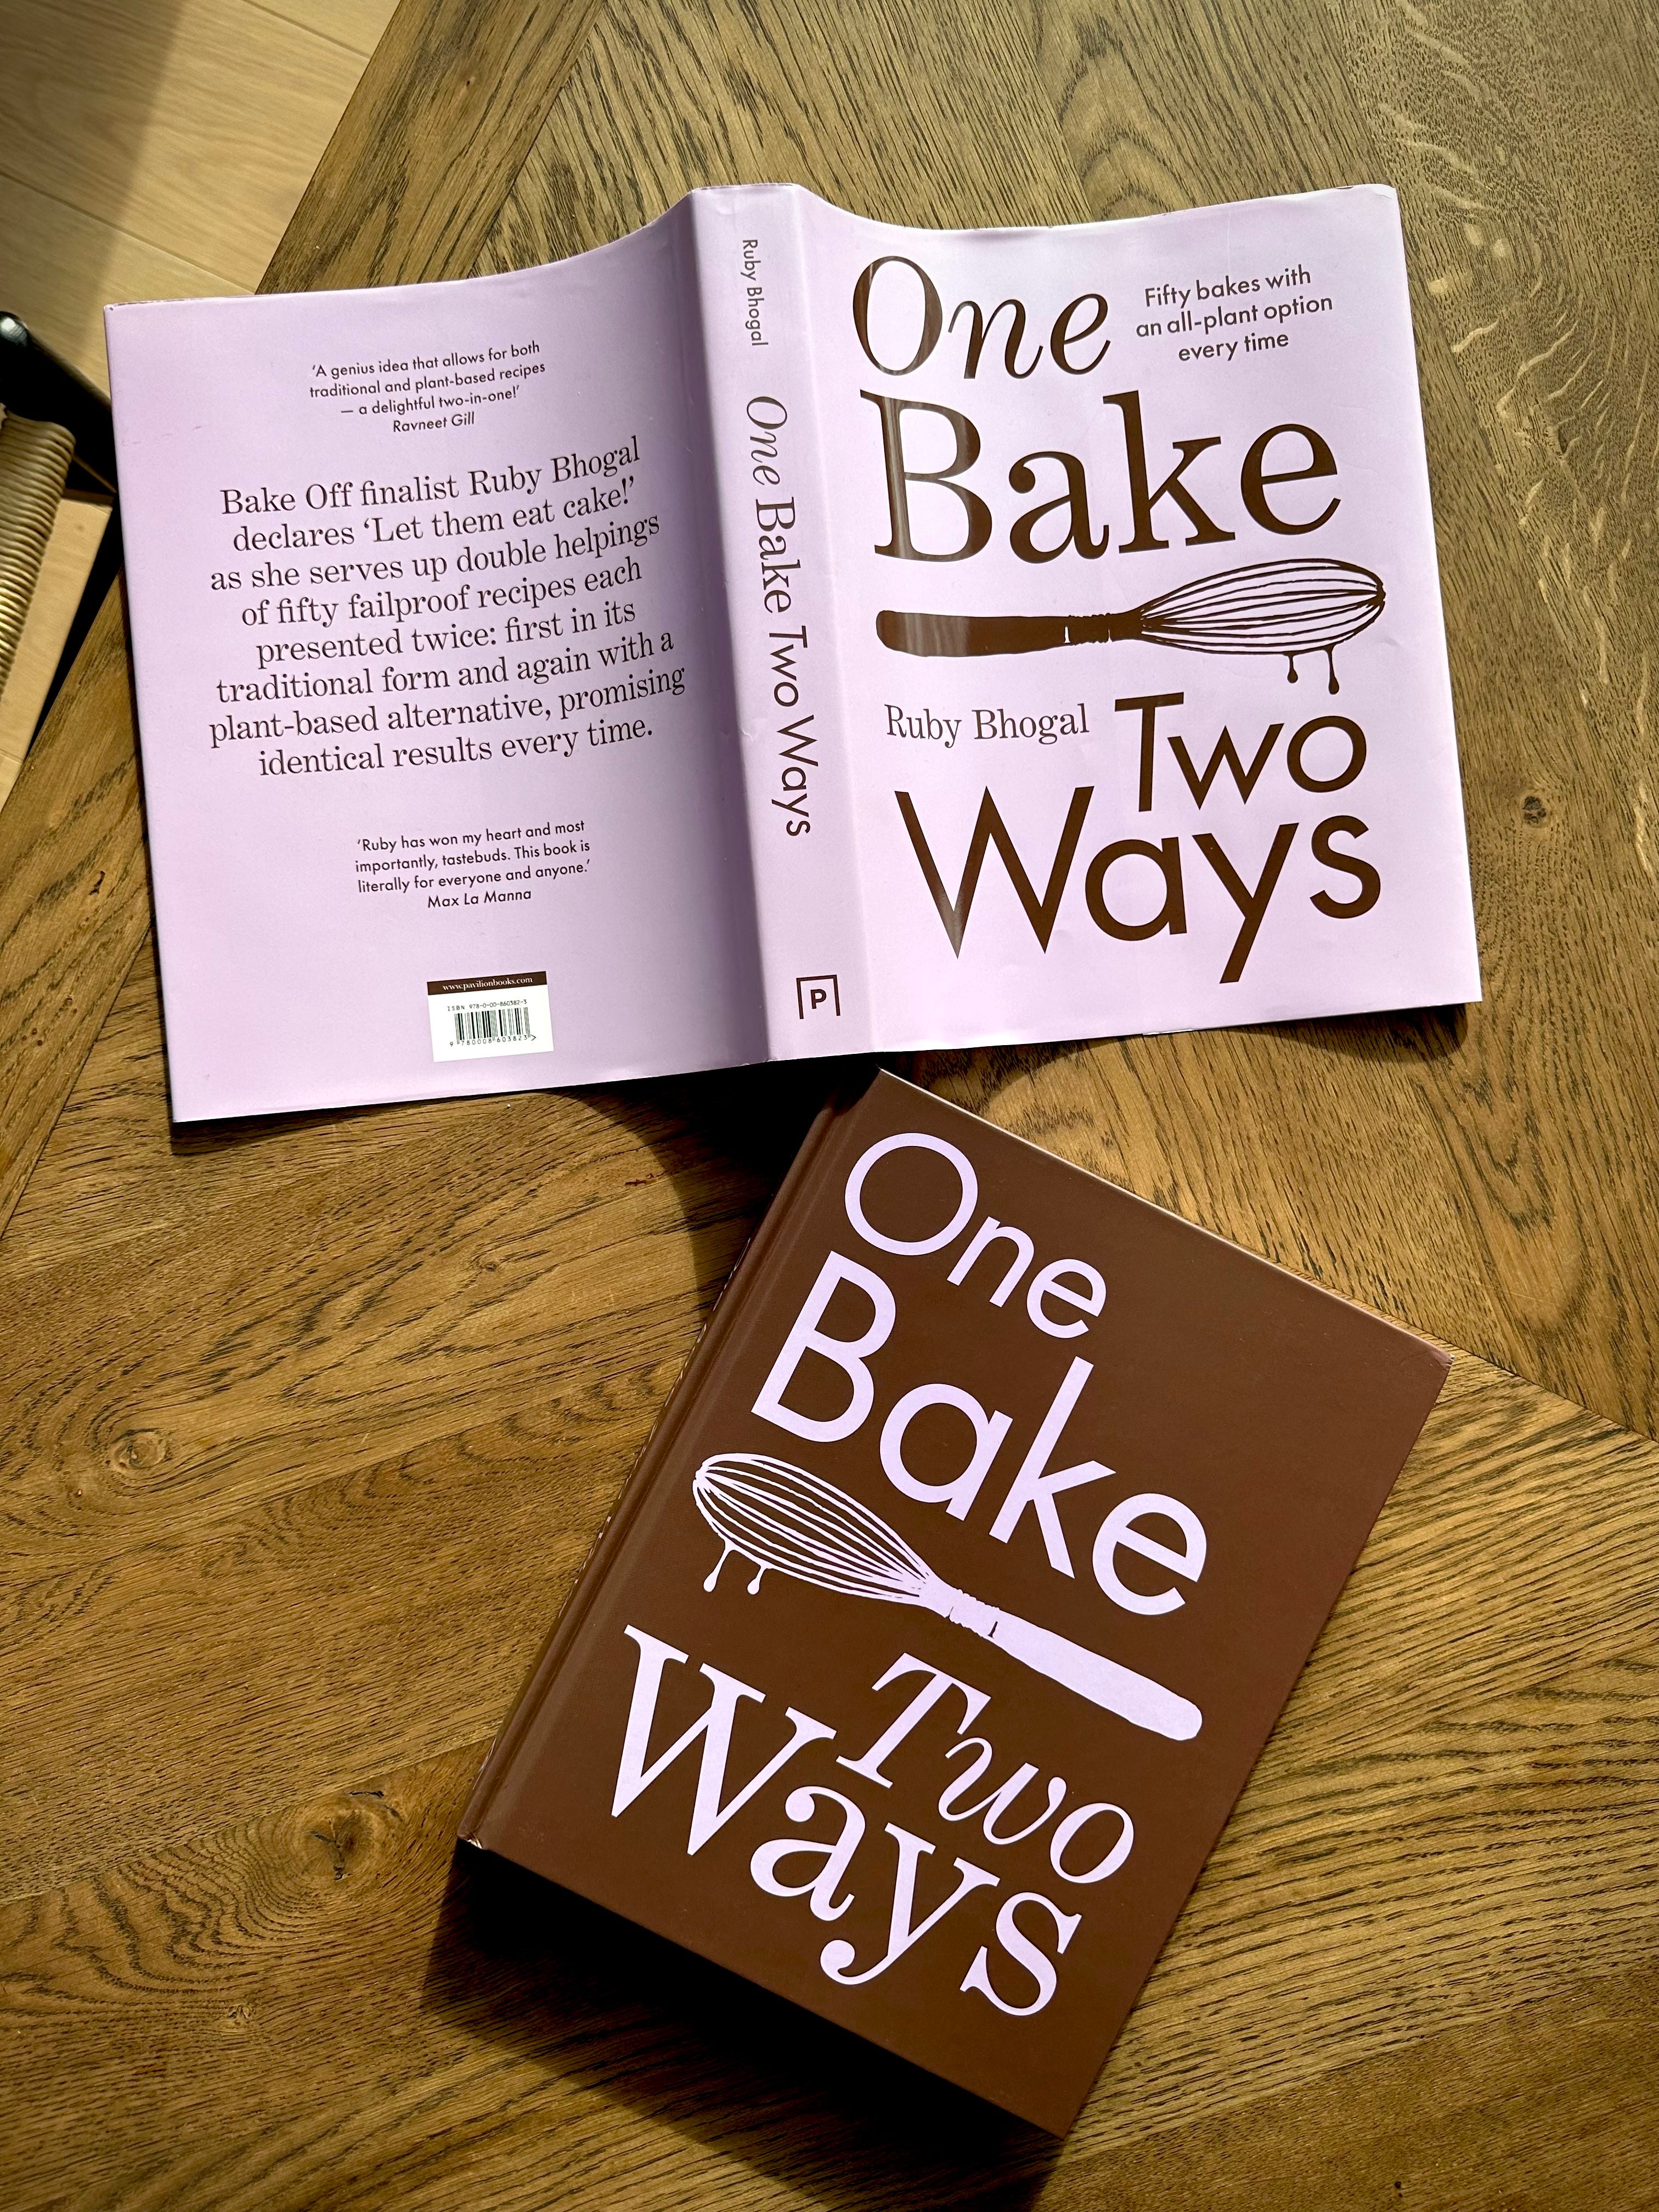
I hope when you read it, it’ll be like having me standing next to you in the kitchen. The text is conversational, my words haven’t been edited in any way and my publishers have truly allowed me to be my most authentic and genuine self in every aspect. This is the baking book I wish I had when I first started. Not just because the recipes are delicious but mostly because the approach is fun. There is nothing serious or stuffy about it – it’s truly a book which hopefully lets you build your confidence as you go on and a book where you can make the recipes your own. I actively encourage you to scribble, make notes and doodle in it – mix and match parts of one recipe with another and hopefully find your new favourite.
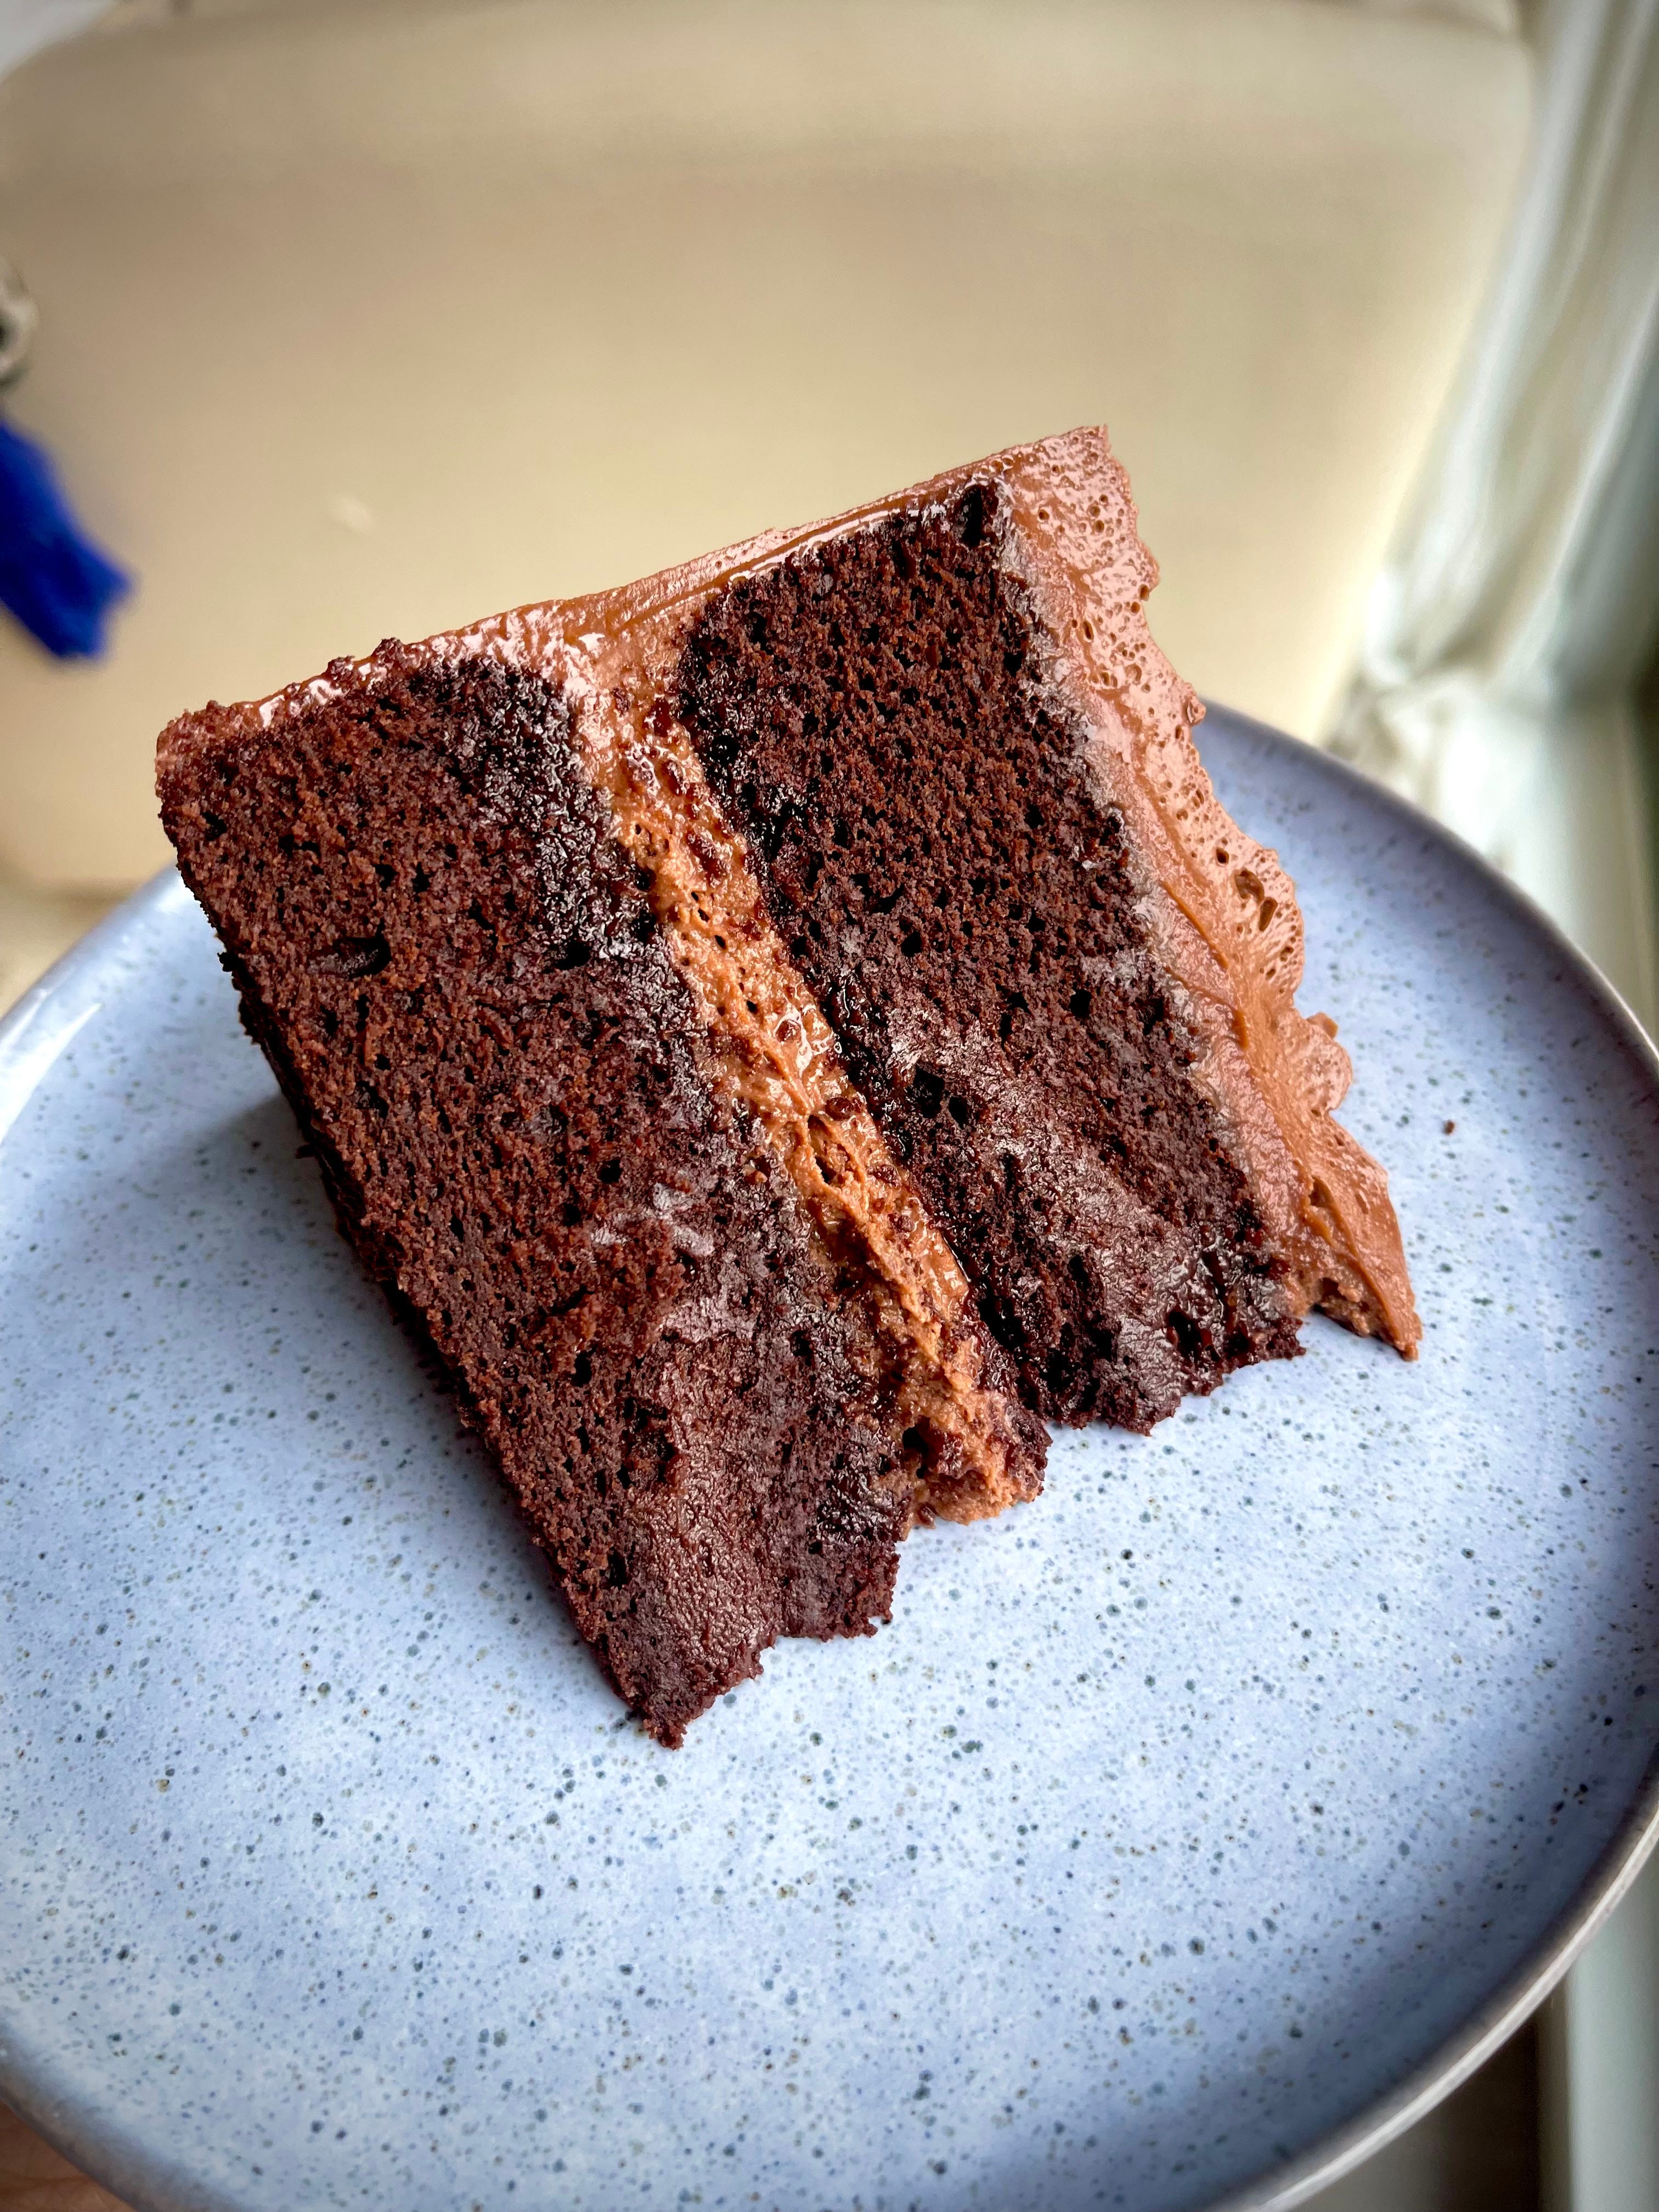
I am so so so SO proud of this book – it’s a dream I never dared to dream because I mean…me?? An author?? WHAT! One Bake Two Ways let’s everyone have a slice of nice. Whether you are plant based or eat dairy, there is something for everyone and I PROMISE YOU the plant-based recipes are SO good. Look at this choccy cake!
I can’t wait to share more on the whole book process (happy to share how it went, timelines and book proposals for anyone looking to do something similar), I feel super lucky to have worked with so many incredibly talented people on it. From my Editor to designer, photographer to stylist (food and props), One Bake is a beauty of a book and I just CANNOT WAIT for you to get your hands on it.


Cause we all deserve a bit of filth in our lives, right?


Cause this week we are CELEBRATING – *drum roll please* – we have our THIRD GIVEAWAY! To celebrate hitting over 25 k subscribers on the newsletter AND the pre-sale of my very first book (yayayayayay), I thought it was time to giveaway one of my most prized possessions…that’s right, I am giving away A KITCHENAID. Wherever you are based in the world, I WILL get it to you. This giveaway is open to EVERYONE but Paid Subs will automatically be entered 3 times, as opposed to one, into the competition.
NOT JUST THAT but as the Blue Salt coloured Kitchenaid is the same colour as my book (or near enough from what I can see online), I will also be giving away 5 copies of my book (founding members, I will be in touch with you to get you yours out to you as soon as it ships in May!).
This isn’t an ad or affiliated with any company, I just a way to say thanks, ya know? There’s nothing more you need to do to enter. I’ll announce the winner next week and will hit you up for your details to get it over to you.
LOTS OF FUN FOR EVERYONE.


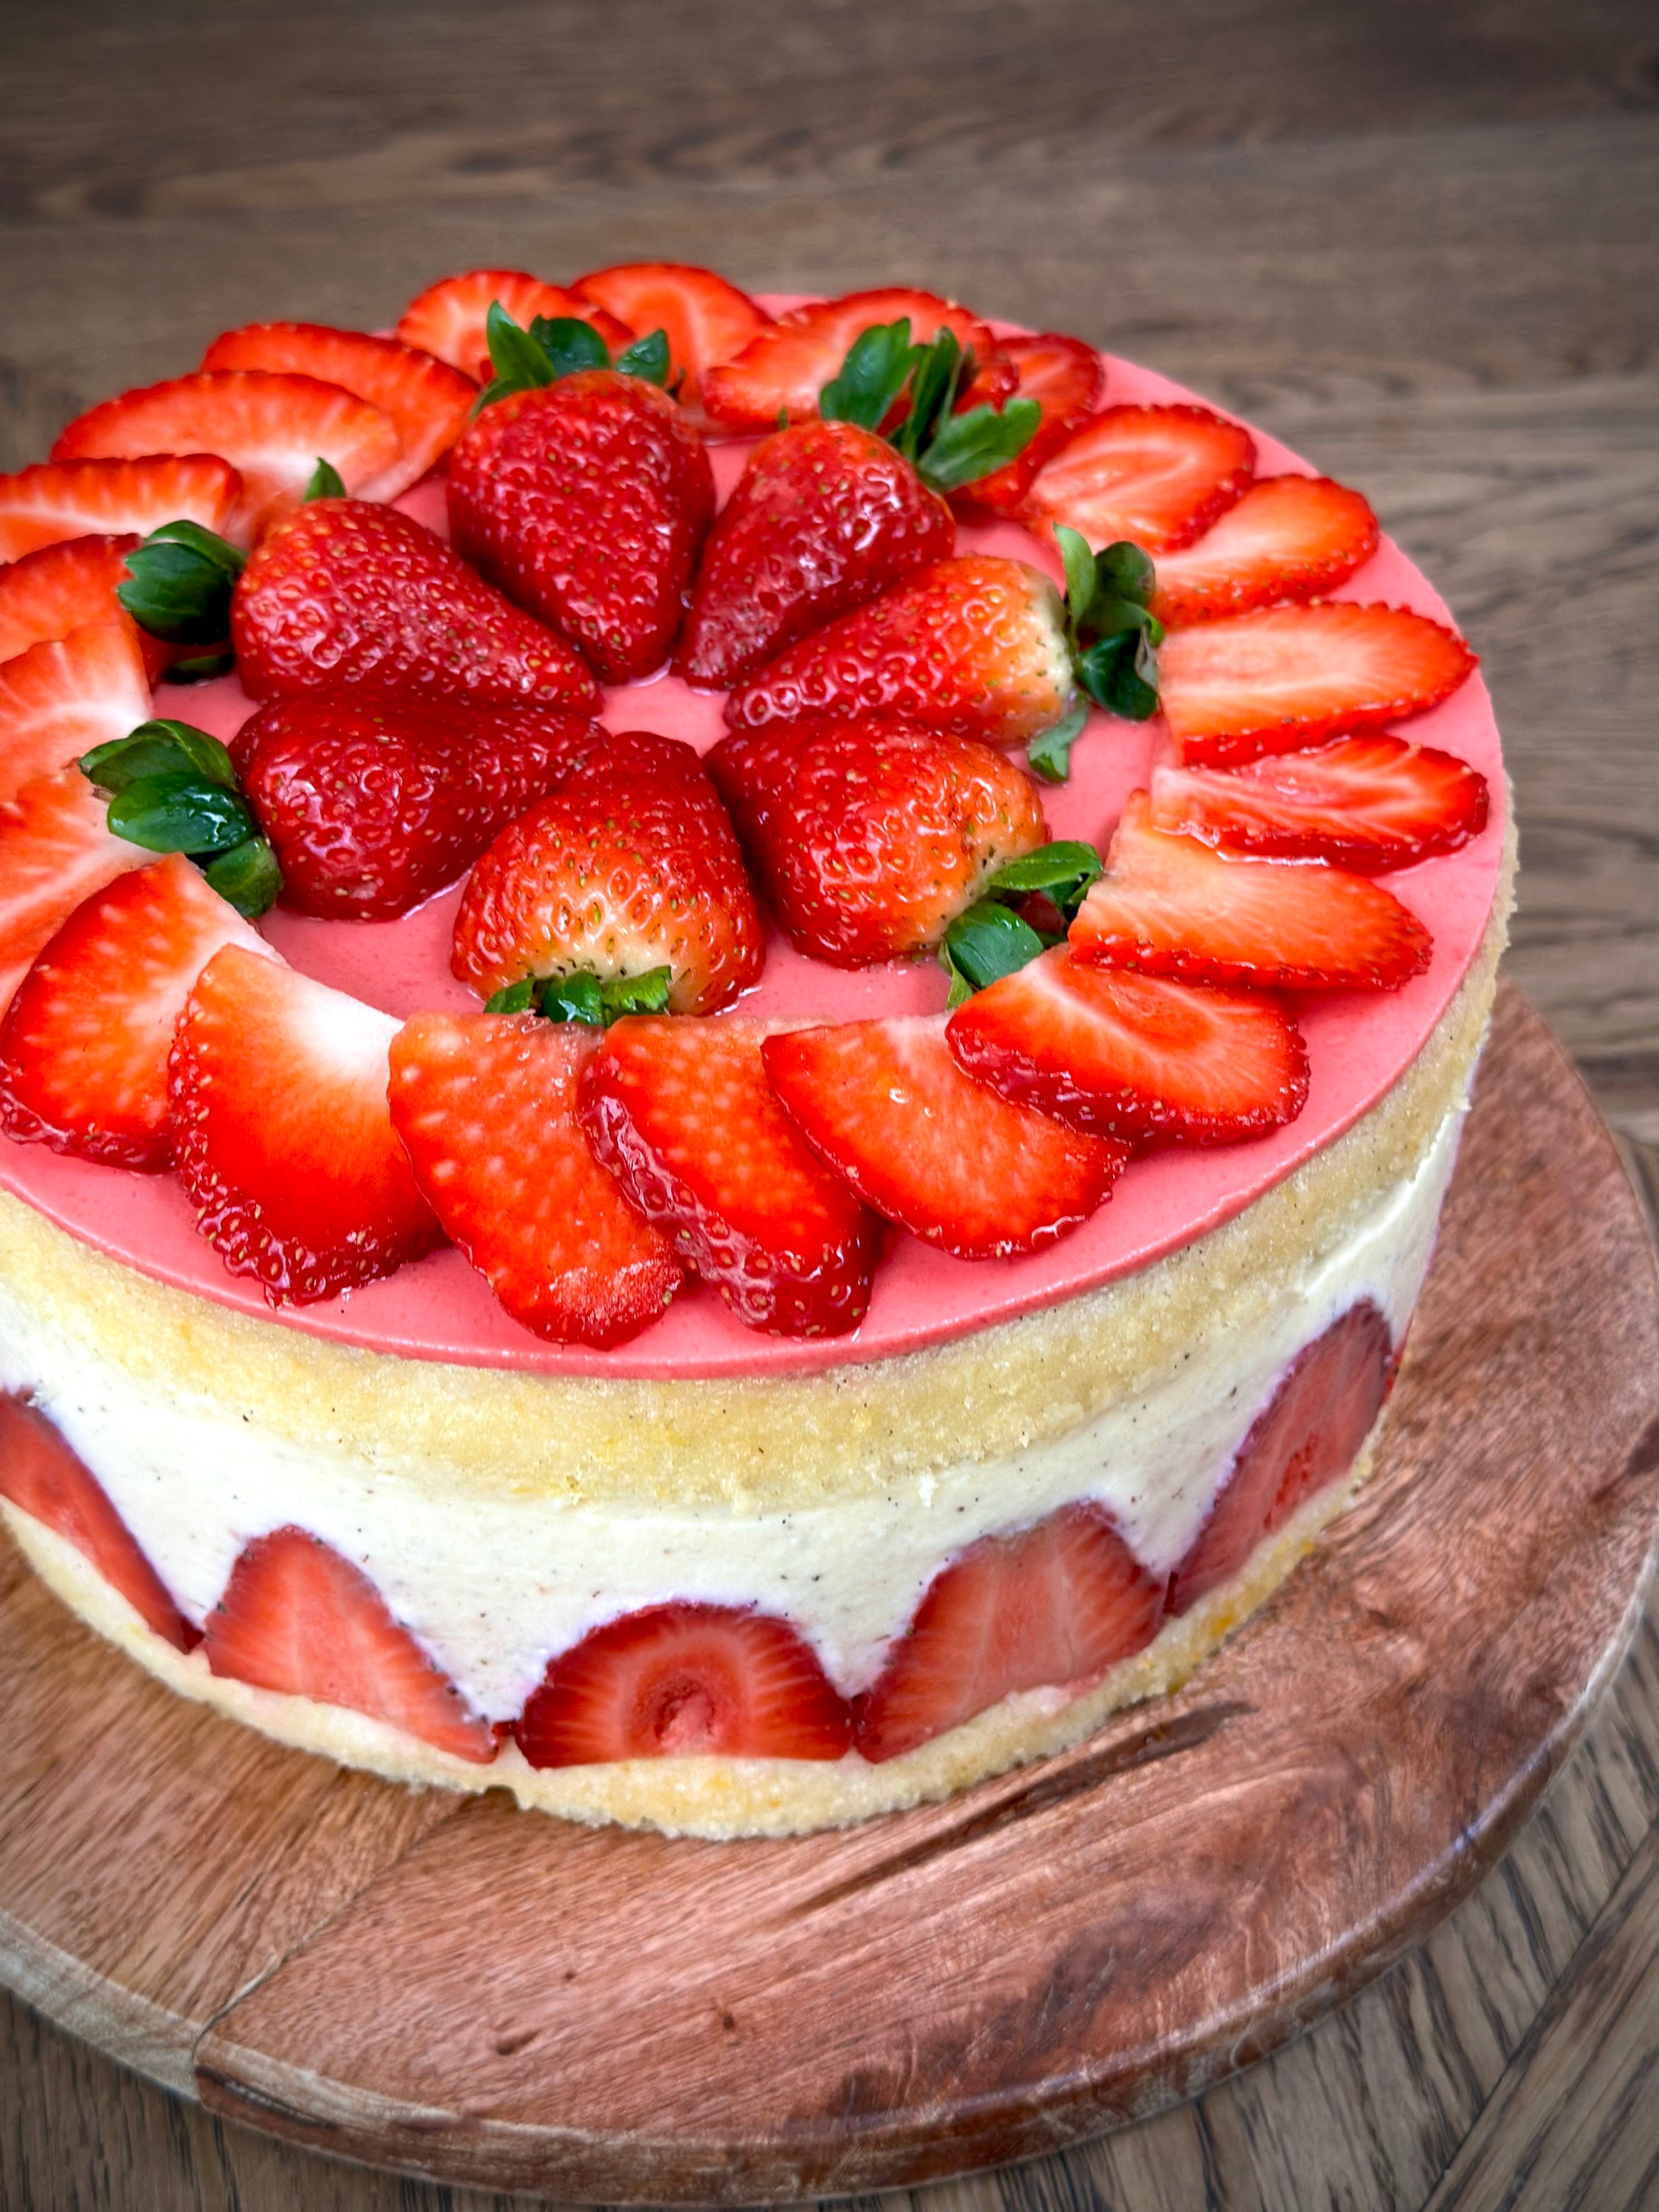
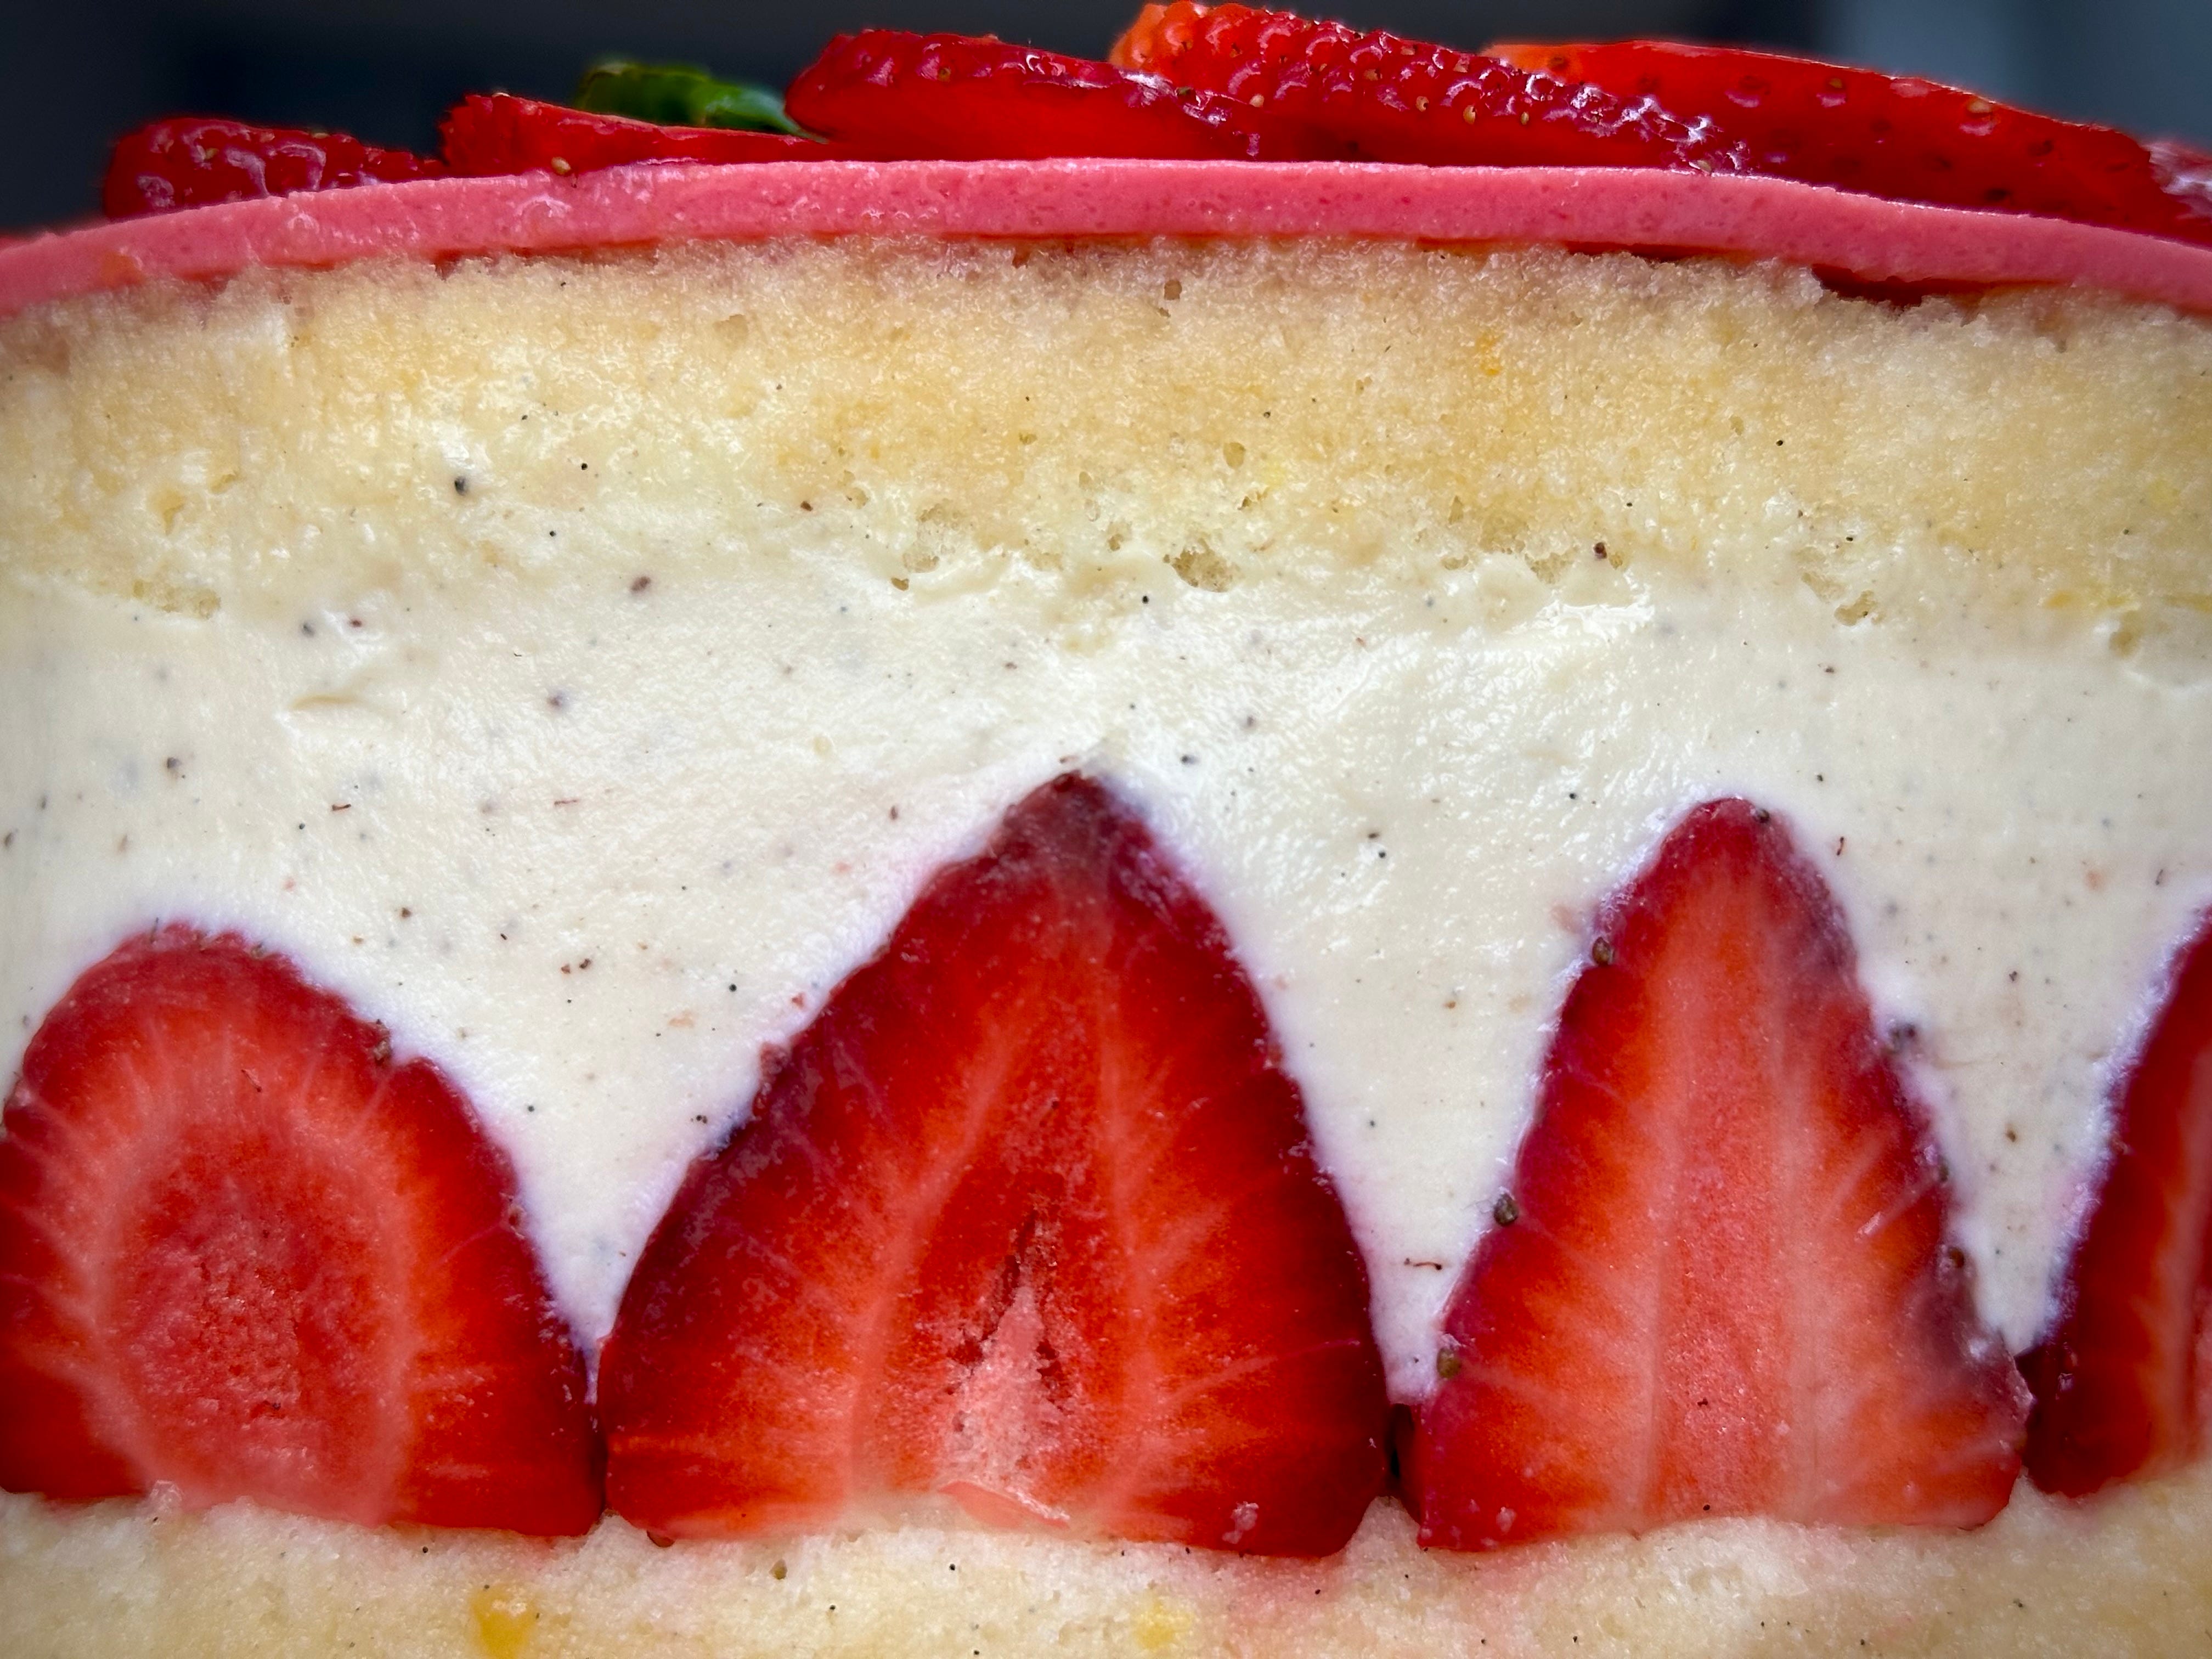
We are going to get straight into it this week as we have an OVERLOAD of info across the board. So first up, we have one of my all-time favourite cakes and the latest cake from my ‘Around the World’ series, a French Fraisier Cake.
This delightfully delicious number is made up of 2 super light genoise sponges soaked in a sugar syrup, a vanilla creme mouselline (think custard buttercream), fresh strawberries and topped with either a layer of marzipan or strawberry compote.
This cake easily hits the top 5/6 mark for me so far out of all the ones I have made. It is super simple but simply done perfectly right. The flavour combo is a classic, so we know we are good there, but every component is just *chefs kiss*. Whether you make the cake, or just one part of it, you're in for a good time. She's a little fussy but SO worth the effort. Whatever you do, please don’t skip on leaving the cake to set overnight – the buttercream recipe veers purposely on the looser side for a better mouthfeel and taste so to avoid serving up slop, give this baby enough time to chill.


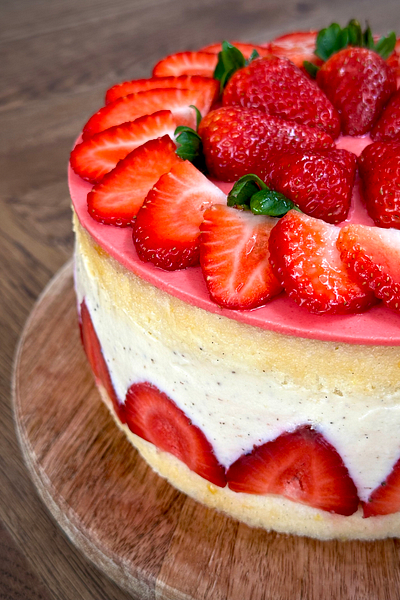
She’s SO pretty. I mean look at her, so worthy of being a centerpiece to any dinner, Sunday lunch or as part of your Easter menu. If you like a Viccy Sponge, then I URGE you to make her classier, sophisticated, and all-round elite sibling. It’s a real crowd-pleasing bake – light and refreshing, perfect for Spring (is it spring yet? Deffo feels like it has sprung here in London).
Recipe Makes: 2 x 20 cm / 8 inch sponges
Recipe Serves: 8
Y O U – W I L L – N E E D –
Genoise
15 ml Vegetable Oil
3 Large Eggs
130 g Caster Sugar
100 g Plain Flour, sifted
30 g Potato Starch, sifted
Pinch of Salt
0.75 tsp Baking Powder, sifted
1 tsp Vanilla Bean Paste
Zest of 1/2 Lemon
Soaking Syrup
65 ml Water
35 ml Lemon Juice, fresh
60 g Caster Sugar
0.25 tsp Vanilla Bean Paste
Crème Mouselline
500 ml Whole Milk
1.5 tsp Vanilla Bean Paste
125 g Caster Sugar
5 Large Egg Yolks
20 g Plain Flour, sifted
20 g Cornflour, sifted
160 g Unsalted Butter, fridge temp
160 g Unsalted Butter, room temp
Filling & Finish
600 g Fresh Strawberries
Strawberry Jam, to glaze
Marzipan, optional
M E T H O D –
Begin by preheating the oven to 150°C Fan/340°F/Gas Mark 4 and grease and line 2 x 20 cm / 8 inc cake tins, bottom and sides.
First up, let’s make the genoise sponge by adding the eggs and sugar to a stand mixer bowl. Use the whisk attachment to mix the eggs for 8 minutes on a high speed, until light, fluffy and doubled in volume.
After 8 minutes, reduce the speed to the lowest setting and slowly and carefully pour in the oil down the side of the bowl. Don’t get sad when the volume reduces slightly.
Into a separate bowl, add the flour, potato starch, salt and baking powder. Give that a mixy mix before adding 1/3 of the flour to the stand mixer bowl. Use a rubber spatula to gently fold in. Once there are little flour streaks remaining, go in with the second 1/3.
Fold again before adding the vanilla bean paste, lemon zest and remaining flour. Fold one last time until no flour streaks remain – remember to scrape the sides and base of the bowl to ensure no flour pockets remain.
Divide the batter evenly between the two tins and use the back of a spoon to level out the batter. Pop the tins into the oven and bake for 21 to 22 minutes until the tops are golden and bouncy – you want the tops to spring back when gently touched.
Let the sponges sit in the tins for a few minutes before turning them out and wrapping in clingfilm/saran wrap to completely cool.
Whilst it’s cooling, make the sugar syrup as it’s an easy, speedy win that can just chill till when needed. Add all the ingredients to a pan and place over a medium heat. Allow that to come to a boil before reducing the heat to a simmer and let it do its thing for about 5 minutes until it has turned slightly syrupy. Leave to one side to cool.
Make the crème mouselline by starting with the custard base. Add the milk to a saucepan alongside the vanilla bean and place over a medium heat.
In another bowl, add the yolks, caster sugar and both flours. Use a balloon whisk to mix until smooth – work through the gritty, clumpy stage. It will take a few minutes so hang in there!
Once the milk is at a near boil, pour 1/3 of it into the yolk bowl. Use a balloon whisk to whisk immediately and thoroughly until smooth. Pour the mixed milk back into the saucepan and place it back over the heat.
Stir continuously until the custard has thickened considerably – you will know when it’s good when the custard ‘burps’ or bubbles. Remove from the heat before adding in the 160 g fridge temp butter. Mix well until smooth.
Transfer the custard to a shallow tray to cool at room temperature and cover with either clingfilm or baking paper to prevent the top crusting over. NOTE: if you are leaving to cool overnight, pop the custard in the fridge and then bring to room temp the next day.
When the custard has completely cooled, add 160 g room temp butter to a mixing bowl. Use the paddle attachment to mix the butter until light and fluffy. Add a good scoop of the custard to the butter and mix until just combined. Continue to add the custard in batches. Once all the custard has been added and the buttercream is smooth, pat yourself on the back cause you just made crème mousseline.
Transfer the crème to a piping bag and pop in the fridge.
Before constructing, cut the green tops off the strawberries and vertically slice each one in half.
If you have a loose bottomed baking tin, construct your cake inside that for ease. For smooth edges, overline the side of the tin with acetate or baking paper. By this I mean make sure the acetate/baking paper goes above the top of the tin by an extra couple of inches to help with construction.
Brush the tops of both sponges with the lemon sugar syrup. Place one of the sponges into the base of the tin.
Tightly line the edge of the tin with the strawberries, facing the sliced edge outwards. Try to leave no space in between each for a neater finish. Add whole strawberries to the middle to cover the base.
Grab your piping bag of crème mousseline from the fridge and gently pipe the crème between each strawberry. Once done, pipe the remaining crème over the top and use the back of a spoon to level out.
Place the second sponge on top and use a pastry brush to glaze the strawberry jam on top (this just helps to glue on the marzipan).
Roll out the marzipan to a thickness of about 3 mm and use the tin base to cut around for an exact measuring. Carefully place on top of the strawberry jam and gently use your hands to press down.
Use any remaining strawberries to decorate how you wish but PLEASE PLEASE PLEASE, leave your cake to set overnight. The flavours will undoubtedly be better and the slice will be so nice you’ll go in for thrice (I know this doesn’t make sense but we had to finish off the rhyme).
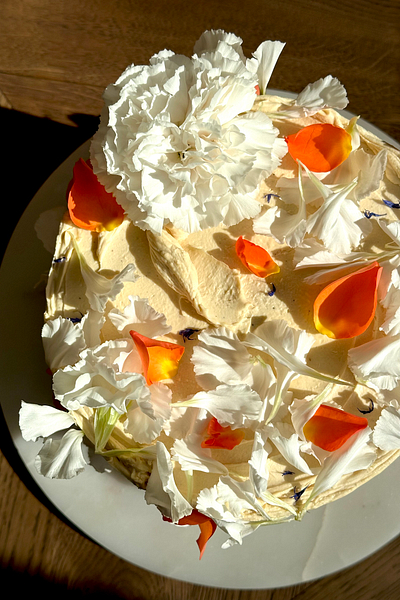
Next up, we have the main bake of the day – my Coconut, Passionfruit and Caramelized White Chocolate Cake. This celebration cake is a bit of a whopper in size (it would be perfect for a birthday cake or can easily be scaled down from 3 sponges to 2) and also in flavour. It’s made up of moist and tender coconut sponges, soaked in a coconut milk syrup, sandwiched between a velvety smooth and tangy passionfruit curd and smothered in an indulgent and incredibly moreish caramelized white chocolate whipped mascarpone.
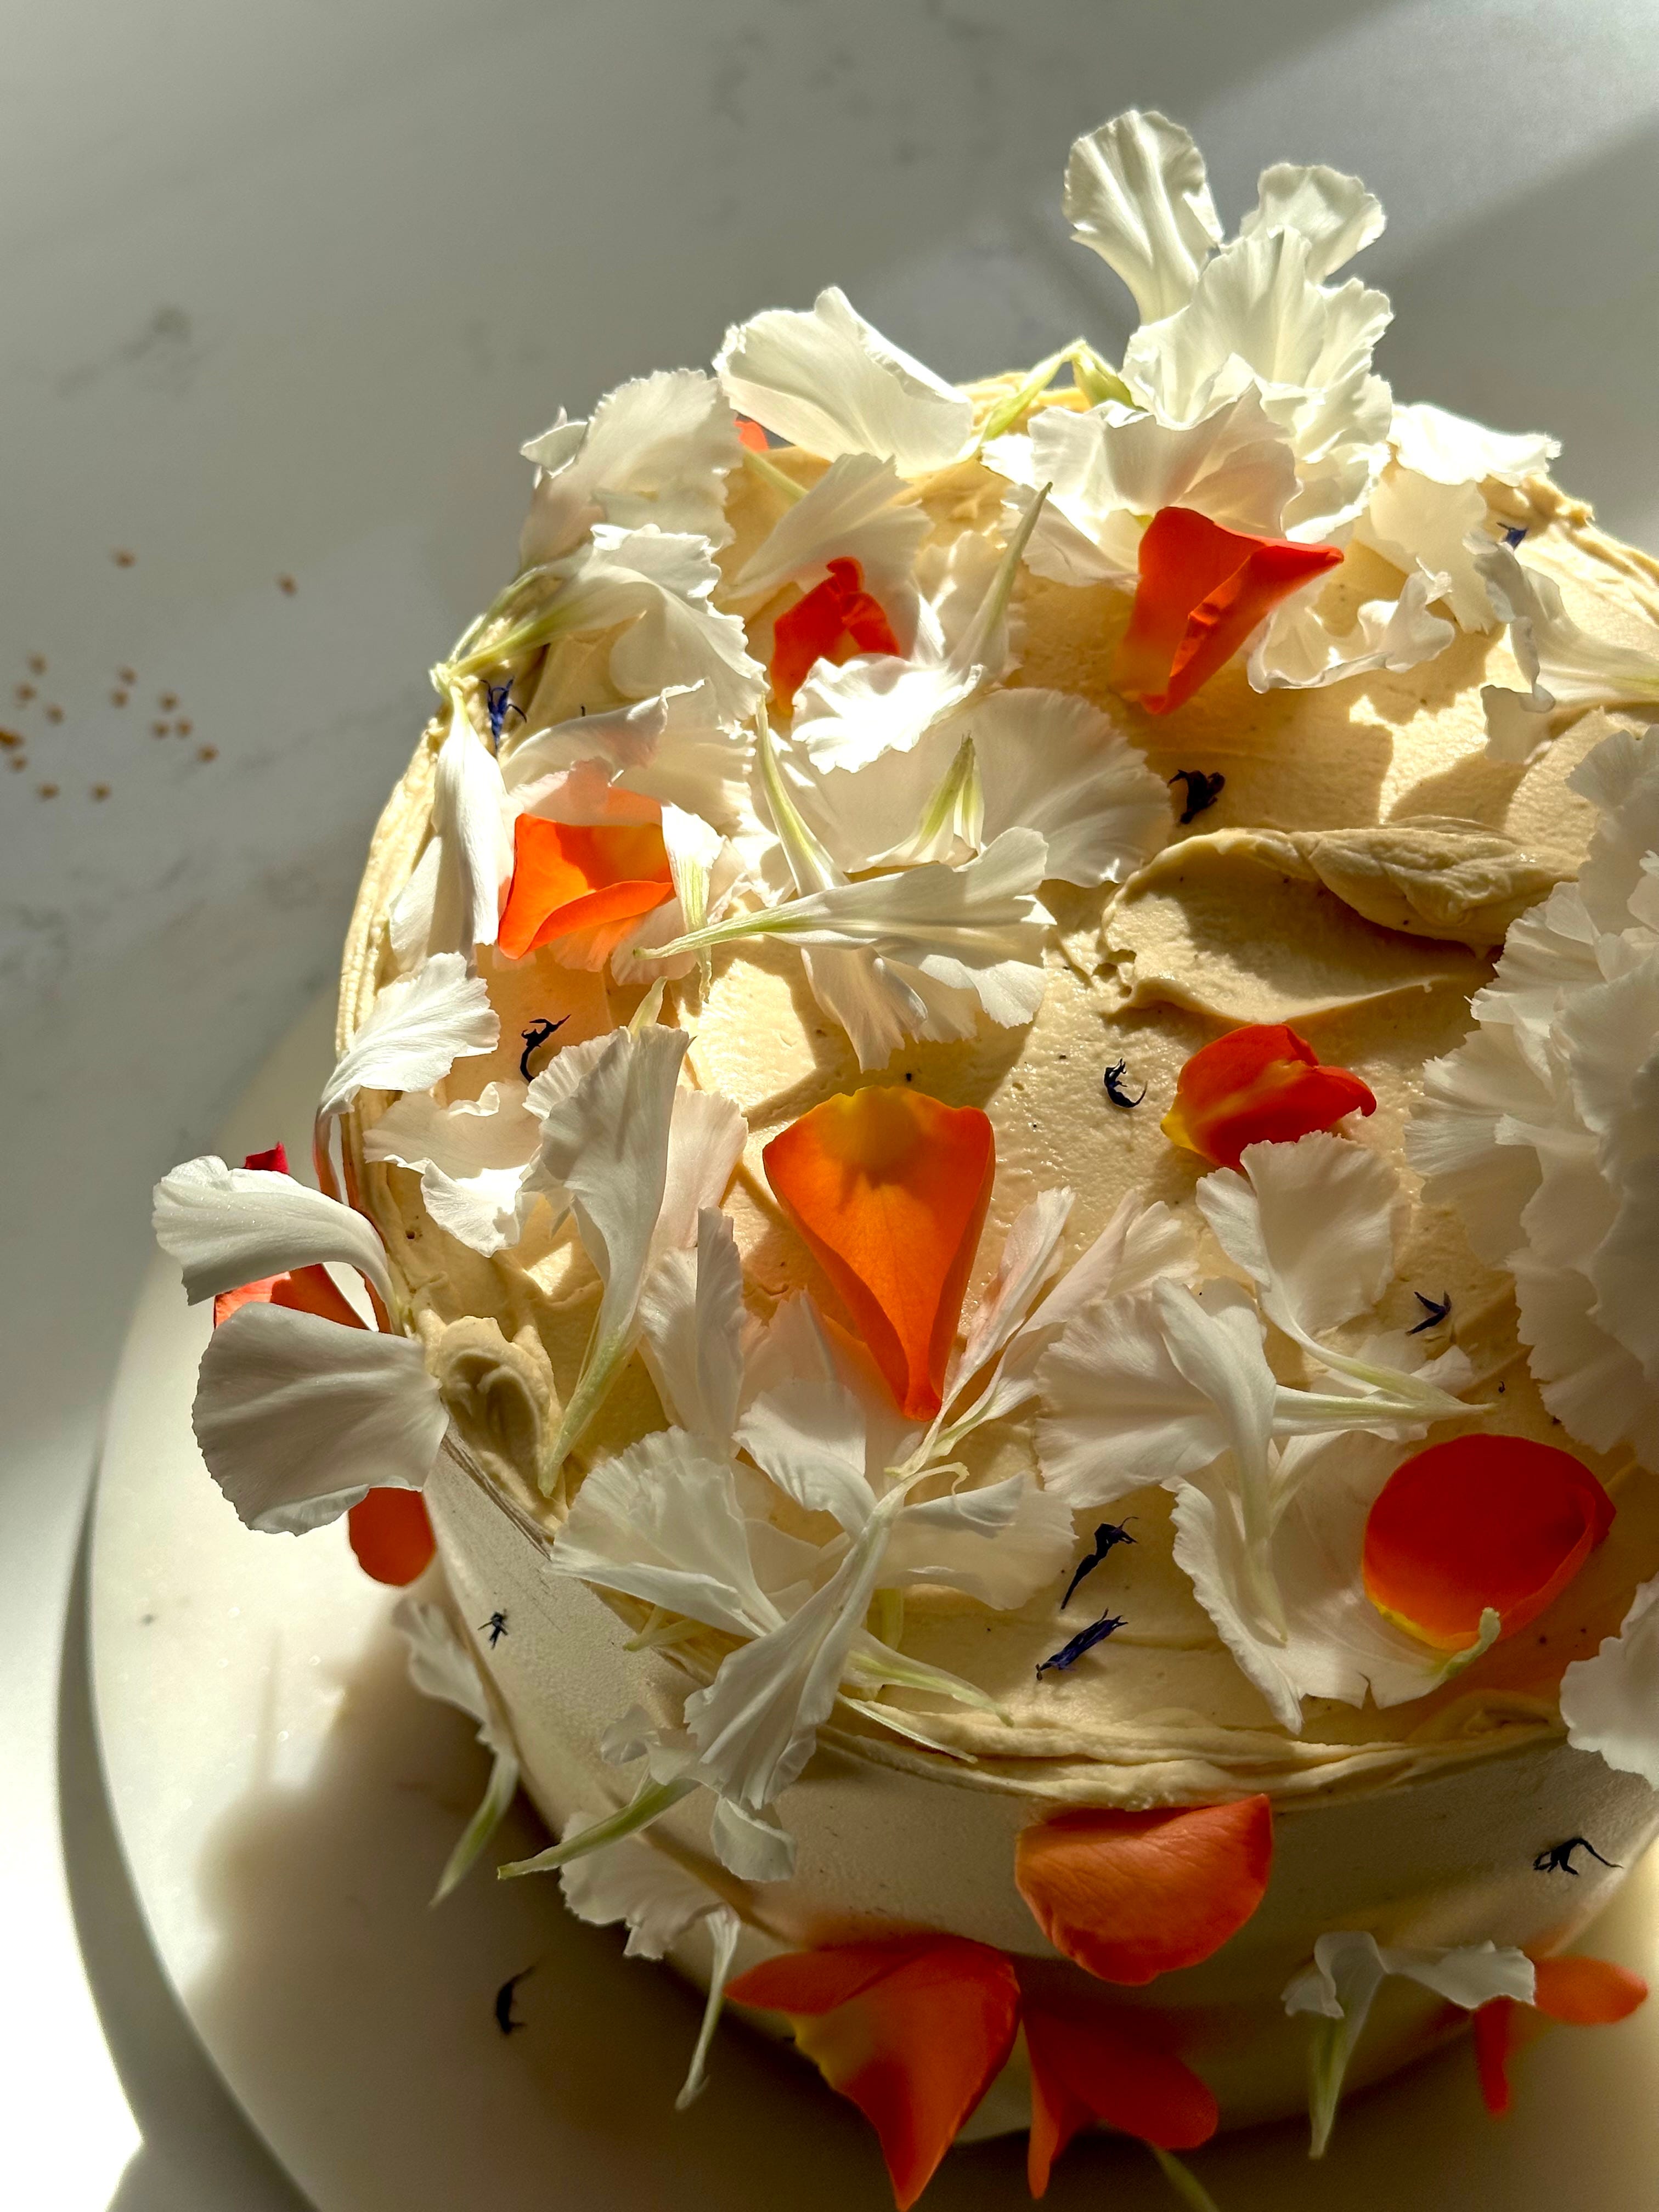
The flavour combo is nothing short of stunning and as we are celebrating this week (book day, yay!), I wanted to share the goodness with you all. This cake is ideal for anyone who isn’t big on chocolatey cakes (weird flex but fine) or if you’re looking for something a little zingy, punchy and delicious.
Now I know what you’re thinking – rubes this cake is massive why and when am I ever going to make this?? To that, I say shh. Shh, shh, shhhhhhh. Don’t talk so negative around here – what do you mean why, when, where, what. You ALWAYS deserve cake, no matter how big or small and if you truly are baking for one, minus 30% out of each ingredient for the sponge and make this 3 sponger into a double stack instead. For any leftovers, slice, wrap and freeze individually. This way whenever the cake craving hits (8.15pm without fail, every damn night), you can take out a slither of cake, allow it to defrost at room temperature and have a slice of nice ready and waiting for you.


I’m truly in my floral era right now when it comes to decorating cakes because it is a quick and easy way to elevate a simple cake. Make sure you do check that any florals you use on your bakes are safe and not toxic (steer clear of gypsophila aka baby’s breath, hydrangeas and foxglove – even if you do wrap the ends) and wrap the stem with a bit of foil to avoid any contamination.
Doom and gloom over, let’s get to the good stuff.
Recipe Makes: 3 x 18 cm / 7 inch sponges
Recipe Serves: a LOT. Easily 12 with a generous slice or double if you halve each slice horizontally
Y O U – W I L L – N E E D –
Sponge
275 g Unsalted butter, room temp
75 ml Veg Oil
335 g Caster Sugar
5 Large Eggs (approx. weight 335 g with shells)
250 g 00 Flour, sifted (can sub for Plain/AP)
75 g Potato starch, sifted
75 g Desiccated Coconut
3.5 tsp Baking Powder, sifted
Pinch of Salt
115 ml Coconut Cream
1 tsp Vanilla Bean Paste
Soaking Syrup
120 ml Water
50 ml Coconut Cream
100 g Caster Sugar
0.5 tsp Vanilla Bean Paste
Caramelized White Choc Ganache
250 g White Chocolate, chunk/callets (over 28 % milk solids)
300 ml Double Cream
Passionfruit Curd
1 Large Egg, whole
2 Large Egg, yolks only
9 Passionfruit, middle only and deseeded
60 g Caster Sugar
0.5 tbsp Cornflour, sifted
0.5 tsp Vanilla Bean
60 g Unsalted Butter, room temp
Caramelized White Choc Whipped Mascarpone
460 g Caramelized White Choc (from above)
400 g Mascarpone, fridge temp
250 ml Double/Heavy Cream
1 tsp Vanilla Bean Paste
M E T H O D -
Preheat the oven to 150C Fan/170C/340F/Gas Mark 3 and grease and line 3 x 18 cm / 7 inch cake tins bottom and sides.
First let’s start with the sponges. Into a stand mixer bowl, add the butter, oil and sugar. Use the paddle attachment to mix for 6 to 8 minutes until light and fluffy.
Next in are the eggs, mixing well between each addition.
In a separate bowl, add the two flours, desiccated coconut, baking powder and salt. Mix well before adding 1/3 into the stand mixer bowl. Mix until everything has just combined before adding in the second 1/3.
Use a rubber spatula to gently fold in the flour, making sure you scrape the bottom and sides of the bowl as you go along.
Add the final 1/3 of flour, alongside the coconut cream and vanilla. Fold through until no visible flour or coconut streaks remain.
Evenly distribute the batter between the 3 tins and bake for 25 to 28 minutes. Once the sponge have baked, remove from the oven and leave to sit in the tins for 5 minutes. Gently turn out (be careful, they will be super soft) and wrap in clingfilm/saran wrap whilst they are still hot to retain all the moisture. Leave to cool.
Whilst they are cooling, make the coconut soaking syrup. Add all the ingredients to a pan and place over a medium heat. Allow that to come to a boil before reducing the heat to a simmer and let it do its thing for about 5 minutes until it has turned slightly syrupy. Leave to one side to cool.
For the caramelized white chocolate ganache, preheat the oven to 110C Fan/130C/270F/Gas ½.
Add the white chocolate to a baking tray and place into the oven for 10 minutes. Remove the tray from the oven and use a rubber spatula to mix. Place the tray back in the oven and continue this in/out process for about 90 minutes (it is worth it, I promise) until the chocolate is golden brown. If it gets chalky, don’t worry – keep mixing well and baking till you reach that golden colour.
Once achieved, remove from the oven and transfer to a bowl to gently cool. Once cooled, add the double cream into a saucepan and place over a medium heat.
When near boiling, pour the cream over the caramelized white chocolate and leave to sit for a minute or two. Mix until smooth before transferring to a bowl or tray and leave to cool for about 30 minutes. Cover the top with clingfilm/saran wrap and leave to set until thickened.
To make the curd, place your whole egg and egg yolks (make sure you save the whites for meringue/pavlova/buttercreams etc) into a large heatproof bowl alongside the remaining ingredients, bar the room temp butter. Give it a good old mix with a wooden spoon.
Place the bowl over a saucepan of simmering water and stir until the sugar has dissolved. We need this mixture to thicken so it coats the back of a spoon. This should take about 15 minutes. I always like to give it a good mix with a balloon whisk every now and then to ensure there’s no lumps and it remains silky smooth.
Once it has thickened, add the butter and mix well until combined. Leave to cool but make sure you cover the top with some baking paper/clingfilm to prevent a skin from forming.
When the caramelized white chocolate ganache has cooled and thickened, let’s make the whipped mascarpone. Add the ganache to a stand mixer bowl alongside the mascarpone. Use the whisk attachment to mix until smooth.
Go in with the double cream and vanilla bean paste and mix until you reach medium peak. Transfer to a piping bag if you are using.
Once you are ready to construct, use a serrated knife to remove any domed sponge tops for an even finish. Use a pastry brush to liberally brush the coconut soaking syrup over the tops of each one.
Onto your serving plate, add a tiny smidge of the whipped cream to the base. This will ‘glue’ your first sponge down to avoid any slippery disasters later.
Place one of the sponges on top and add a thin layer of the whipped mascarpone on top. Pipe a solid line of cream around the edge to create a dam before filling the middle with half of the curd. REMEMBER – any gaps in this line of cream will allow your curd to escape which in short means disaster. If in doubt, pipe a second line around the first to ensure you’re locked in.
Use the back of a spoon to smooth down the curd before adding the second sponge on top. Repeat the icing and curding one more time.
Add the last sponge before adding a thin layer of cream to the outside of the cake to crumb coat. It doesn’t matter if it’s super rough but you want this to set before adding the final layer and decoration. Pop the cake in the fridge to set for 1 hour.
Use the remaining cream for your final coat and any decoration. Pop in the fridge and add any florals (if you are before serving).
Use a hot knife to slice and serve.


My Extra Bite besties will know what this section is about but for everyone else, this is where I drop my tips and tricks to ensure you nail each recipe included in the recipe. You’ll find more detail, pictures, and key points (imo) highlighting any tripping points and how to work through them. Think of this part as offering the assurance you need and if there is STILL somehow some ground I haven’t covered, you can drop me a message and I’ll offer up some more advice if you need it.
In today’s ‘RR’, you’ll find A LOT of images to help you through key parts of the main bake. I also give you options on how to jazz up your Fraisier Cake with different flavour combo’s that I have tried and tested, as well as variations on the main bake. We’re here to tickle everyones pickle so if anything on offer today doesn’t float your boat, make sure you check out the Last Bite Archive for something that does. We have a hoard of deliciousness hiding in there so make sure you don’t miss out.
Anyway, it time to roll them sleeves up, let’s get into it.
First up, let’s get into the Fraisier Cake.
