

A Slow Start to January
We got 5 deliciously easy recipes to help you with your weekly meal prep, seasoned with a mandatory sprinkling of sumptuously sweet filth.


Hey Friends!
I hope you have all been having a great start to the New Year? Mine got off to a slightly rocky start so we are finally back with the newsy after a little extended break. Thanks so much for those of you who are still here – I appreciate my one job over here is to regularly deliver you with filth and we have been somewhat slacking on that front so I’m suuuuper soz that I haven’t been keeping up my side of the bargain.
Shall we address the elephant in the room? I mean we are all friends here now aren’t we? So in short – life has been pretty shit after experiencing a missed miscarriage on the 19th December (the reason why my newsletter before Christmas was VERY late) and spent my NYE in hospital for management. Not quite the way I envisaged my year ending and after a trying few months post wedding, I was certainly hoping for an easier ride but ya know, life doesn’t always go your way as I am intensely learning.
I’m currently trying to remain peppy and upbeat but ya know, sometimes it gets to a point where the motivation to even change your clothes feels slightly monumental so I’m very much trying to adapt to a slower, more intentional and present way of life. Which as someone who loves nothing more than doing far more than she’s capable of doing, running on nothing but sugar and caffeine and brushing everything under the carpet, glossing over the cracks and steamrolling on – it’s been a real lifestyle shift.


In truth, I have neglected myself on all fronts and now paying an expensive price emotionally, physically and mentally but having finally dipped my toes back into the world of work this week, it feels good to get back to some sort of structure and routine.
I did (and still more often than not do) feel a little lost and bit like the ground beneath me has lost its stability but I also know I’ll get myself through it. I am a stereotypical libra, through and through. Very chilled, very balanced, very rational. So when something like this destabilises you to your core – it feels hugely unsettling. I’m very much in the midst of trying to find myself in amongst the chaos of emotions. Which also means I am trying to rediscover my love and passion for everything that makes me, me.
It’s a real mental hurdle and there are days I feel I am making good progress, and other days which hit me like a tonne of bricks but the fact I have been able to sit here for a few hours today with nothing but Olivia Dean blaring in my ears and my thoughts to haunt my head, I will take that as a major win. And I do want to thank you all for your patience and support – the outpour on socials and in dm’s has been overwhelming (in a good way). The constant check ins, messages of morale and shared stories of grief have all lessened my loneliness and I’ll be eternally grateful to you all.
But with all that done and said, this weeks newsy is jam packed so let’s tuck in, shall we?

Because I have been MIA for the last few weeks, I have a tonne of recipes to share with you all this week so we are going to keep things light, brief and straight to the point (contrary to what the ramble above suggested).
I have decided to be better with my food this year (bye bye 5 packets of crisps for lunch), which includes prepping on a Sunday to help me get ahead. Last week, in a few hours, I made:
Onion Seed Tiger Bread Rolls
Charred Sweetcorn Salad
Chicken Chipotle Salad
Roasted Tomato, Garlic & Red Pepper Soup
Blueberry Muffins
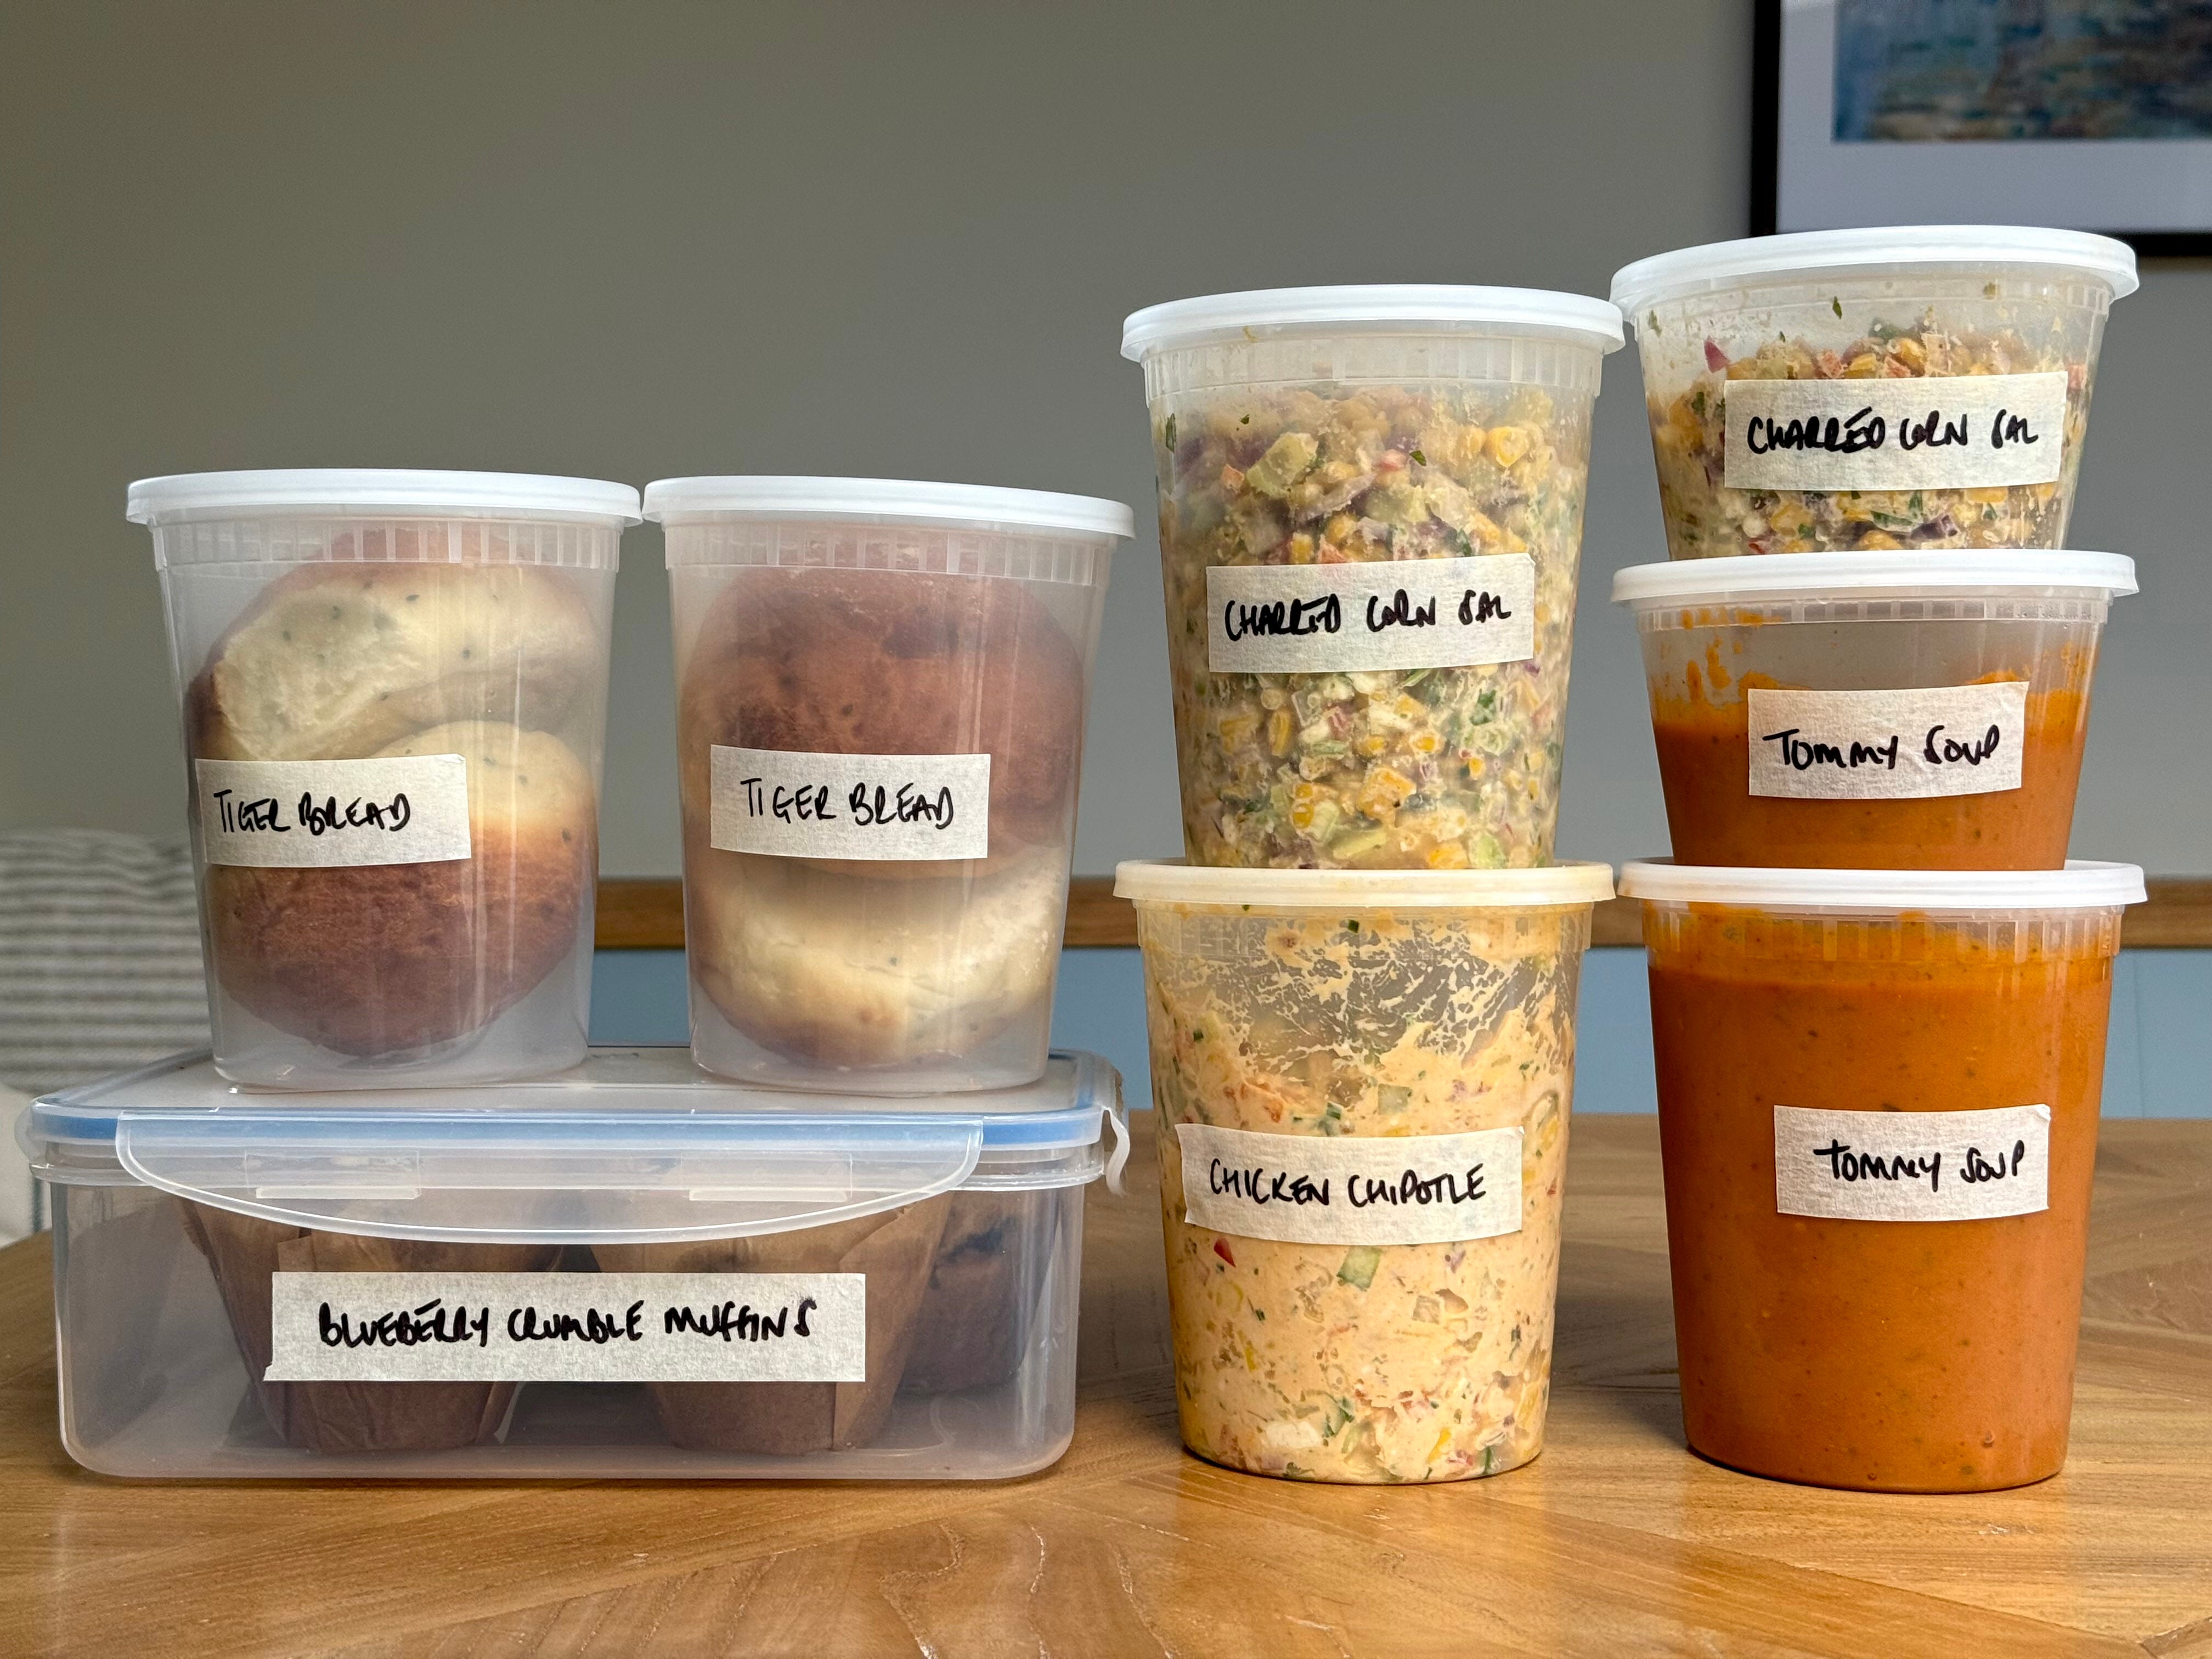
In addition to the above, we also have my Chocolate, PB & J Tray Bake (which I heartily recommend making if sadness ever finds you) and a Vanilla and Chocolate Marble Chiffon Cake, smothered in a chocolate speckled vanilla cream.
A lot of health, sprinkled with a bit of filth. And whilst there will be many weeks like this, I am also pleased to confirm there will be weeks where the filth does the heavy lifting and the health is merely a guest appearance. It’s all about that balance, baby.
OH, I should also preface this by saying some of the recipes this week contain some really naff pictures which don’t do them justice as my brain is still not functioning at 100% capacity and I forgot to take pictures of everything – so please just trust me, or take a look at my meal prep vid on Instagram for a better visual aid.

Please note – I will make sure I add the downloadable recipe PDF’s for you by EOD Saturday and as this is a LONG newsy, the vanilla marbled chiffon cake is at the very bottom which will need to be opened in a browser, and not email.
In a bid to overhaul my diet (slightly, not’s be too rash here), and reduce the amount of UPF’s I am consuming, I am committing to doing a bit of prep on a Sunday to help reduce the urge to make a bagful of potato smiley faces mid morning and eating them all day long (times have been…interesting, lately).

Let’s get right to it starting off with what I think is the most important food group going: carbs. Considering how much I have professed my love for it over here, this admission should come as no great surprise: I eat an ungodly amount of bread each week. Think what you think may be normal and double it. Sure, doesn’t sound anything too dramatic but remember I live with gluten free James so if I am buying a loaf of bread, know it is only I that is demolishing said loaf. And then buying a new loaf. Demolishing that and contemplating buying a third for the week.
So, every week will be a new bread. No preservatives. No nasties. No ingredients that start with an E and end in a bunch of random numbers. Just good, homemade, hearty, delicious bread. To dunk, to slather or to sandwich. This week, I went for simple Onion Seed Tiger Bread Rolls. What a shattering crisp, crunchy crust and pillowy soft inside, these rolls have seen me through this week. Topped with a bed of rocket, a hefty spoonful of my Chipotle Chicken Salad (see below) and served up alongside some pickled Guindilla’s (a mildly hot green chili from Northern Spain) – life in that particular moment feels quite good.


Whilst I use a stand mixer to make my dough, this is a recipe you can also make by hand should you opt for a kitchen based workout – I’ve included all timings for both options in the method below.
Recipe Makes: 9 Large Rolls (great sandwich size) or 12 Small (good for soup size)
Y O U – W I L L – N E E D –
Dough
500 g Strong White Bread Flour
10 g Sea Salt
10 g Fast/Instant Yeast
30 g Unsalted Butter, room temp
1 tbsp Nigella Seeds
325 ml Water (you want this no warmer than lukewarm)
Tiger Bread Paste
50 g Rice Flour
1 tsp Toasted Sesame Oil (I am not a big fan of sesame as a flavour but if you are, increase to 2 tsp)
1 tsp Olive Oil (if you are using 2 tsp Sesame Oil, leave this out)
1.5 tsp Caster Sugar
½ tsp Instant Yeast
Pinch of Sea Salt
45 to 50 ml Water
M E T H O D –
To begin, add all the ingredients for the dough bar the water to a mixer bowl. Pour ¾ of the water in and use your hand to bring the ingredients together to form a rough dough.
Pour in the remaining ¼, roughly mix again and leave for 5 minutes to allow the flour to hydrate. After 5 minutes, using the dough hook attachment, mix on a medium speed for 8 minutes until the dough is smooth, not sticky and passes the windowpane test (i.e. you can stretch a bit of the dough between two fingers without it snapping/breaking and being translucent enough for you to be able to ‘look’ through). If you are making this by hand, after you have left the flour to hydrate, knead the dough for approx. 15 minutes until the dough is soft and elastic – it will begin very sticky and tacky but once the gluten develops, the dough will become smooth and won’t stick to the worktop or your hands.
Lightly oil a large bowl and pop your dough in, cover the bowl with clingfilm and place in a warm environment to prove for 2 hours. I like to place my bowl into the oven with a tray of boiling water at the base for the perfect proving temperature.
Once proved, the dough should be at least doubled in size. Line a large baking tray with greaseproof paper and leave to one side.
Transfer the proved dough onto a lightly floured worktop and divide into 9 for large rolls or 12 for smaller (you want these to be as equal as possible for an even bake time for them all so I like to weigh the weight of the entire dough, divide by 9 or 12 and weigh out each piece to ensure they are the same).
Flatten each piece to remove excess air before rolling into a ball. Ensure the seam at the base is tight before placing each piece onto your lined tray. Space each dough ball apart, leaving them with ample room to grow.
Lightly dust the tops with flour before placing a clean tablecloth over the top to completely cover. Pop back into the unheated oven for another 30 minutes for the second proof.
Whilst the bread is proving, make the tiger paste by adding all the ingredients together in a bowl and mixing well until smooth. Cover the top of the bowl with clingfilm or a cloth and leave for at least 20 minutes.
Once the 30 minute proof is finished, use a pastry brush or back of a spoon to very gently brush the tiger paste over the tops of each proofed roll – be very gentle so to not remove any air. Leave to sit for another 15 minutes at room temperature whilst you preheat your oven to 200C Fan/220C/430F/Gas Mark 7.
Place a tray of boiling water at the base of your oven before popping the tray into the oven. Bake for 20 to 24 minutes, until the rolls are beautifully golden brown and the bases sound hollow when tapped. Leave to sit on the tray for 30 minutes before transferring to a cooling rack.
Store in a sealed container once cooled. The crunchy top will go soft after the first day, so to revive the rolls, bathe the tops of each roll in some water (don’t drench, just a light bathe) and pop into the oven at 180C Fan/200C/390F for about 10 minutes, or until the top is crisp and crunchy.
Moving onto a great side salad which works well with any protein (fish included), to dunk tortilla chips into, alongside tacos, in burger bowls or as my favourite option...the grilled cheese addition you didn’t know you needed. My Charred Sweetcorn Salad is so versatile and quick to make – a great lunch prep addition if you are short on time but still looking for punchy, satiating flavour.
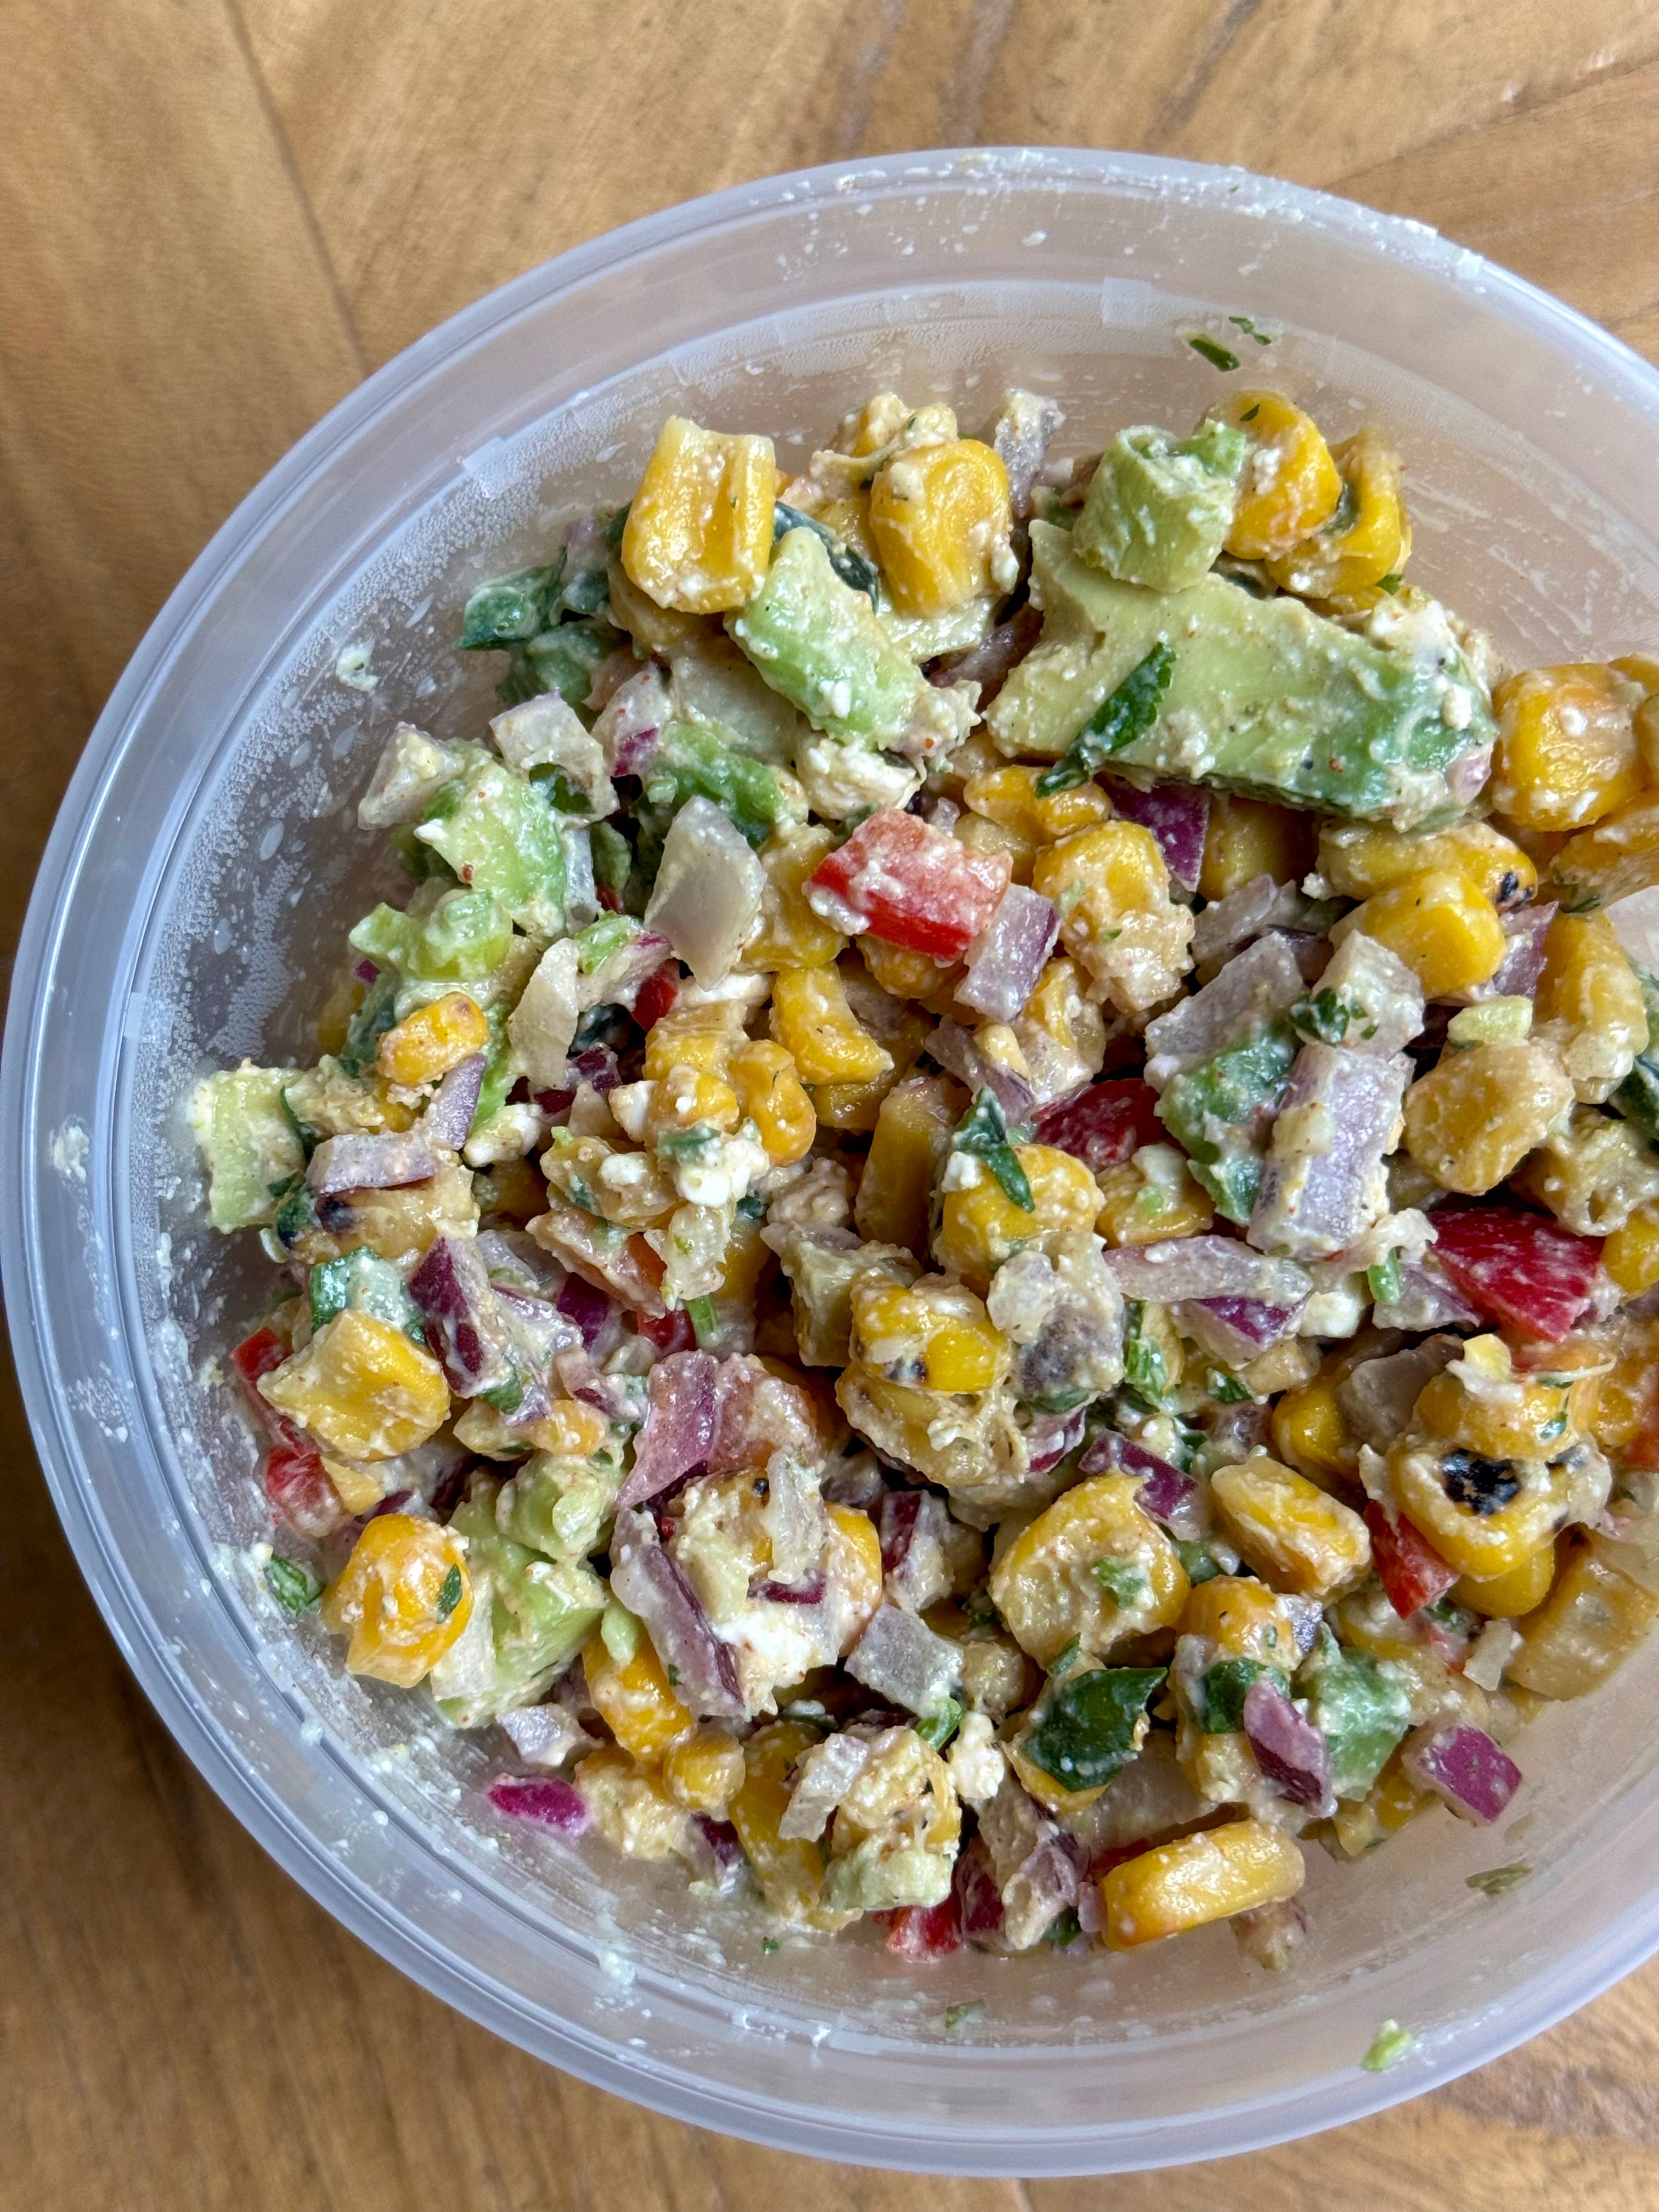
As someone who loves Mexican food, I wouldn’t dare to insult it and say this is that, but I would say it is mildly inspired from my hols there last year. Whilst my preference would be to use shredded Oaxacan Cheese in the below, we have subbed it for the more commonly found feta – a different flavour profile but one that adds a nice salty hit. I’m not shy when it comes to chili (I am 86.9% sure I could take on that One Chip Challenge and survive) but if you prefer something a bit milder, skip the red chili flakes and just allow the jalapeno to do the heavy lifting.
Recipe Makes: 6 Servings
Y O U – W I L L – N E E D -
Cheat Tortilla Chips
5 Large Tortilla Wraps
2 tbsp Olive Oil
1 tsp Smoked Paprika
Sea Salt & Cracked Black Pepper
Charred Sweetcorn Salad
15 g Unsalted Butter
5 to 6 Cloves Garlic, grated
2 x 340 g Tinned Sweetcorn, drained
½ Red Bell Pepper, finely chopped
½ Red Onion, finely diced
Good Handful Coriander, finely chopped
8 Spring Onion, finely chopped
1 Jalapeno, deseeded & finely diced
1 Avocado, chopped
2 Limes, zest and juice
½ tsp Ground Cumin
½ tsp Smoked Paprika
¼ tsp Red Chilli Flakes, optional
Sea Salt & Black Pepper, to taste
25 g Greek Yoghurt
25 g Mayonnaise, can sub for Greek Yoghurt
80 g Feta, crumbled
M E T H O D -
For the cheats tortilla chips, stack the wraps on top of each other. Slice into 12 like you are cutting a pizza. Scatter them on top of a large baking tray before adding a good drizzle of olive oil, a generous sprinkling of sea salt, cracked black pepper and smoked paprika.
Use your hands to mix ensuring all chips are coated. Note: You may want to bake these in two batches if there are too many on one tray.
Place under the grill for 3-4 minutes before using tongs to turn over and bake again for another 2-3 minutes until the edges are crisp and golden brown. Transfer to some kitchen roll. Note: they will continue to crisp and harden once they cool.
For the salad, add the butter to a large pan and place over a medium to high heat. Once the butter has melted, add the grated garlic and let it cook for 2 minutes before adding in the drained sweetcorn.
Cook the sweetcorn for about 10 minutes, until the sweetcorn begins to take on colour and char slightly. Remove the corn from the pan and transfer to a large bowl and leave to cool.
Into the same bowl, go in with all the remaining ingredients and mix everything well to combine.
Taste and adjust the seasoning to preference.
Serve up immediately alongside the freshly baked tortilla chips, or transfer to sealed containers to keep for up to 5 days.
Next up in my marathon meal prep sesh, was my Chipotle Chicken Salad – a horrendously easy, annoyingly delicious salad which I make as a sandwich filler. As someone who could happily eat 3 sandwiches a day on repeat, grew up being called ‘Sandwich Girl’ by my siblings and will hunt out the best sandwich spots in town wherever I go, believe me when I say this will become one of your go to faves for something speedy, something easy and something versatile. Whilst I will use this as a sandwich filler, it also works well as a dip for your cheat tortilla chips (in the recipe above), topping a jacket potato or just eaten with a fork straight out the pot.


Here we are subbing half of the mayonnaise for blended cottage cheese for added protein and a healthier substitute and we are also cheating using store bought chipotle paste instead of making it from scratch because why give yourself another job to do?? Work smarter, not harder folks.
I use an array of veggies in my salad mix and will usually utilise whatever I have in the fridge so I urge you to personalise the below to your liking or to whatever you have available to you. Just make sure you have something crunchy (celery), something slightly sweet (sweetcorn/cucumber), something slightly acidic (red onion), something slightly fruity (red bell pepper) and a hefty amount of herbs (I went for chives but you could go for coriander, mint, or a touch of tarragon for a mild aniseed flavour). I also don’t give a precise measurement for some veggies so will say measure with your heart and your tastebuds.
Recipe Serves: I would love to say 6 portions but I eat this randomly throughout the day with a fork so I can no longer tell.
Y O U – W I L L – N E E D –
2 Chicken Breasts
3 tsp Chipotle Paste
2 Large Celery Sticks, finely diced
150 g Cucumber, diced (removing the middle will help reduce surplus water)
100 g Tinned Sweetcorn, drained
½ Red Bell Pepper, finely diced
½ Red Onion, finely diced
15 g/Good Handful of Chives, finely chopped
150 g Cottage Cheese, blended until smooth
100 g Dijon Mayonnaise/Dijonnaise
Good Squeeze of Lemon, fresh
Sea Salt & Black Pepper, to taste
M E T H O D –
Start with marinating your chicken breasts with 2 tsp of chipotle paste a few hours before (not a necessity, this time round I marinated and baked the chicken straight away). Place onto a foil covered pan and pop into the oven at 160C Fan/180F/360F/Gas Mark 4 for approx. 18 to 25 minutes. The timing will vary depending on the size of your chicken breasts so check after 15, use a thermometer probe if you have one, and gauge from there.
Once cooked, remove from the oven and leave to one side to cool until lukewarm. Do not get rid of any juices sat in the base of your pan, make sure you reserve these to add back to the chicken later.
In the meantime, prep all your veggies. You want to dice these small and all around the same size, so each forkful gets you a little bit of everything.
Once the chicken is lukewarm, either shred manually using a fork or pop into a stand mixer bowl. Using the paddle attachment, mix on the lowest setting to help break up the chicken and shred. Make sure you keep an eye on this and stop at your desired texture (I went for a pulled pork consistency) – anything more than this and your chicken will start to break down, emulsify and turn into a paste.
To the bowl, add the reserved cooking juices and all your chopped veggies.
Add the blitzed cottage cheese (you could also sub for Greek yoghurt if preferred), Dijon mayonnaise (if you can’t find, sub for 100 g mayonnaise plus 1 tbsp Dijon mustard, a squeeze of lemon juice and a pinch of salt), a squeeze of lemon juice and 1 tsp chipotle paste. Add a good pinch or two of sea salt and a hefty crack of black pepper.
Mix well to combine.
Taste once thoroughly mixed, taste and adjust the seasoning accordingly. Store in a sealed container for up to 5 days.
Next, is the last savoury dish of the week and one of my faves to make at this time of year – a Roasted Tomato, Garlic and Red Pepper Soup. The weather at the moment is abysmal (and that’s me being kind) and whilst I continue to slob it out on the sofa for the foreseeable future, a big bowl of this lightly spiced, warming, hearty soup and a couple of freshly made onion seed tiger bread rolls is keeping me perfect company.


Easy to make for a quick and satisfying lunch or dinner option – nothing beats tomato soup with a side of grilled cheese. There’s nothing basic about my version. It’s salty, it’s sweet, it’s tangy, with layers of flavour with very little effort required.
Not that I’d judge you for sticking to your canned soup, I get it, been there, done that (and still occasionally do) but I promise, once you have tried my way, you’ll see why this is on repeat at this time of year. I went for a half batch option this time round as gluten free James isn’t a soup fan (he says he doesn’t trust it??) but the below does well doubled up if prepping for others.
Recipe Makes: 6 good bowlfuls
Y O U – W I L L – N E E D –
900 g Plum Tomatoes, sliced in half lengthway
1 Large Garlic Bulb
1 Romano Pepper
Sea Salt & Pepper
Good Glug of Olive Oil
20 g Unsalted Butter
225 g/1 Large White Onion, finely diced
400 g Plum Tomato Tin
¼ tsp Chili Flakes
25 g Basil, fresh
2 Thyme Sprigs, leaves only
500 ml Chicken Bone Broth, for cooking (can sub for chicken or veg stock)
1 tsp Marmite
M E T H O D –
To begin, preheat your oven to 180C Fan/200C/400F/Gas Mark 6.
Onto a large baking tray (make sure you don’t use a sheet as you want to catch all the juice), add your sliced plum tomatoes, exposed face up.
To the garlic bulb, slice the top off to expose the tops of the cloves. Place onto a piece of foil, before drizzling the top with olive oil and a sprinkling of salt and pepper. Wrap tightly and place onto your tray, along with the Romano pepper. If your tray is small, use two to avoid overcrowding.
Drizzle over olive oil across the tops of the tomatoes and pepper and lightly rub over to ensure everything is coated. Sprinkle over some sea salt and a crack of black pepper before placing the tray into the oven for 40 to 45 minutes until the tops of the tomatoes are blistered and have softened in shape. Leave to one side.
Whilst the tomatoes are roasting, add a glug of oil and butter to a large pan. Once the butter has melted, add your diced onions, along with a pinch of salt, and sauté until golden brown and translucent. Remove from the heat.
Once the tomatoes are done, add them all, along with any juice to the large pan. Remove the stalk of the Romano pepper and any seeds inside and add. Remove the garlic from the foil and squeeze the base to remove the cloves directly into the pan – they should be beautifully soft by now and need little encouraging to remove. If any are stuck, use a fork to remove.
Also to the pan, add the tinned plum tomatoes (add some water to the empty can to remove any residual sauce), whole basil, thyme leaves, chili flakes and bone broth.
Mix well and bring to a simmer. Once simmering, add the marmite, a small pinch of sea salt and a generous crack of black pepper and mix well. Taste and adjust seasoning accordingly.
Continue cooking the soup for 50 to 60 minutes (lid off), stirring little but often to avoid the base from catching.
Once thick and the sauce is reduced, taste a final time before leaving to cool. Once cool, transfer to a large blender or processor and blitzing until smooth. If you are wanting to eat straight away. Puree using a hand blender (pls do not blend anything whilst piping hot – a disaster will ensue, you will accidentally paint your ceiling with soup and yes I am talking from experience).
Transfer the soup to a sealed container and keep in the fridge for up to 5 days.
And because my week is never complete without a little sweet treat, the last bit of my meal prep were for some Blueberry Crumble Muffins. A great addition to any packed lunch or for a speedy breakfast on the go option – they are moist, they are jam packed with blueberries, not drowning in a tonne of sugar but are sweet enough to satisfy any cravings and finished with that moreishly good, crunchy, crackly, crumble top.


Currently I am very much a part of the cottage cheese fan club, after my unexpected revelation that I could use it in baking, these muffins also pack more of a protein punch so I have now convinced myself these are a good post workout treat (needless to say, please don’t take this as medical or physical advice) so you’ll be catching me in the gym far more often than I have been.
These keep well for up to 5 days, retaining moisture and their yum factor thanks to a brown butter base, but I have also added subs for ingredients below because yes, browning butter and then waiting for it to cool down is a slightly unnecessary step when you are busy prepping a mountain of food.


Recipe Makes: 9 Muffins
Y O U – W I L L – N E E D –
Brown Butter, optional
150 g Unsalted Butter
Crumble
100g Plain Flour
60 g Salted Butter, fridge temp & diced
30 g Caster Sugar
Batter
225 g Plain Flour, sifted
1 tsp Baking Powder, sifted
1 tsp Bicarbonate of Soda, sifted
Pinch of Sea Salt
115 g Brown Butter, room temp (can sub for unsalted)
80 g Light Brown Sugar (can sub for caster sugar but will reduce moisture slightly)
75 g Caster Sugar
2 Large Eggs
½ tsp Vanilla Powder/1 tsp Vanilla Bean Paste
130 g Cottage Cheese, room temp (can sub for Greek yoghurt)
50 ml Whole Milk
Good Squeeze of Lemon Juice
1 tsp Almond Extract
225 g frozen blueberries plus 2 tbsp flour to coat
To Finish
15 g Demerara Sugar
M E T H O D –
Start with the brown butter, if you are using. Please note that we are using more butter than needed in the recipe, as a percentage of butter is made up of water, which will cook off when boiled. Add the butter to a pan and place over a medium heat.
Allow the butter to melt but stirring little and often. You want this to keep cooking until the butter turns golden brown, with speckles of brown sediment sitting at the base of the pan and the butter begins to let off a nutty aroma.
Remove from the heat and leave to cool completely, before bringing back to room temp.
For the crumble, add the flour and butter to a food processor and pulse until you are left with a well combined, clumpy mix. Remove from the food processor and place onto a lined tray. Add the caster sugar and mix until combined. Pop into the fridge until later.
For the batter, add all the dried ingredients into a large bowl and mix well with a balloon whisk. Incorporating them all before you add to the wet ingredients will help prevent you from overmixing which will result in a tough sponge.
For the wet ingredients, start by adding the brown butter and sugars to a mixer bowl. Using the paddle attachment mix until aerated and smooth – this will take at least 5 minutes on a high speed. Scrape down the sides and base of the bowl before mixing again for another few minutes.
Add the eggs one at a time, mixing well between each addition. Scrape down the base and sides of the bowl before adding the next, making sure the base is emulsified and smooth.
Once both eggs are added, add the vanilla and mix again for at least 3 minutes on a high speed.
Either using a hand or mini blender, add the cottage cheese, milk, lemon and almond extract. Blitz until smooth.
Add half of the mixed flour and blended cottage cheese to the stand mixer bowl. On the slowest setting, mix until you are left with little flour streaks in the batter.
Add the final half of flour and cottage cheese and mix again until you are left with no visible flour streaks.
Leave the batter to sit to one side for 15 to 30 minutes.
In this time, preheat your oven to 200C Fan/220/425F/Gas Mark 7.
To a lined muffin tray (I would say to leave a gap between each one for overflow), add a spoonful of batter to the base of each muffin case. Use a spoon to spread. This stops the blueberries sinking right to the bottom, leaving you with a soggy base, and gives your batter a cushion to sit on instead.
To the remaining batter, add ¾ of the blueberries. Lightly fold through, ensuring you stop the minute you see the batter streaking with purple (liquid from the fruit – inevitable but we want to minimise where possible).
Use an ice cream spoon or large spoon to generously fill each muffin case. Don’t be scared of filling these to at least ¾ full – this will result in a nice full muffin.
Top each case with a few reserved blueberries and generously top each one with a good handful of crumble. You might think it is too much but the more the better.
To finish, sprinkle over demerara sugar across the top for a crunchy finish.
Pop into the oven and bake for 5 minutes before turning down the temperature to 170C Fan/190C/375F/Gas Mark 5 for a further 23 to 25 minutes, until the tops are golden brown and a skewer, when inserted to the middle, returns no uncooked batter.
Leave to sit in the tray for 5 minutes before transferring to a cooling rack.
Finally, we move onto some slightly filthier things. First up we have something pretty tame – even for me. This week I have been craving gentle things – things that are helping me get back to me and things that aren’t overwhelming. The next is that, all whilst being heavenly delicious and entirely memorable. It’s pillowy soft, it’s incredibly light and has this touch of decadence which feels classy. This is my Vanilla and Chocolate Marble Chiffon Cake with a speckled chocolate vanilla whipped mascarpone. So sure, vanilla doesn’t sound overtly sexy and indulgent and the combo of it with chocolate is a tale as old as time but the beauty of this lies within the sponge.
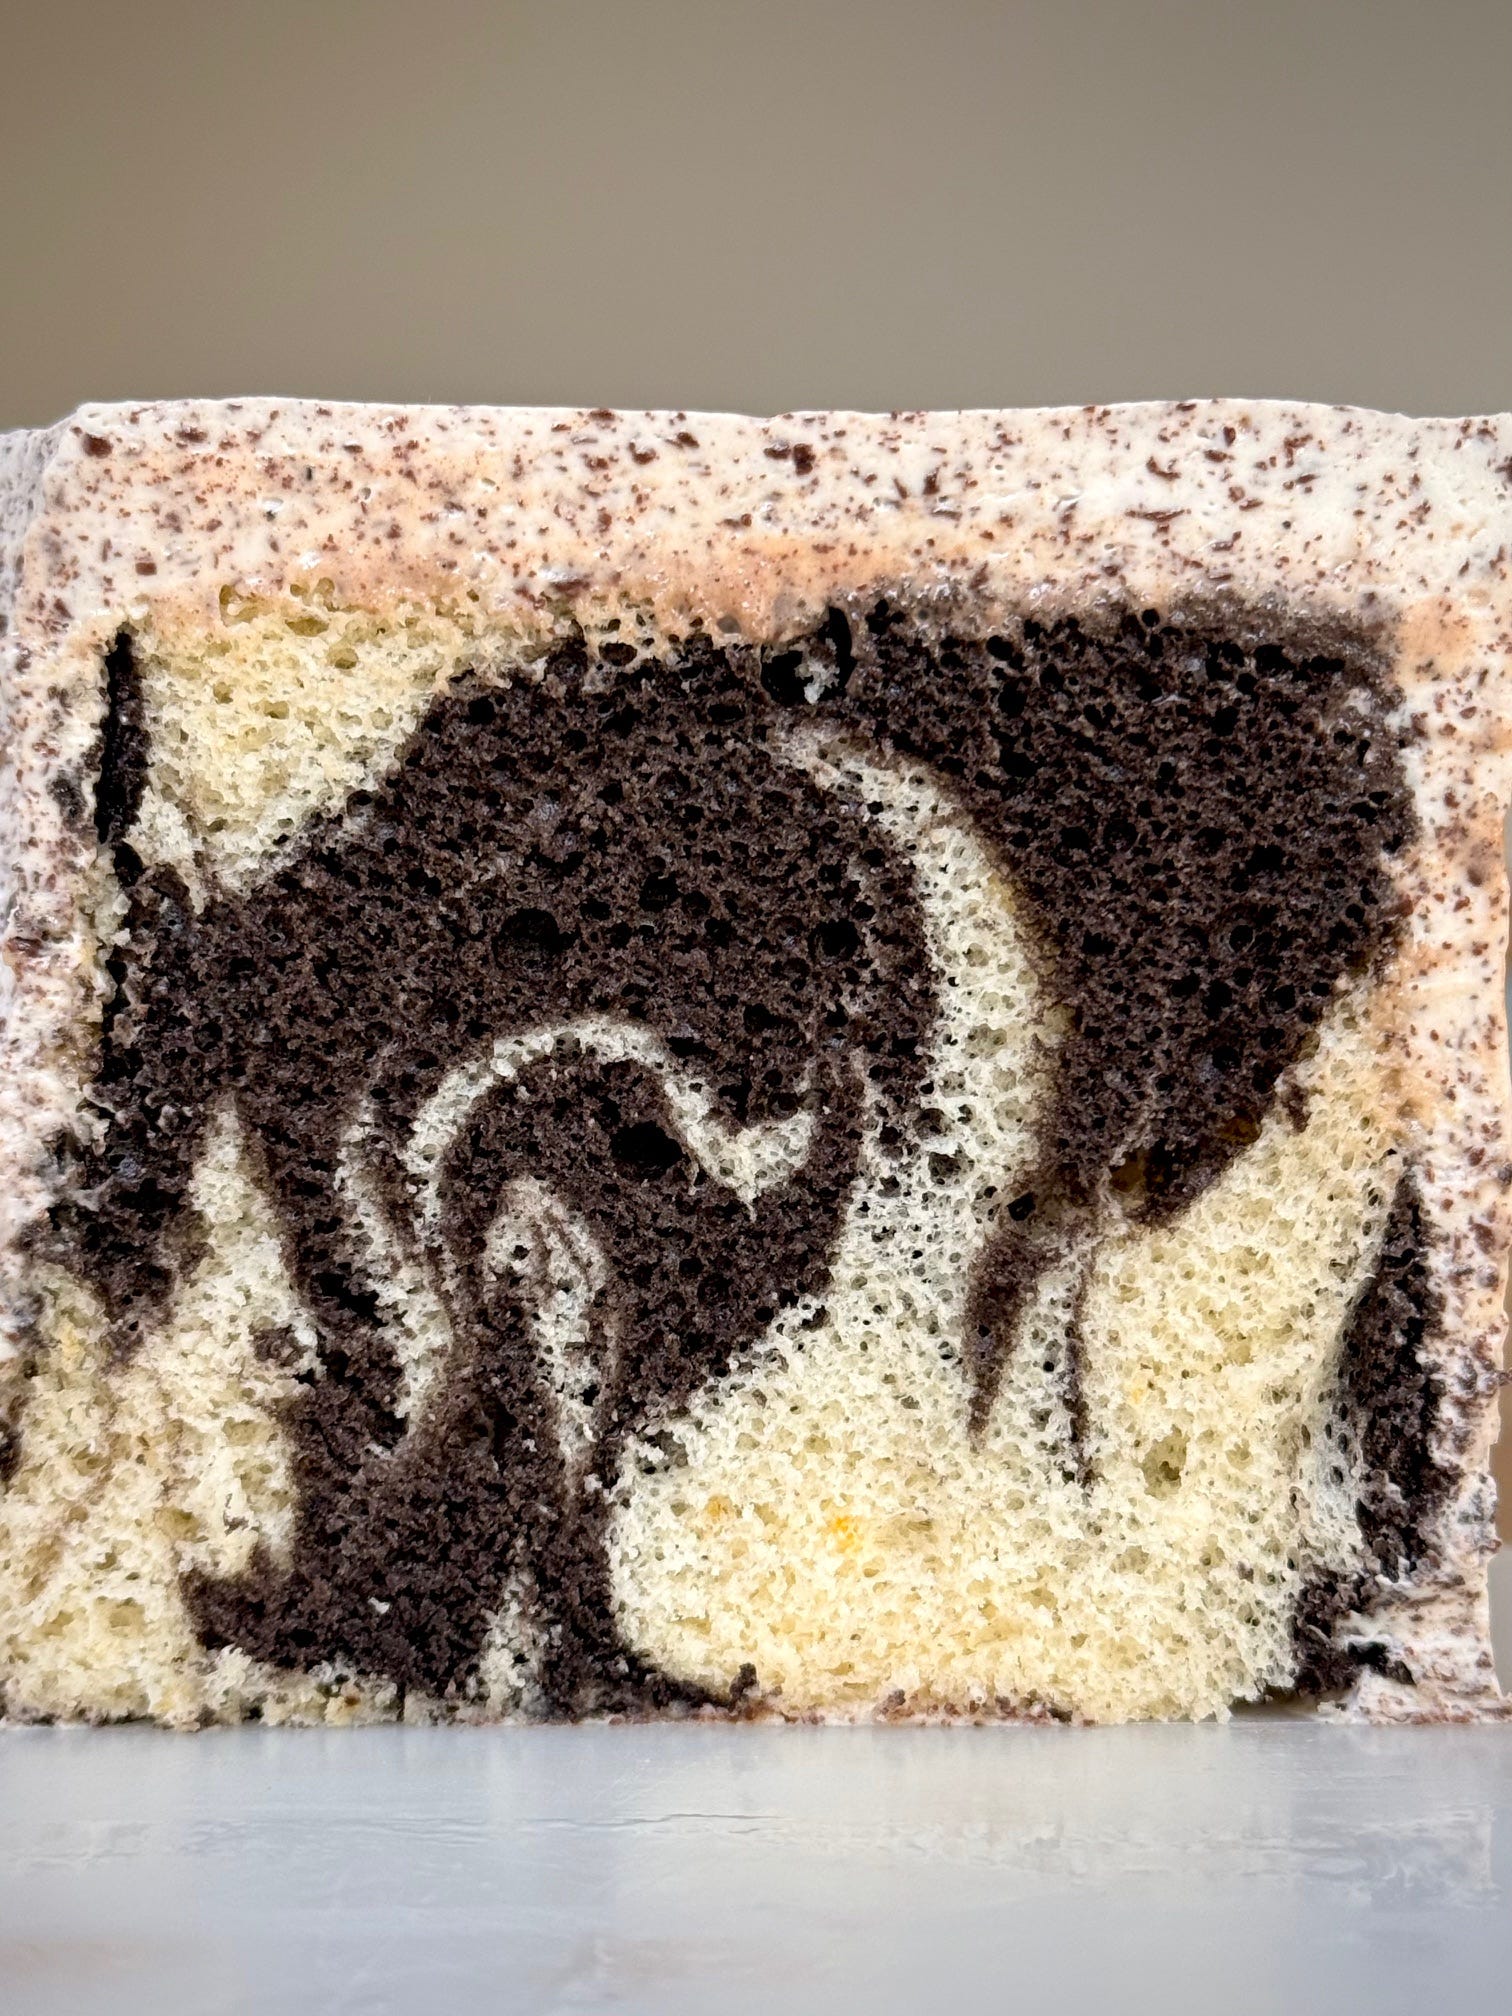
Chiffon is one of my all time fave ways to cake. Sumptuously soft, it’s so damn moreish. One slice turns into another, which turns into the whole thing. Teamed with fresh fruit, drizzled with a chocolate sauce or eaten as is – this is a crown pleasing, eye catching bake. A testament to simplicity. But simplicity done beautifully well.
I’ve seen a lot of people online struggle with making chiffon cakes as they can be temperamental but I promise you, follow the below to a T and it’ll bring you the sweetest of rewards.


Recipe Makes: 25-cm / 10-in. angel cake tin/chiffon cake tin (preferably the one with feet/prongs to sit on when turned upside down)
Y O U – W I L L – N E E D –
